Friday, June 29, 2012

Takin' a Road Trip


Hello, and welcome to our little creative world today!
I've used the Road Trip Wood Mounted Stamp on scrapbook page layouts in the past,
but this is my first card made with this fun stamp.

It's a lot more versatile than what I first gave it credit for.

About the card . . .

I started by stamping the card background at an angle, and then the masking fun began.

To create a space to rubber stamp my birthday greeting, I got inked the stamp with India Black and THEN masked off the areas I didn't want to stamp.


This left just enough open space for my other stamped greetings.


After adding a bit of color mist to the background of the card, I attached the
stamped squares to the card panel. What a fun, different look!


Thanks for making the trip into our world today!
Kay Williamson of Club Scrap

Thursday, June 28, 2012

Retreat Spoiler (of sorts)

Hello, everyone!

I know I chatted about Retreat in the blog a few weeks ago and told you about my favorite things about Retreat and some of you shared your favorite things in the comments, too. But today I wanted to share something new, so I spoke with Tricia earlier this week and she told me I could share some info about Retreat with all of you.

As you know, Club Scrap has an August and an October Retreat, and this year I'll be attending both of them! (I'm so very excited about meeting all of the August Retreat folks!! ) I'll be teaching the Hybrid Workshop at both Retreats (I've taught it at the October Retreat for the past two years) and I'll also be teaching another Workshop with Tricia! How cool is that? (It's gonna be a super-cool Workshop too! Really different and so very creative! You're gonna love it!!!) And after chatting with Jac the other day, I really think the Hybrid Workshop is gonna rock, too! Remember, it's not 'digital' it's 'hybrid' so paper crafters are really going to love it!

Retreat folks having some Workshop fun in 2011!

Now you probably saw your email reminder from Club Scrap this week letting you know that you've only got until July 1st to sign up for Retreat. If you're 'on the fence' about attending this year, I gotta tell you - it's gonna be amazing, so head on over to the sign-up page and register for Retreat now!


Kay's Workshop in 2011

Making a Music Box at the 2011 Retreat

And whether you're heading to Wisconsin in August or October, I'll see you there!!

Wednesday, June 27, 2012

Bon Appetit! A masking technique for cards

I'm Deb Charlesworth, and I'm very excited to be the guest blogger at Club Scrap this week.  (On the Club Scrap Community, I'm known as "deb".)  I also have a personal blog about paper crafts at Lift Bridge Cards and Crafts.  If you like this tutorial, check out my blog for more inspiration with this month's kit.

I joined Club Scrap in August 2004 - just after I got married - and have enjoyed the anticipation of receiving a new box of goodies every month since then!

This month, Club Scrap invited me to create cards from the Bon Appetit Greetings to Go kit, so I thought I would show you how I made this card:

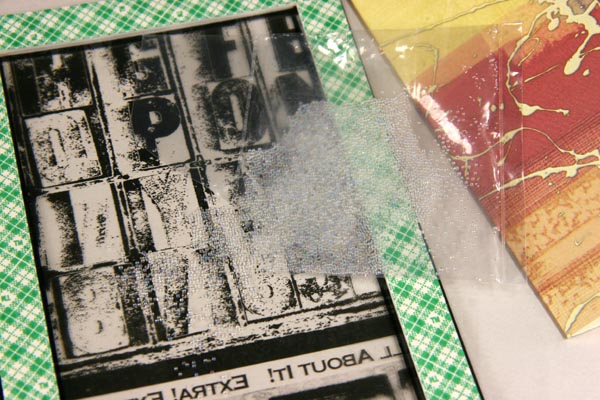
When I saw how the panels on the card overlapped, I thought it would be cool to have a stripe from the front carry over to the other side.  To start, I used removable adhesive to adhere the white panels to my grid paper.  I then used my Club Scrap grid ruler (the 8 x 8 size here) to find the center point of the panel and align the piece of masking tape in the middle (the tape and the panel are white).

After placing the first piece of tape, I lined up the 1 1/8" mark of the ruler with the bottom of the tape to align the next piece of tape.  This piece of tape goes across both panels to create the stripe that will run across both panels.

Continue applying tape so that there are 1 1/8" gaps between each line.  Here's how it looks when it's finished.

On the front panel, I want the upper part to be white, so I covered that with a piece of scratch paper just so I didn't accidentally stamp on it before I was ready.

I used Versa Mark ink to stamp the row of chandeliers from the Bon Appetit Art Nouveau Unmounted Rubber - they fit so nicely in this space!

After the image was stamped, I rubbed pan pastels over the stripe.  I am in love with these pastels - they are so smooth and blend like paint.  If you don't have them, you can use regular pastels, too.

Continue until all of the stripes are stamped and have pastel coloring the open areas.

To add a bit of depth, I rubbed a bit of the blue on the outer edges - it blends into a gorgeous purple when you're done.

I removed the scratch paper, and stamped a sentiment from the Bon Appetit Greetings Unmounted Stamps.

Remove the tape, and admire your hard work!  I sprayed my panels with a fixative to ensure the pastel won't smear in transit.

When the card is open, the recipient will be surprised by the burst of color.

If that seems like too much work for you, this technique can also be used more simply.  Here, I masked off a single stripe.

Then, I used a combination of pastels to create color.

I stamped the image with the Palette Ink Glue Pad, and rubbed Lotus Pond's Gilded Lily Glitter over the stripe.

After the glue dried, I added a sentiment, ribbon, and a few brads for a great card!

I hope you enjoy the Bon Appetit collection as much as I do!  I'm excited to see what everyone else uses their stamps for - this kit really does go beyond the kitchen.  All stamps, paper, and embellishments are from the Bon Appetit collection.

Tuesday, June 26, 2012

Do you have "Artsy Orphans"?


I've been teaching two-hour technique workshops at retreats and other events for years, and it seems that I've accumulated quite a few momentos as a result! I've got a box labeled "Art Panels" that has been sitting on a shelf in my craft room. Years of inspiration virtually untouched.

Do you have a box like this?

I thought it might be fun to show you my routine for these artsy orphans. Maybe yours will find a home, too.

1. Spread out the panels on your work surface. Step back and basque in your creative brilliance.

2. Group the panels into color families like primary, bright, earth tones, pastels, bold, soft, etc. Whatever helps narrow them into smaller fields.

3. Search your paper stash for colors that will coordinate well with the art pieces. I spend a lot of time with Club Scrap paper and know the colors well. So well, in fact, that sometimes I can say, "Gee, the burgundy from Academy and the pink from Love Blooms will be just perfect on this card." Sometimes it takes a bit more effort. But when I've found the right color combination, I know that all will be right with the world. Got HPOP's? (Club Scrap's "Half Pounds of Paper"?) Use your stash for card panels!

4. Trim one of the papers to a standard card base: 5-1/2x8-1/2". Score and fold it in half. (Or, you can save that scoring/folding part for later.)

5. Measure the final size of the art piece, and cut a layering matte that is 1/4" larger. For example, if your art piece is 3x3", trim a 3-1/4x3-1/4" matte. If you have a third color, trim a second matte to 3-1/2x3-1/2" or some other desired size. If I'm incorporating an altered shipping tag into a card, I sometimes create a 5x7" card base, or simply trim the top off the tag so that it will fit on the standard card base.

6. Stack the card base, mattes and art pieces on a pile, grab another art piece, and return to step 3. Pretty soon you'll have a nice big pile of cards that are ready to be stamped. (If you're going to a crop or planning to spend a day away from your craft room, this would be a great time to stash your materials into a zip-top bag 'cuz all of the prep work is done!)

7. Grab a collection of rubber stamps and a black ink pad. Arrange the mattes and art onto the card and plan a spot for an image and/or greeting to be added. I usually just use our India Black ink (my fave) and add other colors on a whim. Attach everything to the card base and stamp the inside of the card, too, if you like. This is also a great time to attach embellishments from your stash.

8. Soon, you'll have a new pile of beautifully completed cards!

What great timing! Pro Scrapbookers League Summer Camp is just around the corner . . . find your box of orphaned art pieces! You can incorporate them onto cards or your scrapbook pages as embellishments!

Metallic Marvels Workshop

Spin Art Workshop with MicroGlaze Resist

Spin Art Workshop: Manila Tag with Memories Mist/Water Resist

Spin Art Workshop


Monday, June 25, 2012

Join Me for Summer Camp!!!

It's that time of year again...SUMMER! And at Club Scrap, that means it's time for PSL Summer Camp!


What the heck is PSL Summer Camp, you ask? Lemme give you a bit of background:

Members of our Clubs find themselves in the unique situation of receiving an entirely new collection of papers, stamps, stickers and stencils EVERY MONTH. That's alotta stuff! And let's face it, life can get in the way of our crafty time, so sometimes that stuff stacks up. With that knowledge, Club Scrap came up with PSL (aka: Pro Scrapbooker's League)--it's kinda like the NFL, but with paper, instead of pigskin. It all started with the Winter PSL (timed right after the NFL Super Bowl)...but due to overwhelming popularity, we quickly added a Summer Camp version.

PSL Summer Camp is your chance to use all that "stuff" that's been stacking up: You get a whole lotta scrapbook pages, digi pages, or greeting cards done, in a really short amount of time. And you have tons of fun, too! Oh, and prizes...did I mention the prizes?  

When you sign up, you'll be assigned to a Cabin, based on your interests: Scrapbooking, Cardmaking, or Digital Scrapbooking. Each Cabin has a place to chat on our Community Forum, which is a great way to get to know your Cabin-mates, cheer each other on, and make lasting friendships...just like real Camp! Each week, Campers are provided with a challenge, and participants have the potential to earn prizes in the form of AWESOME online shopping discounts. 

Hmmm...PSL = get a lot done + use what you have + earn fabulous discounts. What could be better?

So c'mon...what are you waiting for? Need more information? Go to: http://www.clubscrapcommunity.com/news/proscrapbookersleague

Ready to join me? It all starts on June 28. You can register here: http://www.clubscrapcommunity.com/news/1984

Last one to the campfire is a rotten egg! 

Friday, June 22, 2012

Great Wall of Dimension!


Hello and thanks for stopping by!

Today I'm pulling out a fun 8.5x11 that's been an old favorite of mine. I haven't visited it in awhile, so it was clearly overdue. The Asian Artisan 8.5x11 Cream Print was perfect for this little project I had in mind, and adding a bit of the Asian Artisan 8.5x11 Blue Print for matting my 5x7 photo was the perfect touch.

My idea was to add dimension to the scrapbook page by cutting out the bird, branch and leaves print and re-attaching with foam squares. So I grabbed three of this fun print and started cutting.

I cut the bird, leaves and red block from one 8.5x11 sheet and the branch from another. Then I used the top portion of the cut prints for matting 'n such (Disclaimer: Absolutely no Club Scrap paper was wasted, discarded or harmed during the making of this project).

Then, to cover my very non-perfect cutting skills, I used black ink and a foam tip applicator to add ink
to the cut edges. They look so much better now!

I added foam squares onto the backs of all the pieces and attached onto an uncut print.
I started with the branch and then moved on to the bird, then the leaves.


Lastly, I added the red block as a finishing touch.

I just love what this print adds to this scrapbook layout!

Thanks for visiting Club Scrap's Asian Artisan collection with me. (Oh, and if you get a chance, check out Tricia's nifty blog about the birdie stencil!)

Wishing you a very creative day!

Kay Williamson of Club Scrap

Thursday, June 21, 2012

It's All In the Cards!

I don't know if you've noticed, but there's been a 'card' theme going on here at Club Scrap Creates for a few posts now - Kay made a beautiful shaker card and both Tricia and Lynn blogged about Operation Write Home and their card-making efforts to support that very worthy cause. So as not to be left out, I decided to write about cards today, too!

I love cards! In fact, I've been making cards for over 20 years. In comparison, i've only been scrapbooking for a little over 3 years, and even less for digital scrapbooking. I get my inspiration for cards from a lot of different places, but when I want to make cards quickly, with very little waste, I go to my 'other' cards - the Club Scrap Assembly Line Card Making Idea Decks - Volume 1 and Volume 2 (yes, you really do need both!)


Each deck has 52 ideas for making amazing cards, envelopes and more (yup, Volume 2 has some envelope & mini-project ideas, too!) with few or no scraps leftover (it's like magic!). When you're creative muse is on vacation, these Idea Decks can really help you out. (And for you scrapbookers out there, there are a couple of Assembly Line Scrapbooking Idea Decks, too!!)

The designs are all cool, but one of my favorites is the Jack of Spades from Volume 1 - just 3 sheets of 8½ X 11 paper produces 3 A2 sized cards. And because each sheet of paper is cut exactly the same way, you can easily use 4, 5, 6 or more sheets of paper and really mix it up!

So I grabbed  Navy, Kraft, and Ivory card stock, a few stamps, some fiber, a scrap or 2 from my stash, & a couple of doodads and got 3 nifty cards in a matter of minutes!


So next time you want to make a card and need a little inspiration, just reach for an Idea Deck, 'cuz it's all in the cards!

And now, a brief announcement - if you remember my post from last week on Food (and Drink) traditions, I promised to pick one of the comments as the winner of the Bon Appétit Digi Kit.  I'm happy to announce that Hetty Sanders is our winner! Hetty, please watch your email, you'll be receiving a link to download your free Digi Kit! And thanks to all of you who posted!

Tuesday, June 19, 2012

Card Sketch #24


Hey, Bloggers!

We heard back from Sandy at Operation Write Home. She'd mentioned how much everyone loved the cutting formulas we featured during the Memorial Day blog hop! I decided to take another OWH Card Sketch (#24) and see if I could whip out another set of instructions. This one took a bit. I think I had three crumpled pieces of graph paper on my desk until I finally arrived at a suitable batch of nine cards. (And only three of them look exactly like sketch #24!)


You'll need the following:
It's good to have six different paper colors. It just makes the mixin' and matchin' easier.

6/21/12 Blog Update: Just completed quick video for those who like to see the formulas in action! Go to the bottom of this blog to see the finished cards and to pick up the paper and stamps I used!

1. Trim each 12x12 at 9.5 and 5.5". Cut the 5.5x12 horizontally at 10.25 and 8.5". Cut each 1.75x5.5 horizontally at 5". Trim the 4x12 horizontally at 10.5 and 5.25". Cut the 2.5x12 horizontally at 11, 8.75, 6.5 and 3.25". Score and fold each 5.5x8.5 horizontally at 4.25".

2. Things will go just a bit faster if you first score each 8.5x11 sheet vertically at 4.25". Cut horizontally at 5.5". Fold each card in half.

Assemble the parts 'n pieces any way you like. Stamp with images and adhere to assemble. I made it a mission to add a simple embellishment to each card in addition to the stamped images. I had fun using stuff from my stash! Tah-dah!!!


If you're liking this method of efficient card making, you'll want to pick up our Idea Deck--fifty-two formulas for making great batches of cards, plus a few other bonus projects, too!


There 'ya have it. Get out there and make some cards for our heroes!

The eighteen cards below were created with the formula, stamps and papers in a set that can be purchased from Club Scrap for a screamin' deal!