
Overlays are ‘transparent’ PNG files that you can simply ‘lay over’ a digital background to give it a new/different look - they add some visual texture to your backgrounds. Overlays can be black & white, or full color - and you can use them in a couple of different ways. Let’s take a look…
For my first example, I started with a fairly plain background from Club Scrap’s Cape Cod Digital kit:

And added a black & white overlay:

As simple as that you have a new background! Neat, huh? You can reduce the opacity if you want, or further change it up by adding a layer style like ‘Overlay’:

Or the ‘Divide’ layer style:

Different combinations/colors of overlays, backgrounds, and layer styles will produce different effects - don’t be afraid to try various combinations until you find something you like.
Okay, time for another example. this time with a color overlay from Club Scrap’s Bookshelves Digital kit. First, 3 I chose 3 different backgrounds:

And added the same overlay to each one (with 85% opacity):
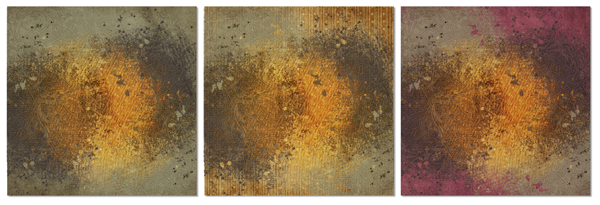
To change it up a bit, I added the ‘Overlay’ layer style (and brought the overlay layer back to 100% opacity) - very different looks, but all quite cool:

So there you have it - a quick look at what you can do with overlays - alone and in conjunction with layer styles and opacity settings. But that’s just the beginning! Don’t be afraid to experiment (and remember, you can mix kits for even more varied looks!) and you’re sure to create something wonderful!
Thanks for stopping by!

-Ron
Awesome, Ron! I just played with overlays for the first time the other day...but didn't know how to change the opacity, etc. So much to learn! Thanks for the inspiration!
ReplyDeleteWOW! Very cool techniques, thanks Ron!
ReplyDeleteThanks Ron - I tried some of those overlays and using a picture as an overlay too. Thanks for the lesson and for that little extra hint.
ReplyDeletethanks Ron, awesome job on them
ReplyDeleteThanks Ron - Another great bit of info!!!
ReplyDeleteRon, thank you sooo much for the tutorial. I think I got confused when I noticed several recent ones were color. I guess I always thought thy were black. Like a transparency.
ReplyDeleteThanks Ron. I used one for my digi swap w Bookshelves. Cool looks is right.
ReplyDelete