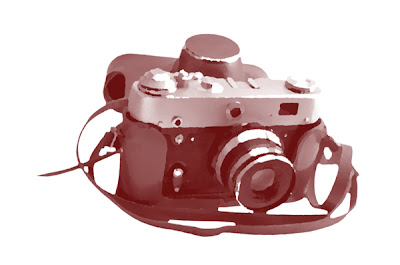
For this tutorial, I’ve used the same stamp image from the Get the Picture Digital Collection each time, but picked different coloring methods. Just pick the one you like best!
Fill Color
1. Choose a graphic and drag it onto a new layer in your layout.
2. Go to the Layer Palette and CTRL-Click (on a PC) or Command-Click (on a Mac) on the thumbnail of that layer containing the stamp graphic. You will see ‘marching ants’ around the graphic, letting you know that the graphic is selected.
3. Create a new layer in the Layer Palette.
4. From the Edit Menu, choose Fill and then Use a Color.
5. Select a color and click OK.
6. Hide or delete the original stamp graphic layer.
Note: It’s important to color a blank layer rather than the actual stamp graphic layer, especially when the graphic has different areas of opacity. This will ensure that you get a true representation of the color you selected.
Color Overlay
1. Choose a graphic and drag it onto a new layer in your layout.
2. At the bottom of the Layer Palette, click on the Styles button (the button has ‘fx’ on it). You can also select Layer Styles from the Layers Menu.
3. From the Pop-up Menu, Select Color Overlay.
4. In the Color Overlay Dialog, click on the color swatch. The color picker will open.
5. Choose a color and click OK.
Make a Brush
1. Open a stamp graphic.
2. Select ‘Define Brush Preset’ from the Edit menu. (note, if your graphic is larger than 2500 pixels, you’ll need to resize to a smaller size before you can make a brush.)
3. Give the brush a name and click on okay.
4. Open a new file for your layout.
5. Add a background, as you normally would.
6. Choose a color on the Tool Palette - this will be the color of your stamped image.
7. Create a new Layer in the Layer Palette.
8. Select the Brush tool from the Tool Palette.
9. In the Brush Palette at the top of the screen, select the brush you just created (it will be the last brush on the list).
10. Adjust the size of your brush, as desired.
11. Click once in the new layer to ’stamp’ the brush image.
Because you’ve stamped it in a new layer, you can adjust the size of the graphic if you need to.
So there you have it. Three different ways to color your stamp images. Try it for yourself and create something wonderful!
-Ron


Great tips - always posting bright and early Ron!! So happy to see this before work!
ReplyDeleteRon, thanks for another great tutorial! Love that camera graphic!
ReplyDeletegreat tip Ron
ReplyDeleteAwesome Ron - thank you.
ReplyDeleteAnnetteD
Thanks a bunch Ron. I'll be using this tut!
ReplyDelete