I am excited to share this little project with you today.
It all started with this inspiration piece, a small framed home decor item found in a thrift store in Florida.
My Mom brought me to this tiny shop full of all sorts of unique gifts and thrift items. I took a photo of this framed butterfly and just knew I could recreate it myself. My trip to Florida was in November 2011 and I have been sitting on this idea for some time.
The seed was planted, it just took 2 years for it to grow into this.
Step 1. I used iScrapbook digital scrapbooking software for Macs to make a contact sheet of 8 images of the Butterfly Collage Stamp from the CS® Papillon Digital kit. I printed it out on an 8.5 x 11 sheet of white cardstock using a toner ink printer.
Step 2. Using Perfect Pearls and a little water to create a paint, I added shimmery color to the butterflies with a paintbrush. I tested out some color combinations on plain copy paper first and then added the chosen colors or pink, purple and blue to five of the butterflies. On the very first image, I added green and pearl to the torn leaf paper and sheet music images. I also added a touch of bronze to the sheet music to give it some shadowing affects. This is the base image that the butterflies would be added to for the layered dimensional affect.
Step 3. Fussy cut 4 of the butterflies out of the sheet.
Step 4. I mounted the base image of the collage digi stamp and matted with CS® Memoirs green and CS® Papillon purple cardstocks. I inked the edges of all of the layers of cardstock with black india ink. Used a black broad tipped brush marker to "ink" the edges of the butterflies. The brush tip helps get into the tight spaces and covers the white edges to give them a cleaner look.
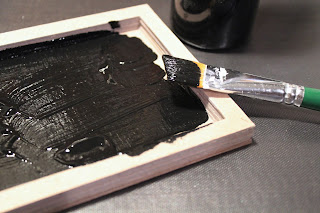
Step 5. Had cut several frames from chip board and had a stack of about six .5 inch wide frames all ready to go. Used CS® Bookbinding Glue to attach them all together. Then glued them onto a thicker piece of matte board cut to the same dimensions 4.25 x 6.25 inches. Once dried, I painted the whole piece with Dick Blick Black Matte Paint and set aside to dry.
Step 6. Once dry, I attached the first matted collage image to the bottom of the shadow box frame with double sided ATG adhesive.
Step 7. Use black foam dimensional squares to create the butterfly stack.
Step 8. Using more of the same dimensional adhesive squares, I attached the butterfly stack to the matted collage.
Step 9. Enjoy the finished project. I am so happy with how it came out!
I really hope you enjoyed this little home decor project.
Thanks for stopping by!


Perfect! Really pretty!
ReplyDeleteOoooh, I love that matted idea, Julie. Thanks for sharing!
ReplyDeleteScrumptious idea with one of my favorite stamps of all time!
ReplyDeleteThis is just gorgeous Julie and I love that stamp!!
ReplyDeleteJulie, thanks for sharing such a wonderful project with one of my all time favorite stamps!
ReplyDeleteThat butterfly stamps is one of THE BEST EVER. Been meaning to do something similar to this for a long time...maybe you've inspired me to get busy! Thanks for sharing Julie!
ReplyDeleteBeautiful! I love this. When you say toner printer, does that mean you used a laser printer? Is that why you could paint with water without the printed butterfly black ink spreading?
ReplyDeleteYes, exactly! Laser printers use Toner which is fused to the paper instead of inkjet which absorbs into the paper. The toner prevents the the inks from running when water is introduced.
DeleteLove this! Great project!
ReplyDeletePretty!!
ReplyDeleteOf course you know I LOVE this little gem of a project Julie, thanks so much!
ReplyDeleteVery pretty, Julie. I love little home decor projects like this. This would look great in my craft room! (walls are painted a light purple, my favorite color)
ReplyDeleteLove, Love, Love this idea!!!!!
ReplyDeleteIs there any reason I couldn't just use the rubber stamp to make the images as opposed to the digi stamp?
howdy kim! yes, you can use the rubber stamp in lieu of the digital graphic. the digital graphic insures that you have a perfect image every time and the toner printer makes it waterproof. however, if you're using the rubber stamp, just stamp carefully with a good waterproof ink and you'll get the same result. :) jac
DeleteIndeed! Our India Black Ink Pad is designed just for this purpose! :)
DeleteReally cute Julie - I have been meaning to make something for MIL using the Pineapple WM stamp from Welcome - this looks like the right idea!
ReplyDeletelovely!!!
ReplyDeleteAbsolutely beautiful, Julie! That is why i do not throw away things, they always come in handy for crafting. Great frame for a great project.
ReplyDelete