Did you see
Kay’s blog post last Friday? I love her quick and easy masking technique - it creates such a cool background for a layout. So of course, I decided that I needed to try interpreting this digitally and it ended up being easier than I thought! You'll need the
Bugs Digital Collection to recreate this über-cool layout!
1. Open a 12 x 12 document in Photoshop and drag some guidelines from the ruler to divide the page into 3 sections, leaving a narrow ‘blank area’ between each section.
2. Create a new layer. Tip: Creating new layers for every element allows you to easily delete a single layer if you make a mistake. T
his way, you don’t lose previous work since everything is on separate layers.
3. Use the marquee tool to select the top section; ‘marching ants’ will surround the selected area.
4. Pick a color for the top section.
5. Select a round brush and adjust the size so it’s really large (around 1700 pixels across).
6. Adjust the opacity of the brush to around 75% and the flow to around 85%. You may need to adjust these numbers, based on the color that you’ve selected.
7. Click the brush in an area to apply color; move to a new location and click again. Continue until you’re satisfied with the look. It’s important to leave some white areas to mimic the spray effect.
8. Repeat steps 2-7 for the middle and bottom sections. Tip: Vary the size of the brush, opacity, & flow to change the look.
9. Open
Xtra7 from the Bugs Digital Kit, and use the lasso tool to grab only the dragonfly portion of the image. Drag it to a NEW document and then save it as a brush. Close the new document without saving.
10. Set the foreground color to white in the tool palette.
11. Choose the brush tool and select the dragonfly brush.
12. Create a new layer and click once to ‘stamp’ the dragonfly in that layer.
13. Select the pointer tool and rotate and then drag the dragonfly to its desired position. Use the marquee tool to delete any part of the dragonfly that crosses to another section.
14. Repeat steps 12-14 to place additional dragonflies where desired.
15. Create a new layer. Use a splatter brush with one of the previous ‘spray’ colors to add a bit of paint splatter on the layout. This provides a bit of visual texture to the background. Tip: Adjust the opacity and flow setting to vary the intensity of the splatter.
16. Add stamp word images (just like Kay’s layout, I used images from the
Sorrento Digital Kit), a matte and photo - and anything else you’d like and you’re done.
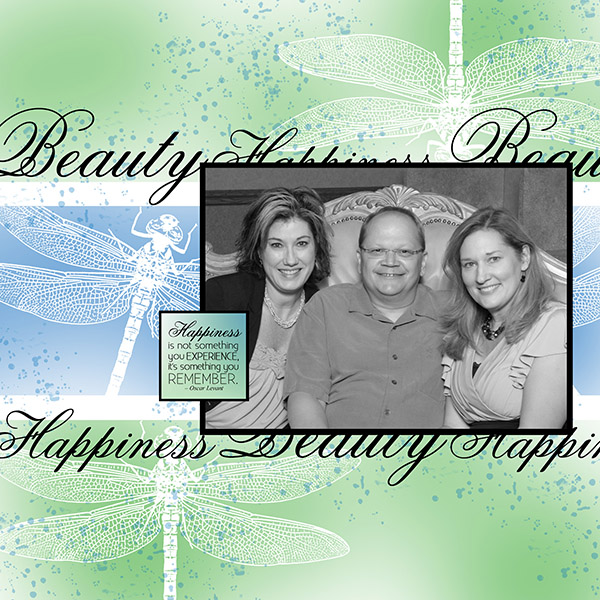
I chose a photo of Karen, Kay and me taken at last year’s Retreat, which is only appropriate since on the day this blog post debuts I’m heading to Wisconsin for this year’s August Retreat!
Hope this post starts you thinking about using paper layouts as inspiration for your digital masterpieces. And thank you, Kay, for inspiring me once again!
I'm glad you stopped by!
-Ron