Showing posts with label inspiration. Show all posts

Tuesday, August 19, 2014

Inspiration Three Ways


We all know that inspiration can come from any number of places. Today's batch of cards were inspired by three sources . . . Karen's cool background technique, Kay's clever cutapart tutorial, and Marya and Ann Marie's super simple August Card Sketch Challenge.

Let's get started!

1. Create the background. I used Gelato as suggested by Karen in her tutorial.


Oops!  I stamped the sentiment on my background upside down... stay tuned to see how I fixed my boo boo. 
2. Stamp sentiment onto card base.

Second try at a background with sentiment stamped right side up ;)
Tribal sentiment
3. Select a cutapart that coordinates with the Gelato background.

Artifacts cutaparts, Feb 2009


Distress the edges of the cutapart for added interest.
4. Create the card using the August Card Sketch as your inspiration.


5. Admire the finished card!


Remember my upside down sentiment?

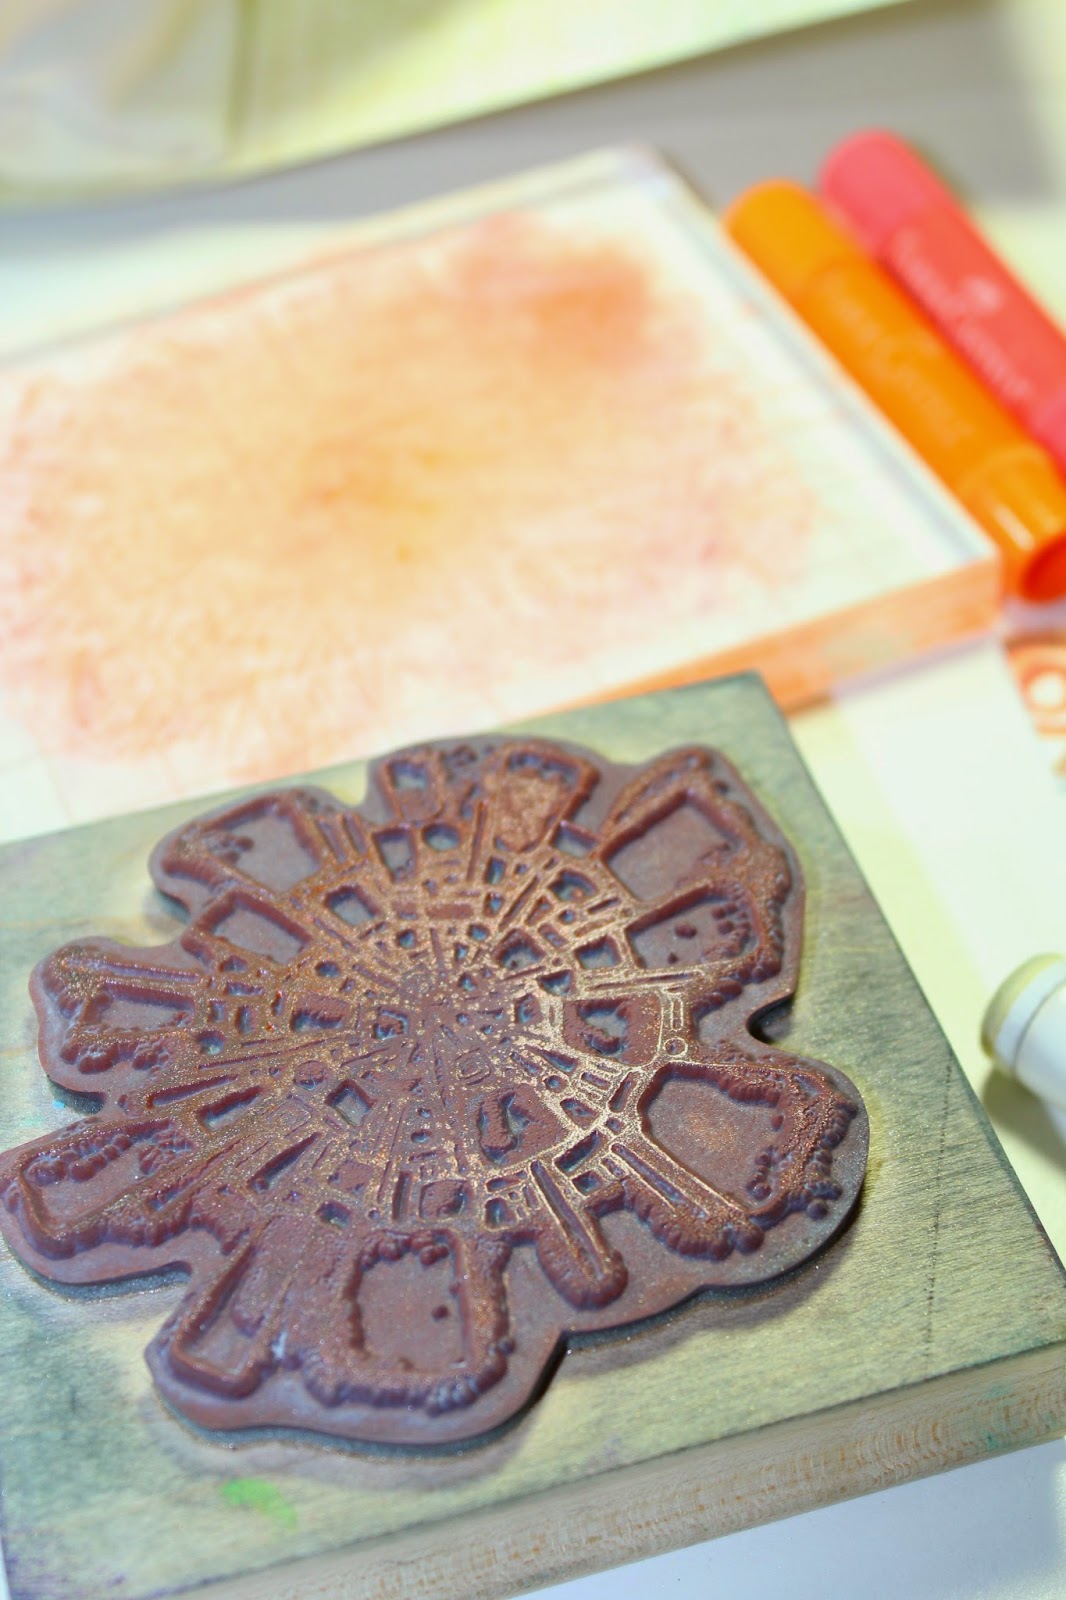
Turn card base on its side, layer with another cutapart (to cover up said boo boo), and stamp with the Picnic sentiment. I stamped the Artifacts sunburst image on the background using the Gelatos misted with a bit of water.

Scribble Gelatos on an acrylic block and mist with water.  Press the stamp onto the block to load with color. 

BONUS: In the process of creating this card, I discovered another background technique!

I noticed the acrylic block had a neat pattern on it after I loaded my stamp.


I took a piece of plain white paper and pressed it into the colors.


Voila, another background!


Don't you love the simplicity of this month's sketch? The "white" space allows the background technique to take center stage.

Have fun with this technique triple-play!

Julie

Wednesday, August 7, 2013

Inspiration is everywhere, if you know where to look!

Club Scrap is blessed with some of the most talented scrapbookers, stampers and papercrafters. When your muse takes a vacation, there are a few key places to visit that will have your crafting mojo revved up in no time!

Number one on my list is this blog. I'm so proud of how far we've come in just a little over a year (our one-year "blogiversary" was in May). And since February of this year, we've had the honor of partnering with numerous other talented bloggers, to celebrate all things crafty with the monthly Blog Hop. Just look at some examples of all the crafty goodness shared last week on the Wisteria Blog Hop!


So many of the Wisteria projects blew me away! After 6 months of Blog Hops, I have so many MORE awesome ideas floating around in my head than before . . . now I just need the time to make them a reality. Sigh.

Now that our "Pro Scrapbookers League" Summer Camp challenges have come to a close, the Club Scrap Galleria is chock-full of awesome scrapbook pages, greeting cards, digital art, and other papercraft projects. No shortage of inspiration there!

Have you checked out the free Scrap Rap Magazine recently? I know I'm biased, but I think this monthly publication just keeps getting better and better. Not only is there a TON of eye candy in the way of beautiful photographs, but each issue features at least one new technique to try to stretch those creative muscles.

Finally, my very favorite source of creative inspiration starts tomorrow: Our annual Club Scrap Retreat! Four days with 50 new friends, learning and sharing, and laughing and wining and dining . . . can you tell I'm excited? Actually, the fun for me, and 17 others, kicks off tonight at a pre-Retreat wine tasting this evening. I can't wait!

So, I guess what I'm saying is, if you ever find yourself needing a little creative boost, look to the amazing resources inspired by, and created by, your fellow Club Scrappers.

Have an amazingly creative day!
Karen

Thursday, June 20, 2013

Look What Kay & Jac Have Been Doing!


We all know that Kay Williamson and Jacqueline Carney are super-talented ladies - you just have to look at the monthly kits and projects, right? Well, my friends, they are both featured in this month’s issue of Scrapbooking.com’s online Magazine!

Kay's Mini Album

Kay’s Bead Embellished Family Mini Album is a really cool 6x6 stitched book. You can see photos and step-by-step instructions (and even a video) HERE.

Jac's Digital Layout

Jac’s article shows a neat digital layout entitled “I Got You, Babe” featuring the Get the Picture Digital Collection. Full instructions are also available for the layout. Check it out HERE.

You’ll notice that there are also ‘YouTube Video’ icons in each of their articles - Scrapbooking.com has actually created brief videos showing the various photos while one of the Scrapbooking.com staff narrates the story.

I encourage you to take a moment and visit both of the links above and get a little CS inspiration. I don’t know about you, but I love seeing Club Scrap products highlighted on other sites!!

And don’t forget that the Club Stamp Hopes Kit ships today! If you haven’t ordered one yet, head to GHM! and get one before they’re all gone! (Mine should be at my door next week!)

See you next week!


-Ron

Thursday, June 13, 2013

Tag, You’re It!

Did you see that cool video that Tricia posted on YouTube last week? (If not, click HERE.) She made an amazing card using a manila tag that she stamped using a few of the images from this month’s Hopes kit. As soon as I watched that video I thought, “I’ve got to make me some of them tags!!!”
But, alas, I’m a Club Stamp member, so I won’t get my paper supplies until the end of the month :(

Hold on a sec - I’ve got the Hopes digi kit! Can I maybe mimic that cool technique digitally? You betchya!

First, I need a tag. I’m sure that Jac could build one in Photoshop from scratch, (yeah, she really IS that talented), but I’m not that much of an overachiever. So I grabbed one from the Orient Express Digital kit, dragged it onto a new document, and enlarged it just a bit.

The first stamp we’re gonna use is the stem.

You can ‘stamp’ in two ways (totally up to you which way you prefer).

Method One:
1. Drag the stem stamp onto the tag.
Start with 1 stem


2. CTRL+Click (Windows) or Command+Click (Mac) on the thumbnail of the stem stamp layer in the layers palette. You’ll see ‘marching ants’ around the stem.
3. From the Edit menu, choose Fill and select a color for the stem. I chose a dark brown from the standard color palette.
4. Click okay and the stem is now brown.
5. Duplicate the stem layer and move/rotate the new branch layer on the tag.
Duplicate and rotate to add 2 more stems

6. Repeat Step 5 until you’re happy with the placement of stems on the tag.

Method Two:
1. Open the stem stamp.
2. From the Edit menu, choose ‘Define Bush Preset’ and save the stem stamp as a brush.
3. Set the foreground color in the tools palette (double-click the foreground color and choose a new color from the Color Picker dialog box).
4. Choose the Brush tool and select the stem stamp.
5. Create a new layer in your document and stamp the stem brush.
6. Repeat Step 5, moving and rotating each stem until you’re happy with the arrangement.

Hint: Just like in ‘real’ stamping, make sure some of your stems are partway off the tag. And don’t worry about these ‘stray’ images hanging off the tag, we’ll fix those with some digi-magic later!

Once you’ve got the stems all done, you’ll use the same method to stamp your leaves, using that nifty leaf stamp. Just one minor change. Set the opacity of the stamped leaf to about 50% (more or less - use your own judgement on what looks best to you - and don’t be afraid to vary the opacity from leaf to leaf!) I used the same brown color that was used from the stems, but you can certainly mix that up if you’d like.

After the leaves are done, repeat the whole process for the flowers. I made orange flowers, but you can use any color you’d like for your flowers!
Then add leaves and flowers
Okay, let’s draw some lines!!!

I love Tricia’s messy freehand lines around each of the leaves & flowers, but I thought ‘How the heck am I gonna do that in Photoshop?’ Well, hidden in the Brush tool is a Pencil tool that works perfectly!

1. Click and hold the Brush tool until the menu pops up.
2. Select the Pencil tool.
3. Set your foreground color to black.
4. Set the pencil size to 2-pixels (there’s a drop-down setting at the top of the Photoshop window where you can set that)
5. Create a new Layer.
6. Use your mouse like a pencil (or marker) and draw double lines around each element. Remember, the goal here is to be free with your drawing, it’ll look a bit messy, but that’s okay. The more you practice, the easier this becomes! And if one of your lines is really ‘off,’ remember Ctrl-Z (Windows) or Command-Z )Mac) will Undo the last action, so you can easily undo and redo lines if you need to.(Another digi-bonus 'cuz you can’t do that on a real tag!)
Use the Pencil Tool to add lines


Next come the spatters that mimic what Tricia did with the water brush and gelatos. I happened to have a ‘spatter’ brush in my stash. You may be able to find something similar online or in a past digi kit like Wildflowers. Here’s your chance to experiment with different brushes, overlays, inked edge files, etc. to add a bit more visual texture to your tag. Once you’ve played a bit and have a look that you like, we’ll be ready to clean up all of that ‘extra’ stuff that isn’t directly on the tag itself.
A spatter brush adds some visual 'texture'


Save your document as a PSD file. This ensures that all of your layers are preserved so that you can go back and play a bit more later!

1. Select all of the layers in the layers palette EXCEPT for the Tag and the white background.
2. Merge the selected layers together - with the layers selected, Ctrl-E (Windows) or Command-E (Mac) will merge the selected layers.
3. Select the tag layer in the layers palette.
4. Select the Magic Wand tool in the tool palette. Make sure the ‘contiguous’ box is NOT checked off in the options at the top of the window.
5  Click on anything EXCEPT the tag - this will select the blank area surrounding the tag.
6. Click on the layer that you merged together in Step 2.
7. Press the Delete key - this will delete all of the extraneous bits of stem, leaf, flower, etc. and leave a clean tag.
Clean it up for a perfect digi-tag!

8. Merge this layer with the tag layer, delete the background and save as a PNG file to use this tag on a card or layout.

Whew! There you have it! Sorry that this tutorial is a bit long, but I think the results are worth it. And many of the steps are quite repetitive, so once you get the hang of it, it really doesn’t take all that long to do.

Now go and create a tag of your own, then use it on your next digital layout or card!


-Ron

Thursday, June 6, 2013

Pick a Card, Any Card…

…and then turn it into a digi layout!

A couple of weeks ago, I used a Cape Cod ALSB page as inspiration for a digital layout. That got me thinking about other sources of inspiration. And recently, a member started a thread in the CS forums on how to get your creative muse back. It seems we’re all looking for sources of inspiration at one time or another.

So this week, I decided to do something completely different (for me, anyway) - using a greeting card layout as inspiration for a digital page.

I grabbed my Assembly Line Card Making Idea Deck, Volume 2 and gave them a shuffle. Then I chose a card - it happened to be the 7 of Hearts. It’s a matchbook-style card, but I didn’t let that deter me.

Okay. I can do this.

Let’s use June’s Hopes Digital Kit, since it’s quite neutral and clean (and really fun!). I played around a bit, and came up with this in less than 30 minutes:


Not bad, huh? Sure the proportions aren’t the same, but hey, it’s just a jumping off point - inspiring me to create - I can adjust as much as I want (‘cuz it’s my own darn layout, right?).

The next time you’re feeling like the muse has left you, grab an Idea Deck - you’ve got one (or more), right? No? Well, head on over HERE to get one - and see what you can come up with - you might be pleasantly surprised!

Thanks for stopping by!


-Ron

Thursday, May 23, 2013

What Inspires You?

Do you ever get into a digi-slump? Ya know, you want to make a digital layout, but nothing seems to work?

To help me get through times like this, I’ve started keeping a notebook for inspiration. After all, there are lots of amazing layouts and cards out there, and imitation is the sincerest form of flattery, right? Whenever I see a layout (either paper or digital), card, ad in a magazine, etc. that appeals to me, I’ll draw a quick sketch in my notebook - nothing fancy, just a simple line drawing to help me remember the overall design. If I’m out and about, I’ll grab a photo of something inspiring with my phone and print it out and later glue it down into the notebook, too.

So this week, I thought I’d use a paper layout from Cape Cod’s ALSB instructions. Even though paper scrapping and digital scrapping are quite different in many ways, the goal isn’t to re-create the paper layout exactly, but rather to use it as a starting point and then let the inspiration take over.

Here’s the ALSB layout I selected:
ALSB Inspiration


And here’s what I ended up with:
My Digital Result

Sure, there are a few similarities, but a few differences as well. I used the Cape Cod Digital kit, but I could have easily used another kit - but Cape Cod is such a gorgeous kit, don'cha think? Sometimes my finished layout doesn’t resemble the original at all, sometimes they’re very similar - but it doesn’t matter either way. The point is you were in a slump and your worked through it.

Now pick a layout - or a card, or a page from that magazine on the coffee table - and let it inspire you to create something wonderful.


-Ron


Editor's note: link to Cape Cod ALSB instructions added 6/13/13 jmh**

Thursday, May 16, 2013

Digital Galleria Stroll

It’s been  while since I took a stroll through the Galleria, and I thought today I would just focus on some digital inspiration there. After all, it’s Thursday, and that usually means something digital, right?

So here are a few treasures I encountered on my stroll - not a lot of comments here, just enjoy the creativity...

First up, Annette (AnnetteD) created a lovely layout called “Greek Islands” using the Lotus Pond kit:

Next, April (aprilpzzl) gives us “My Dolls” made with Bold Blooms - so bold and bright, it made me smile:

Rachelle (azemigh) combines Cape Cod, Pure & Simple, & Raku and creates the stunning “Searose Beach”:

“Afternoon Sun in Black and White” by Cathy (cathygray) uses Cape Cod for a dramatic layout:

I love how Barbara (fuzzylover) uses the photo in “Surfing,” made with the Cape Cod kit:

Lisa’s (Scrappin5150) “Let Me Count the Ways” combines Blossom and LMCTW for a beautiful layout - the colors in the bouquet match the kits perfectly:

Finally, Jill (jmp1022) created a simple, but beautiful digital card with the Cape Cod kit, simply entitled “Black and White”:


I hope you enjoyed this little digital stroll through the Galleria - I’m forever inspired by the beautiful digital art I find there. Now it’s your turn - go create something wonderful and post it in the galleria so we can all enjoy it!

Until next time.


- Ron


P.S. If you're not yet a member of Club Scrap Digital™, what are you waiting for? Click HERE to join! You'll be glad you did!!