 I admit to enjoying a lovely glass of wine now 'n then. Cab Sav, Sauv Blanc, Pinot Noir, Pinot Grigio, and even a buttery Chardonnay now 'n then. You?
Ever since we released our Uncorked Collection Unmounted stamps, I've had a vision for this little wine tasting journal.
I finally decided to make one. I think I might give it as a Christmas gift to my wine buddy, Scott Carney, if I can part with it. Scott knows way more about wine than I do, so he'd take far better tasting notes in this journal.
 Tricia's Notes: Gee, this one is tasty. Buy this again.
Scott's Notes: Lovely vintage, but could use a year or two of aging. Spicy finish with nice tannins.
I am mere grasshopper understudy to the great sommelier that is Scott Carney.
OK. Sorry. Back to the "book of wine". I love this project. I really do. I loved every minute of making it. Except punching the holes. Not a fun job.
Supplies:
Uncorked Unmounted Stamps
(4) pkg. Gimme a Ring Drop a Line Journaling Cards (Plain Side)
Sorrento Newsprint Thickers
Sorrento and Equestrian Fibers
(6) 12x12 Sheets All That Jazz Dark Brown Print (seconds)
(2) 3-3/8x4" Matte Board
8.5x11 Sorrento Ginger Print
Crop-A-Dile
(2) 2" Binding Rings
CS® Bookbinding Glue
Foam Brush
Bone Folder
12" Paper Trimmer
CS® Earth and India Black Inks
CS® Grid Ruler
1. Stamp the unmounted "tasting notes" image onto the back of each journaling card with Earth ink.
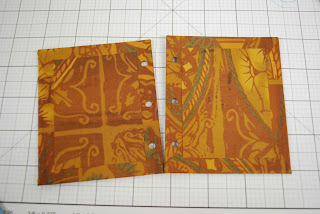
2. Trim each 12x12 Dark Brown Print into nine 3.25x3.75" pieces. (Trim at 11.25, 7.5 and 3.75". Cut each 3.75x12 horizontally at 9.75, 6.5 and 3.25".) Nest one journaling card onto the right edge of a panel. Center the grid ruler onto the panel, 1/4" from the left edge. Mark holes for punching at center, and 1.25" above and below center. Punch holes.
3. Trim the 8.5x11 Sorrento Ginger Print vertically at 6". Trim the 6x11 horizontally at 5.5". Cut the 2.5x11 horizontally at 6.5 and 3.25". (This will create two 5.5x6" outside covers and two 2.5x3.25" inside covers.) Glue the matte boards to the center of the outside covers.
4. Mitre the corners and wrap the flaps. Glue the inside covers in place. (For a great tutorial on this process, please watch this Essentials Video on wrapping!)
5. Place the punched inside page onto the inside back cover with the left edge of the page flush with the left edge of the cover. Mark the location of the holes onto the cover and punch.
6. Transfer the location of the holes on the back covers onto the front cover and punch.
7. Transfer punched holes to all of the panels and attach the journaling cards. Thread the covers and journaling pages onto the binding rings. Decorate the front cover with those adorable newsprint Thickers featured in the Sorrento JR kit.
8. I added a few extra pages to the book to be used as dividers for "reds," "whites," and "other" categories.
8. Tie a bunch of ribbon and fiber onto the rings. Yummy!
So, should I keep it? Or should I hand it off to the winemaster. Decisions, decisions.
Cheers!
Tricia


i LOVE this project! Once the holidays are over and things settle down a bit, I'm making one of these for me! And Tricia, if you made a second one, you could gift one to Scott and keep one for yourself!
ReplyDeleteYou're lucky you didn't ask me to give this one to YOU, Ron!
DeleteLOVE this project too Tricia! So darn cute and I just know Scott with love it!
ReplyDeleteLove it! I think you should keep this journal. Even "love this one, buy it again" is very useful information :-)
ReplyDeleteYou didn't mention Syrah. That's my favorite wine. Sooooo yummy. (and I don't love it just because we have a little Syrah, vineyard. Nope I'm completely unbiased).
Ps I love the wine themed kits; all have been gorgeous! Thanks :-)
So--my dear friend Penelope . . . you happen to have a little Syrah vineyard? That sounds like fun! ;) And I do enjoy Syrah, too! :)
Deletegreat project
ReplyDeleteI'm with Ron, cant wait to make in January! That kit was AWESOME!!
ReplyDeleteI'm going to have to say great minds think alike, because I have a (half-finished) project like this for my brother using those stamps! I better get on finishing it if I want to give it to him for Christmas as planned...
ReplyDeleteI came back to this project a dozen times, so I'll comment again that I love it!!!
ReplyDeleteI (finally) just made this adorable book. I won't wait so long putting it to its intended use. ;-)
ReplyDeleteThat's awesome, Fran!!! :)
Delete