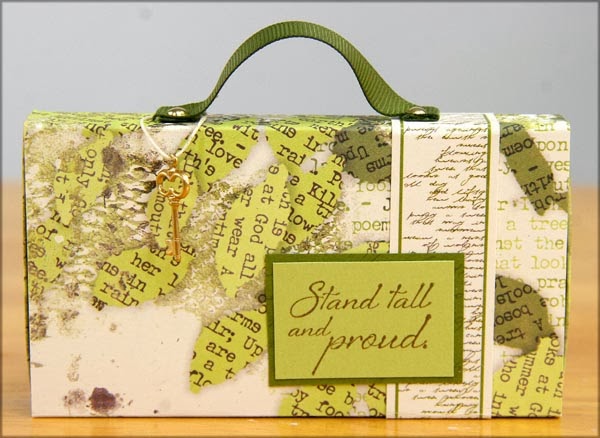
Whether it's a large or small project, Trees Papers do it for me! Look how big of an impact the White 8.5x11" Print makes on this tiny matchbox project.
 |
| This matchbox measures 4-1/2 W x 2-1/2 H x 5/8" Deep. |
2. Use a grid ruler to locate the center of the first 5/8" scored area. Pierce a hole 1" from each side of the center to make holes for a ribbon handle.
3. Cut ribbon to 4-1/2" length, fold end on top of itself and pierce with a brad. Repeat for the other end.
4. Attach ribbon handle to the pre-pierced holes with brads.
5. Glue 5/8" flaps together with the handle on the top to create the matchbox sleeve. Decorate the sleeve with cutaparts or stamped elements from the Trees collection.
6. Trim a 3.5x6.5" base from the Light Green Print. Score vertically at .5 and 3". Score horizontally at .5, 1, 5.5, and 6".
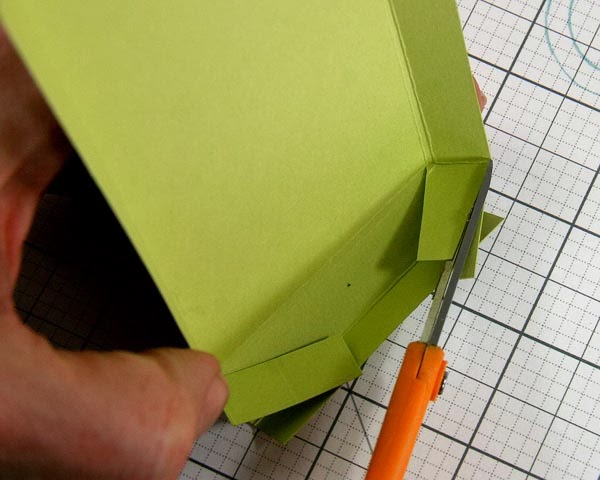
7. Use a scissors to cut flaps along the vertical scorelines as shown.
8. Fold on score lines. Use a bone folder to burnish folds.
9. Before adding glue, test fold box together. Remove any paper that interferes with folding.
10. Apply glue to small inside flaps and press together.
11. Add glue to the last flap and press in place. You may also need to trim the flap for a better fit.
12. Slide the base into match box sleeve.
13. Fill inside with a 2.25x4.25" mini album, accordion album, card or whatever you decide!
Kay at Club Scrap


love this
ReplyDeleteVery cute Kay
ReplyDeletesupercute!
ReplyDeleteHow cute is that?! Love it Kay!
ReplyDeleteAdorable - yet again you have come up with a delightful mini project.
ReplyDeleteVery pretty, that white print is mt favorite.
ReplyDeleteThis is lovely. Is it large enough to hold a gift card?
ReplyDeleteKay shared the measurements of the matchbox above at 4-1/2 W x 2-1/2 H x 5/8" Deep. A standard credit card/gift card size is approximately 2-1/4x3-1/2". It should fit just right.
DeleteThanks Tricia.
DeleteSuper cute, Kay. Are those papers left over after doing the ALSB?
ReplyDeleteHi, Arlene . . . Nope, the entire paper collection is utilized during the ALSB process. If you wanted to do both projects, you'd need to pick up a few extra sheets of paper.
DeleteThanks Tricia.
DeleteSweet project, Kay!
ReplyDeleteReally cute!
ReplyDeleteThis is so adorable - and a great idea with the gift card! Just too stinkin' cute!
ReplyDeleteAdorable!!
ReplyDeleteLove this, I am sure I will be making quite a few of these! Thanks you!
ReplyDeleteThat is really cute and the paper is Gorgeous!!
ReplyDeleteAnother awesome project! I love it! Thanks so much, Kay!
ReplyDeleteI just LOVE this project! I can't WAIT to make it!! It'll make a wonderful gift!!!
ReplyDeleteLove the gift card holder idea!!!
ReplyDeleteLovely. thanks for sharing your talent, Kay! I love it. So pretty
ReplyDelete