Friday, November 30, 2012

Still WOW-ing me!

Happy Holiday Pre-Season  to you today from Kay!

Of course things change so quickly around here at Club Scrap, but for now, there are less than 20, yes 20, WOW Holiday 2012 boxes available! Actually calling it a box doesn't do it justice. The WOW Holiday Collection is more than a mere box of "stuff," it's: Awesome Paper, Embellishments, Unmounted Rubber Stamps, a Stencil, Tiny Cookie Cutters, Embossing Powder, Really Fun Keepsake Book Project, a downloadable Digital Collection, optional Cardmaking Pack and online video instruction! Whew, try saying that all in one breath! Anyway, I'm still WOW-ed by this collection!

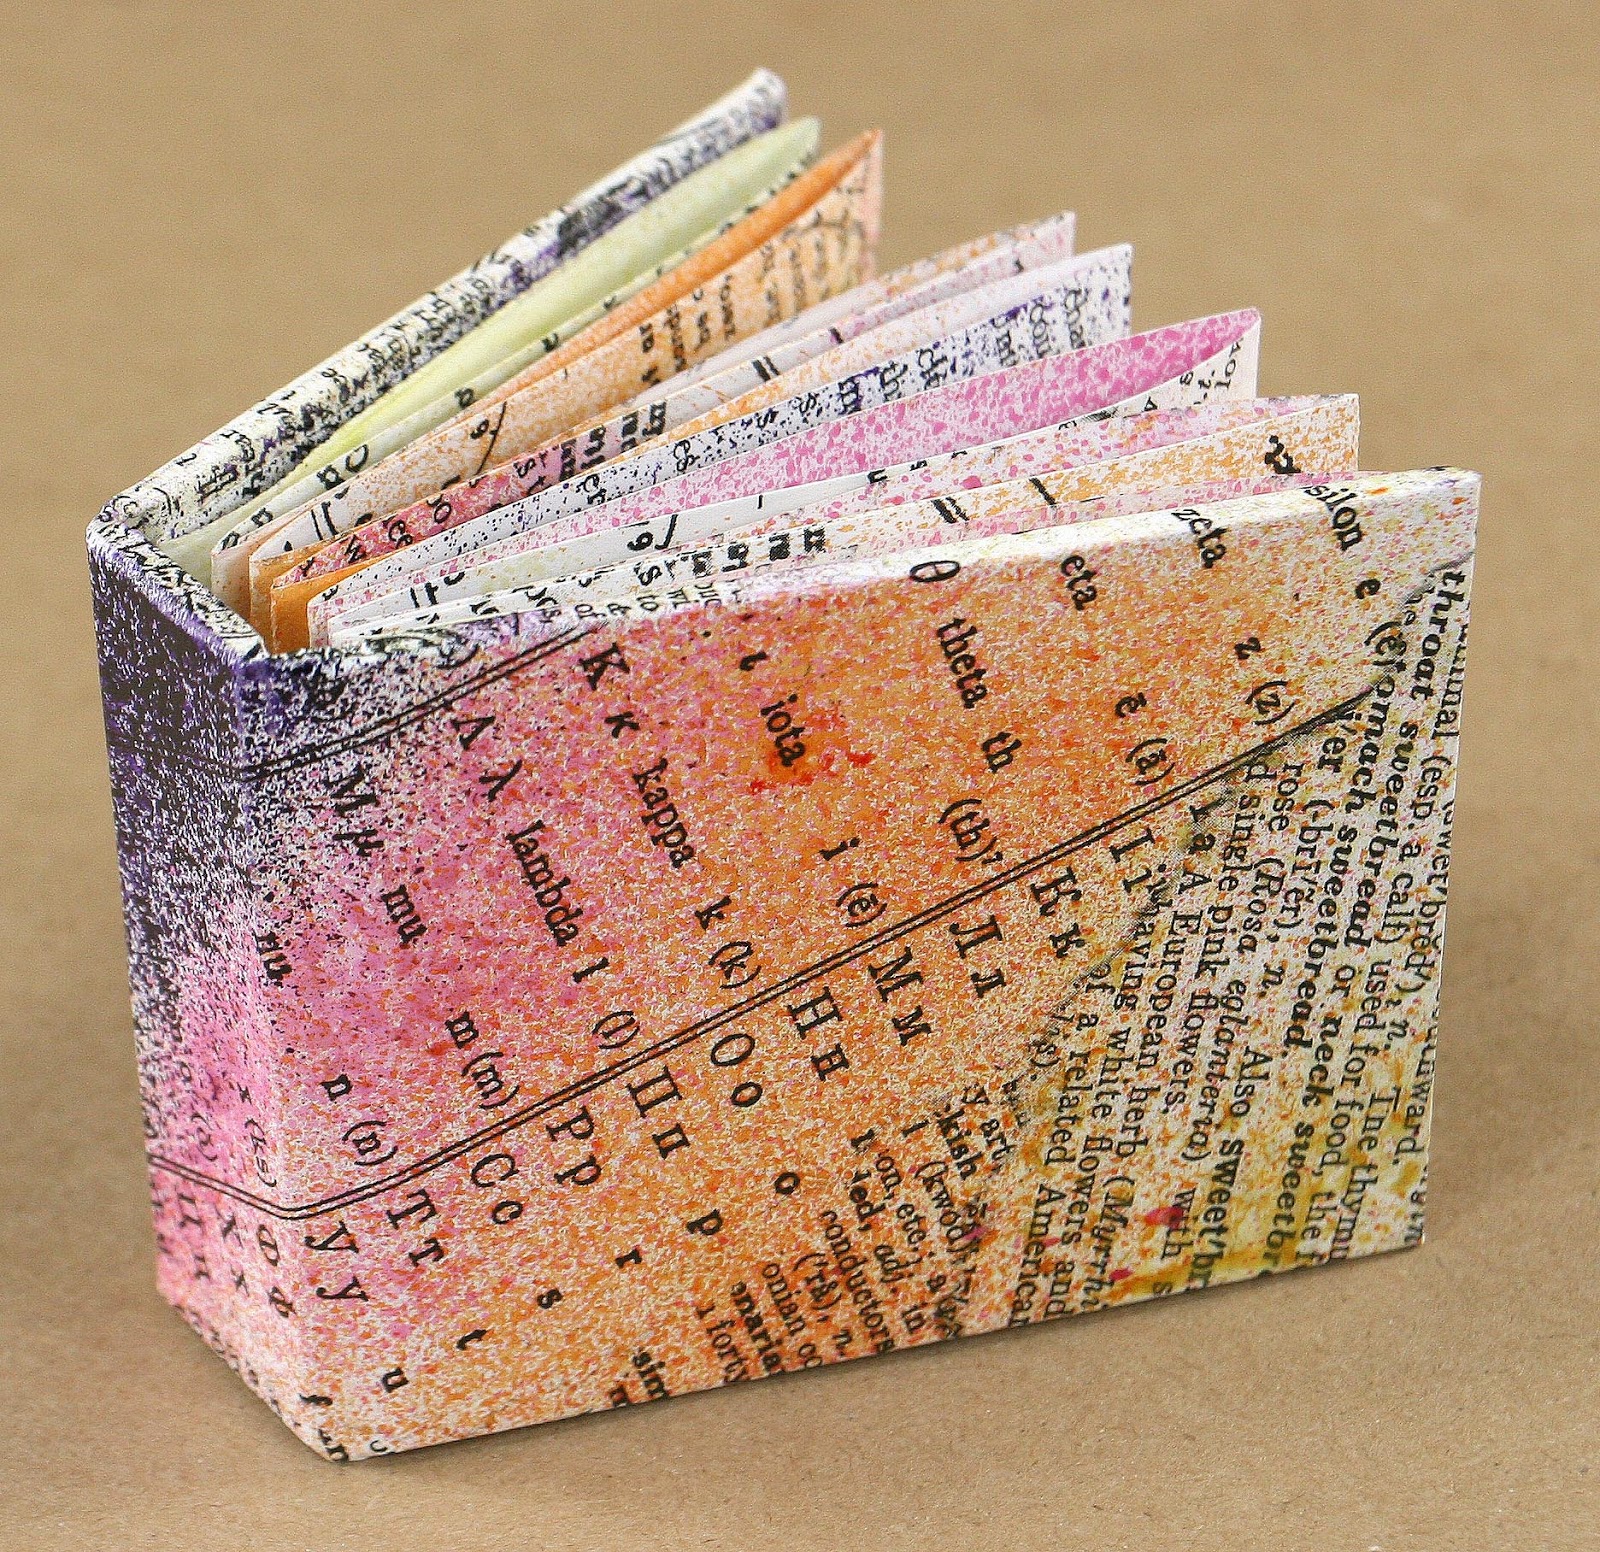
I just happen to have a few pictures of it handy, here is my new favorite project, the Holiday Keepsake Book Project. We put Keepsake in the name because the book houses a fun box for storing special items inside.


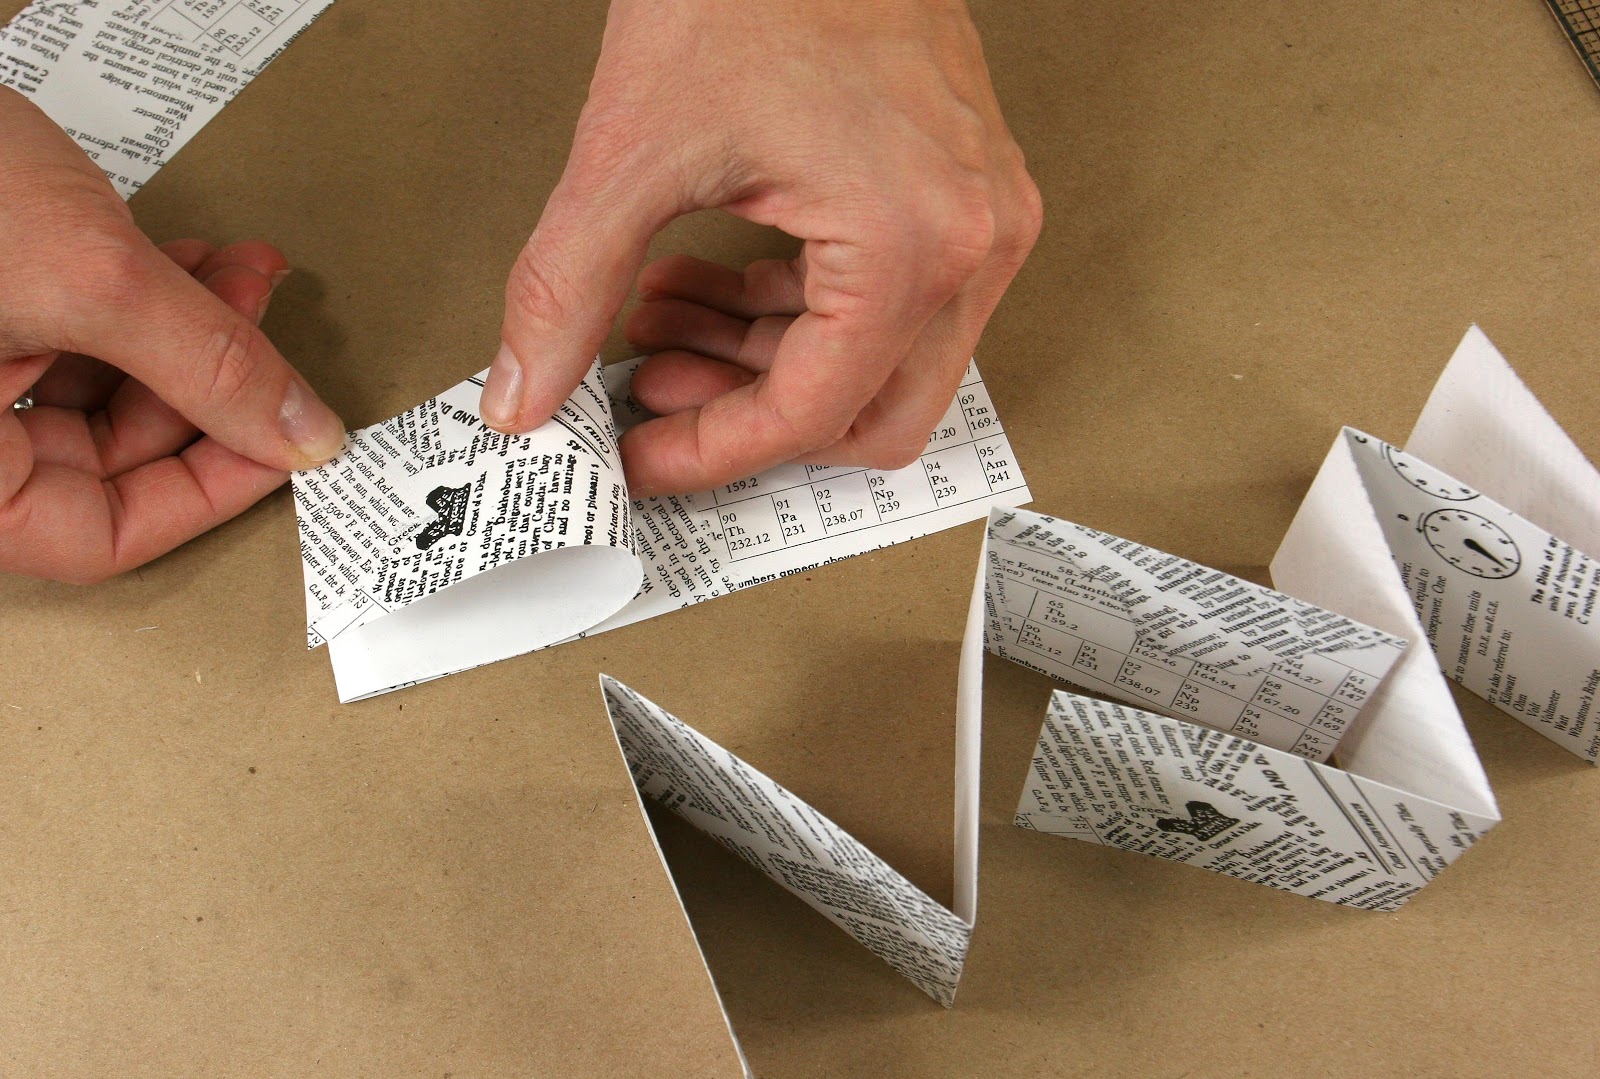
This book has accordian pages inside as well as a watch-sized box for housing pictures and keepsakes. I still need to get my pictures from last Christmas inside the pages. Or maybe I should save it for
this year's pics!

Also, the outside printed text paper wrap was created from a Holiday themed paper collage I made by hand, really a fun touch I think!


Did you happen to see the Jingle Bells Stencil? Here is an 8.5 x 11 page I did using it.


Did you see all the cards Tricia made?
She shares so many fun techniques on her WOW Holiday video instructions.


The sheet of Unmounted Stamps is a great addition to my Holiday collection.


Speaking of the Unmounted Stamps, I had a ball making this card . . . 


The darling Tiny Cookie Cutters are such a great embellishment!


OH, and the papers . . . just so pretty.


. . . and the Verdigris Embossing Powder.


Yep, less than 20 still available, so if you've been on the fence about the 2012 WOW Holiday, don't wait any longer!

Here it is below, all packaged up and ready to go:)


Enjoy this very merry season and this great box of stuff!
Thanks so much for stopping by,

Kay of Club Scrap


Thursday, November 29, 2012

Hybrid Gift Giving

Happy Thursday! Ron here with a quick hybrid gift idea for you.

With the holidays fast approaching, you want to be able to make some quick gifts for family and friends, right? How about a 2013 calendar? And not just any calendar, but one that you can customize with photos! And, if you've got a little bit of digital patience, you can even add some special dates (like birthdays and anniversaries) to the calendar!

Club Scrap® has a super cool digital calendar this year - it's set up like a Quick Drop Digital Layout, so it's really easy to add photos to each month. And each month is based on the monthly kits from 2012, so you know they're gonna be gorgeous, right? They're sized to fit on 8.5 x 11 paper, so you could even print 'em at home in a pinch (or just save 'em all to a thumb drive and bring 'em to your local copy shop and they can make as many copies as you need!). Punch a couple of holes at the top and add a bit of fiber and you've got a really cool gift that lasts the whole year. How easy is that?

You know you want a set, right? Head on over HERE and get 'em and make some quick gifts. Your family and friends will love them!

Now go and create something wonderful!

Tuesday, November 27, 2012

It's Tool Time!

In honor of this week's sweet sale on tools, I wanted to share a little something that I discovered while I was at the Silver Birch Ranch (SBR) Scrapbooking Retreat.

It's rare that I have time to finish my own pages. I mean, making the assembled pages, diagrams and instructions is a pretty big project every month, and by the time all of that is completed, I'm already off to the next month's deadlines.

After lugging tons of albums with naked completed pages and a few bins of photos to the retreat, I had high hopes for what could be accomplished. And once I discovered this little 8x8" CS® Grid Ruler trick, I was off and running. Over one hundred pages were completed despite the fact that I taught seven workshops that same weekend!


A video is worth a million words, so here's the secret to my cropping success. (Go to the blog to view the video.)

Grab your 8x8" Grid Ruler. And if you don't own one, now's the time to change that!

Efficiently Yours,
Tricia

Friday, November 23, 2012

No Crowds, Just Crafting Today.

Hoping you had a wonderful Thanksgiving Holiday!
Kay here at Club Scrap, I'm not out in the shopping crowds today, I'd rather spend it crafting!

The November Equestrian Club Stamp kit just shipped Tuesday, so I wanted to show you some of the fun I've been having with the Club Stamp Unmounted Rubber stamps.

I stamped the fun horse illustration looking image and got out my watercolor pencils.


Then, to get a bit of an aged look, I crumpled it up....

and rubbed Sandstone Ink over the uncrumpled cardstock, leaving ink on the creases of the cardstock.


Then I attached my little work of art to a card with mini brads, and cut a cardstock frame for
on the card front.

This Birthday card will be great for my animal loving friend, or maybe I should save it for when I need a more masculine card, or maybe it should sit on my own desk for awhile until I decide. It's just so pretty to look at that I want to keep it around for awhile!

Thanks for stopping to take a peek, I hope you are spending Black Friday they way you want to be spending it!
Belated Happy Thanksgiving wishes to you,
Kay


Thursday, November 22, 2012

Happy Thanksgiving!


Since it is a day of thanks, I thought I'd take a moment today and share what I'm thankful for.

I'm most thankful for my family and friends - although my biological family is fairly small, I'm lucky enough to have an extended family of dear, dear friends. My DSO David, my BFF Sharon, Cherryl & my Wisconsin family - The Carney's and the Morris's - I can't imagine my life without all of these people.  And then there's my CS family, my co-workers (who are also friends!) and so many more special people in my life - I thank God for all of them each and every day.

I'm also thankful for my health. I've had quite a few health problems over the years (including a few cancer diagnoses), but I'm still here to talk about it all and I feel great, so for that, I'm thankful. And living with (and surviving) cancer has given me a different outlook on life - I'm very grateful for that.

I'm thankful for my life - it's far from perfect, but pretty neat all the same! As I write this, I realize that I could go on and on about things that I'm thankful for, but family, friends and my health - those are the most important ones, so I'll leave it at that.

Take a moment and give thanks for the wonderful things in your life - today and every day.

Creatively and thankfully yours,

Ron

Wednesday, November 21, 2012

November technique: GESSO

Happy Wednesday everyone!

Hetty here with a photo tutorial for using the gesso we made in the retreat Creative Concoctions workshop. Or maybe you have gesso on hand but never knew what to do with it!

Over at the Club Scrap forum, I post a technique every month for you all to try. This way you can see what others do with the same medium. You can find the technique of the month HERE.

There are many ways to use the gesso and here is one:

1. Begin with two pieces of cardstock trimmed to the same size. I used a 4-1/4x5-1/2" piece so that I could use it on a card. Put a blog of gesso on each piece of cardstock.

 2. I use an old credit card to spread the gesso on the cardstock. Not a too thin layer, make sure the gesso is everywhere.
 3. When still wet, put the two pieces on top of each other on the gesso side.
4. Rub it in gently and then slowly take them apart.
5. You see now that on both pieces you have structure in the gesso. Let it completely dry before going on. You can use your heatgun or do this before you go to bed and use the pieces the next morning.
 6. There are all kinds of mediums you can use to color the gesso. I love the new metalic stains and combined it with vintage distress ink to color this background.
7. Now stamp on it with black archival ink. You can also add some cut out pictures or photos. It is great for art journaling.
8. And here is the finished card. I added some glitter glue.
 9. Another way to color the gesso is with your watercolor crayons, a brush and water.
10. After you have colored the background, you can use your stamps in black or in colors.
11. This is the finished card.

Want to see some more gesso techniques? Please come and visit the technique challenge at the Club Scrap forum.

Have a creative day!


Tuesday, November 20, 2012

What's the big idea?

Coupla things.

1. Operation Write Home (OWH) is already asking for Valentine's Day cards! Deadline is December 31.

2. We've got fun Idea Decks. (And, if you're reading this today, November 20, they're on sale. Just sayin'.)

3. We need to help the troops send home some lovin'.

To get the inspiration ball rolling, I skimmed through the Cardmaking Idea Deck and selected the 3 of hearts. Yeppers--hearts. ;) This formula creates four standard cards, an OWH requirement.


Enter: 
(2) 8.5x11 Tahiti Dark Pink Plains
8.5x11 Birds of a Feather Rose Plain
8.5x11 White Plain


Enter:
Tonic Studios 12" Paper Trimmer. Follow cutting instructions on back of idea deck card.


Enter:
Pretty matching ribbon! Oh, and grab that brand new CS® Carnation Ink Pad!


Playtime. Hello, gelato. And grab those fabulous Love Blooms Unmounted Stamps. (On sale, too!)


Batch 'o four cards completed in a jiffy! Time to send off the love . . .


What's your next big idea?
Tricia

Friday, November 16, 2012

Hardcover News Book - Picture Tutorial

Friday Greetings from Kay here at Club Scrap!

Did you happen to see the Hardcover News Book Project introduced at this year's retreat? Along with my Altered Panel Workshop, I got to use the fun printed text collage paper I put together for this little book. It looks great altered with inks and sprays or just left black & white. As usual, the kit comes complete with instructions, "cut to size" book board, outside and inside cover wraps and inside pages, for only $5.95 - I just love that price!  :)

I want to show you the altered styles I've made. Below, I cut windows into the book board cover with my heavy duty craft knife to create nooks for embellishments.


The inside pages hold photos and rubber stamped quotes, of course.


On the book below, I assembled it before adding the color mists. Normally I would color the paper before putting the book together, but didn't do it in that order this time. After the little book was put together, I selected four mist colors and sprayed away.

Luckily, I took a few pictures while putting the book together, and you can see the easy process. It's so simple, and for only $5.95! (Oh, did I mention that already?)

Picture tutorial:

Hope you enjoy this fun little project as much as I did.

As always, thanks for looking and enjoy your day!
Kay Williamson