

(Picnic Guest Artist: Janet Moran)
Howdy Club Scrappers! I was honored to be asked once again to create the Greetings to Go cards. The "picnic" kit idea was actually a collaboration with my mom (Beth Moran). We came up with the idea driving home from the August Retreat last year. Most people spend hours brainstorming future Club Scrap kit ideas on long car rides don't they? We planned to work on the cards together during Mom's visit earlier this month, but the visit was cut short by some family "stuff". We did manage a quick selfie, though!
 |
| Beth and Janet Moran. |
 |
| Blue Z-fold cards. |
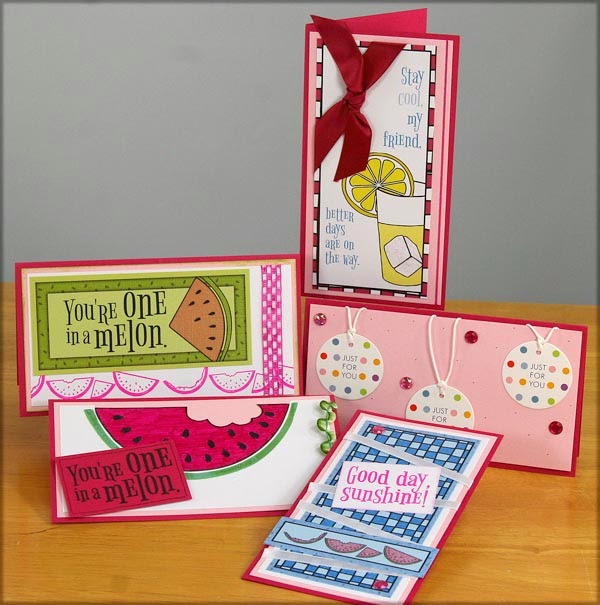 |
| Dark Pink #7 cards. |
 |
| Dark Green A7 cards. |
Here are details on how I created some of these cards.
Blue Z-fold Cards
Blue Z-fold Cards

Use the embossing plate in two directions to create a "grid" effect. It picks up the ink nicely, adding little extra color to the matte.

On the picnic table card, I wanted the table to really stand out. Stamp and heat set table image. Trim closely around image and mount with 3D adhesive dots.

This card features another way to add dimension: Stamp the burger image onto a white matte, and then onto brown and green scrap paper with Sandstone ink.

Cut out each element of the hamburger image and reassemble. It really makes the burger "jump" off the card, don't you think? (Add a quick strip of yellow if you like cheeseburgers.)
 |
| Looks delicious, right? |
 |
| Use embossing folder and ink to add interest to inside panels. |
 |
| Want a different message? Stamp plain side of "Just for You" Hang Tags. |
Dark Pink #7 Cards
To create the 2-tone watermelon, stamp the melon image in green on a white matte and in black on a second matte. (The G2G pack comes with mattes for the inside and the outside of each card, so there are plenty to work with.) Color the white space of the black stamped image pink. Trim and layer onto the green rind.

It was Mom's idea to cut a "bite" out of the watermelon slice. (Are you hungry? I'm getting hungry.)


All this card needed was a bit of flair. To add a touch of sparkle, apply glitter glue to the ice cube.
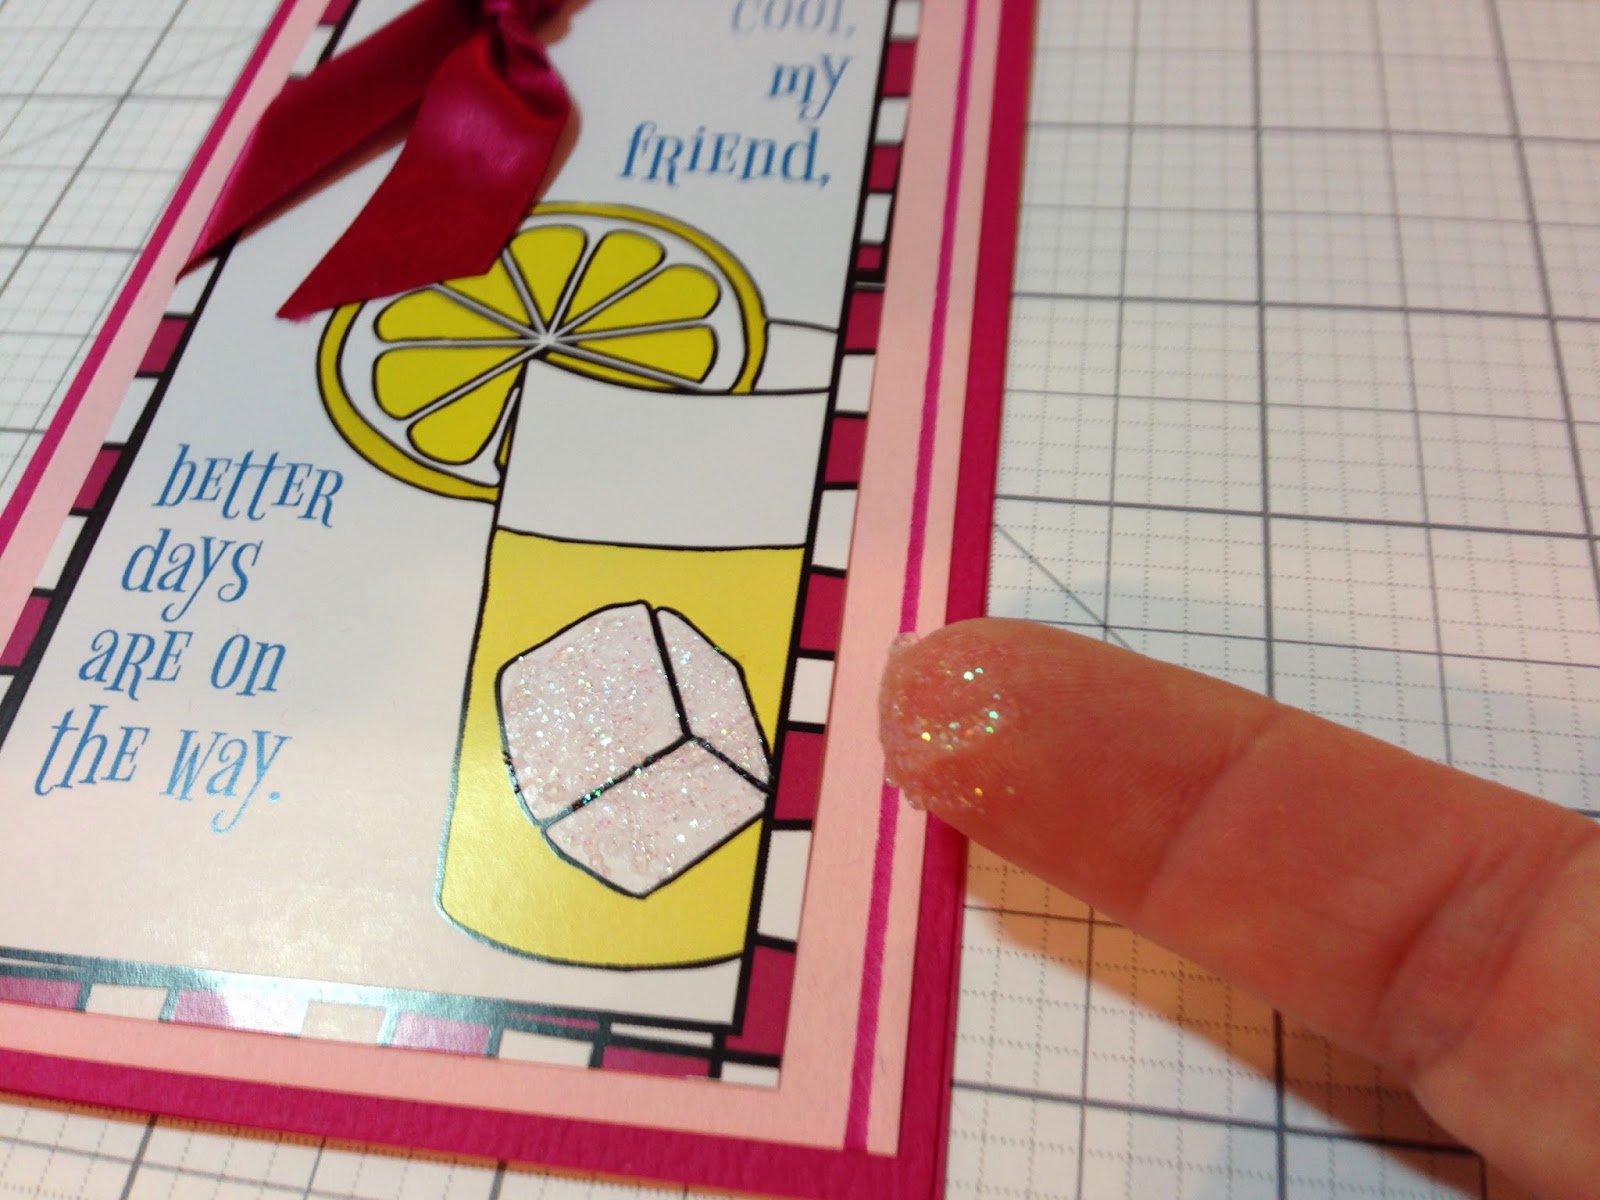 |
| If the glitter glue will not come out of the bottle, use your finger as an alternative applicator. |
 |
| A little bling is always a good idea. |


Green A7 Cards

To create the checkered background on the matte, stamp the grid image from the Art Nouveau UM and color every other square in black. It adds just the graphic touch I was looking for!

Mom decided a flip-flop card was a "must have" this month. After struggling to free-hand draw a flip flop, I decided to trace an ACTUAL flop right onto blue paper. The green twisty ribbon was a perfect addition.

When we originally came up with the picnic idea, Mom and I thought a red checkered tablecloth was a must. Creating this background is super-easy. Use a grid ruler to draw lines on the diagonal in 1/2" increments. Rotate and draw perpendicular lines to create a grid pattern.

Warning: when coloring, be sure to use a permanent ink marker or it might smear on the slightly glossy paper. Color every other grid square with red. (FYI: Cats are not good color-ers.)
Warning: when coloring, be sure to use a permanent ink marker or it might smear on the slightly glossy paper. Color every other grid square with red. (FYI: Cats are not good color-ers.)
 |
| So, are you a ketchup person or a mustard person? |

The "manly grilling card" above highlights my stunning stamping and embossing skills. (Okay, so they aren't perfect, but hey, it was the last card I made.) The grill, tongs and oven mitt look almost perfect embossed in various shades of metallic embossing powders. FYI, the Adobe Copper EP works great here!
I hope I've given you extra ideas for working with this bright set of cards and adorable images. Happy card making!
Janet
Janet
********************
Greetings to Go Guest Artists are given the current month's Club Scrap materials to work with:
- Greetings to Go Pack
- Embellishment Pack
- Collection Unmounted Rubber Stamp sheet
- Greeting Unmounted Rubber Stamp sheet
- Art Nouveau Unmounted Rubber Stamp sheet
- Extra 8.5 x 11" plain papers from the monthly kit
The artist may also choose to incorporate items from their own craft stash, as well as different inks and art mediums. We do our best to make note these additions in the card descriptions whenever possible.
OK, I know I work right at the home office, but this is the first time I've seen your cards. How terrific! I saw the flip flop card and wondered where you got the template. Brilliant! Thanks for all of the clever ideas!
ReplyDeleteWell because someone sent them at the last minute (me) they haven't been hanging around the office long ;)
DeleteWhat a great set of cards, you did a great job on them.
ReplyDeleteAMAZING!! Each and every one of them Janet and Beth too!!
ReplyDeleteGreat photo too, love it. The flip flop idea was brilliant and the red and white checkered cloth grid card, WOW! That is awesome. Great job!!
Great set of cards. Love the creativity, including the red tablecloth and the black and white check using the Art Nouveau stamps. A very fun set of summer cards!
ReplyDeleteJanet and Beth, your cards are fabulous! They make me want to host a cookout. I love the tablecloth!
ReplyDeleteShe was too generous about my efforts for the cards. But I did try to provide moral support. ;-) One idea we ran out of time for was accordion-folding a scrap very narrowly, tying at the middle with fiber and sort of fanning out the top and bottom to use with the "squish you" stamp. Love that stamp!
ReplyDeleteBeth M, aka Mom
Great cards! Janet Ialways love reading your posts!! Nice to see you two! Thanks for Sharing such great ideas!
ReplyDeleteJanet, What a great set of cards you have shared with us. TFS all the techniques you used to create them. I will definitely try some of these.
ReplyDeleteGreat cards! Love the selfie!
ReplyDeleteReally fun cards! Nice you and your mom got to make them together even if it was by texting and phone calls :)
ReplyDeleteGreat cards, Janet and Beth! LOVE the tablecloth.
ReplyDeleteAwesome job Janet - and Beth too!
ReplyDeleteGreat cards and good to see you!! HI there!
ReplyDeleteGreat cards, Janet and Beth!
ReplyDeleteWhat clever ideas you used for the card. You and our Mom will need to go on some more road trips to generate more CS kit ideas. Thanks for sharing.
ReplyDeleteGreat cards! And my cat prefers the Gelli plate :)
ReplyDeleteAn awesome set of cards.....now I need to order that kit......thanks for enabling :D
ReplyDeleteLove these cards. Very clever!
ReplyDeleteGreat job, Janet! I knew you'd be the guest artist this month since Picnic was your idea! Congrats!
ReplyDelete