

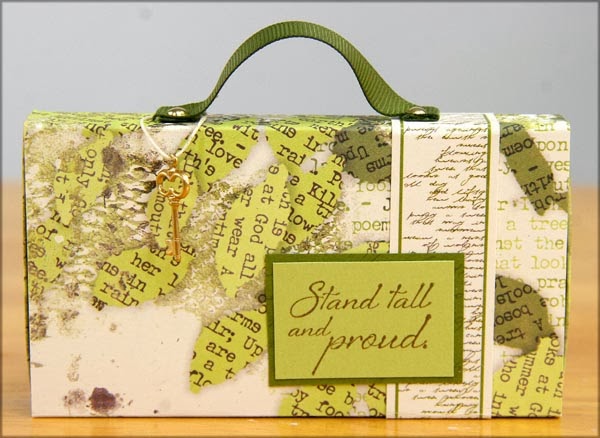
Whether it's a large or small project, Trees Papers do it for me! Look how big of an impact the White 8.5x11" Print makes on this tiny matchbox project.
 |
| This matchbox measures 4-1/2 W x 2-1/2 H x 5/8" Deep. |

2. Use a grid ruler to locate the center of the first 5/8" scored area. Pierce a hole 1" from each side of the center to make holes for a ribbon handle.

3. Cut ribbon to 4-1/2" length, fold end on top of itself and pierce with a brad. Repeat for the other end.

4. Attach ribbon handle to the pre-pierced holes with brads.


5. Glue 5/8" flaps together with the handle on the top to create the matchbox sleeve. Decorate the sleeve with cutaparts or stamped elements from the Trees collection.


6. Trim a 3.5x6.5" base from the Light Green Print. Score vertically at .5 and 3". Score horizontally at .5, 1, 5.5, and 6".

7. Use a scissors to cut flaps along the vertical scorelines as shown.

8. Fold on score lines. Use a bone folder to burnish folds.

9. Before adding glue, test fold box together. Remove any paper that interferes with folding.
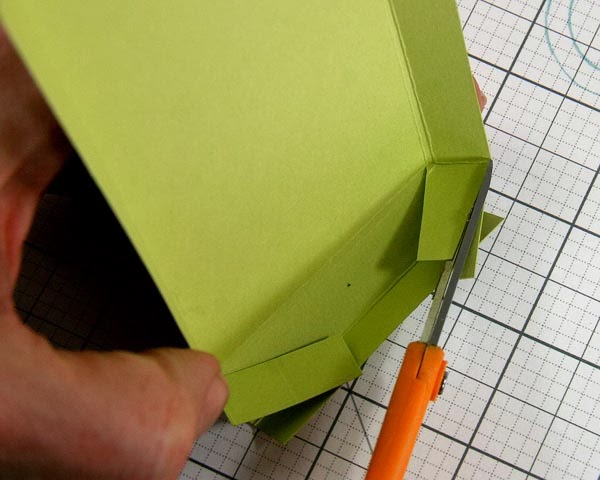
10. Apply glue to small inside flaps and press together.


11. Add glue to the last flap and press in place. You may also need to trim the flap for a better fit.

12. Slide the base into match box sleeve.

13. Fill inside with a 2.25x4.25" mini album, accordion album, card or whatever you decide!


 I wish you a creative day!
Kay at Club Scrap
