Showing posts with label stamping. Show all posts

Tuesday, August 19, 2014

Inspiration Three Ways


We all know that inspiration can come from any number of places. Today's batch of cards were inspired by three sources . . . Karen's cool background technique, Kay's clever cutapart tutorial, and Marya and Ann Marie's super simple August Card Sketch Challenge.

Let's get started!

1. Create the background. I used Gelato as suggested by Karen in her tutorial.


Oops!  I stamped the sentiment on my background upside down... stay tuned to see how I fixed my boo boo. 
2. Stamp sentiment onto card base.

Second try at a background with sentiment stamped right side up ;)
Tribal sentiment
3. Select a cutapart that coordinates with the Gelato background.

Artifacts cutaparts, Feb 2009


Distress the edges of the cutapart for added interest.
4. Create the card using the August Card Sketch as your inspiration.


5. Admire the finished card!


Remember my upside down sentiment?

Turn card base on its side, layer with another cutapart (to cover up said boo boo), and stamp with the Picnic sentiment. I stamped the Artifacts sunburst image on the background using the Gelatos misted with a bit of water.

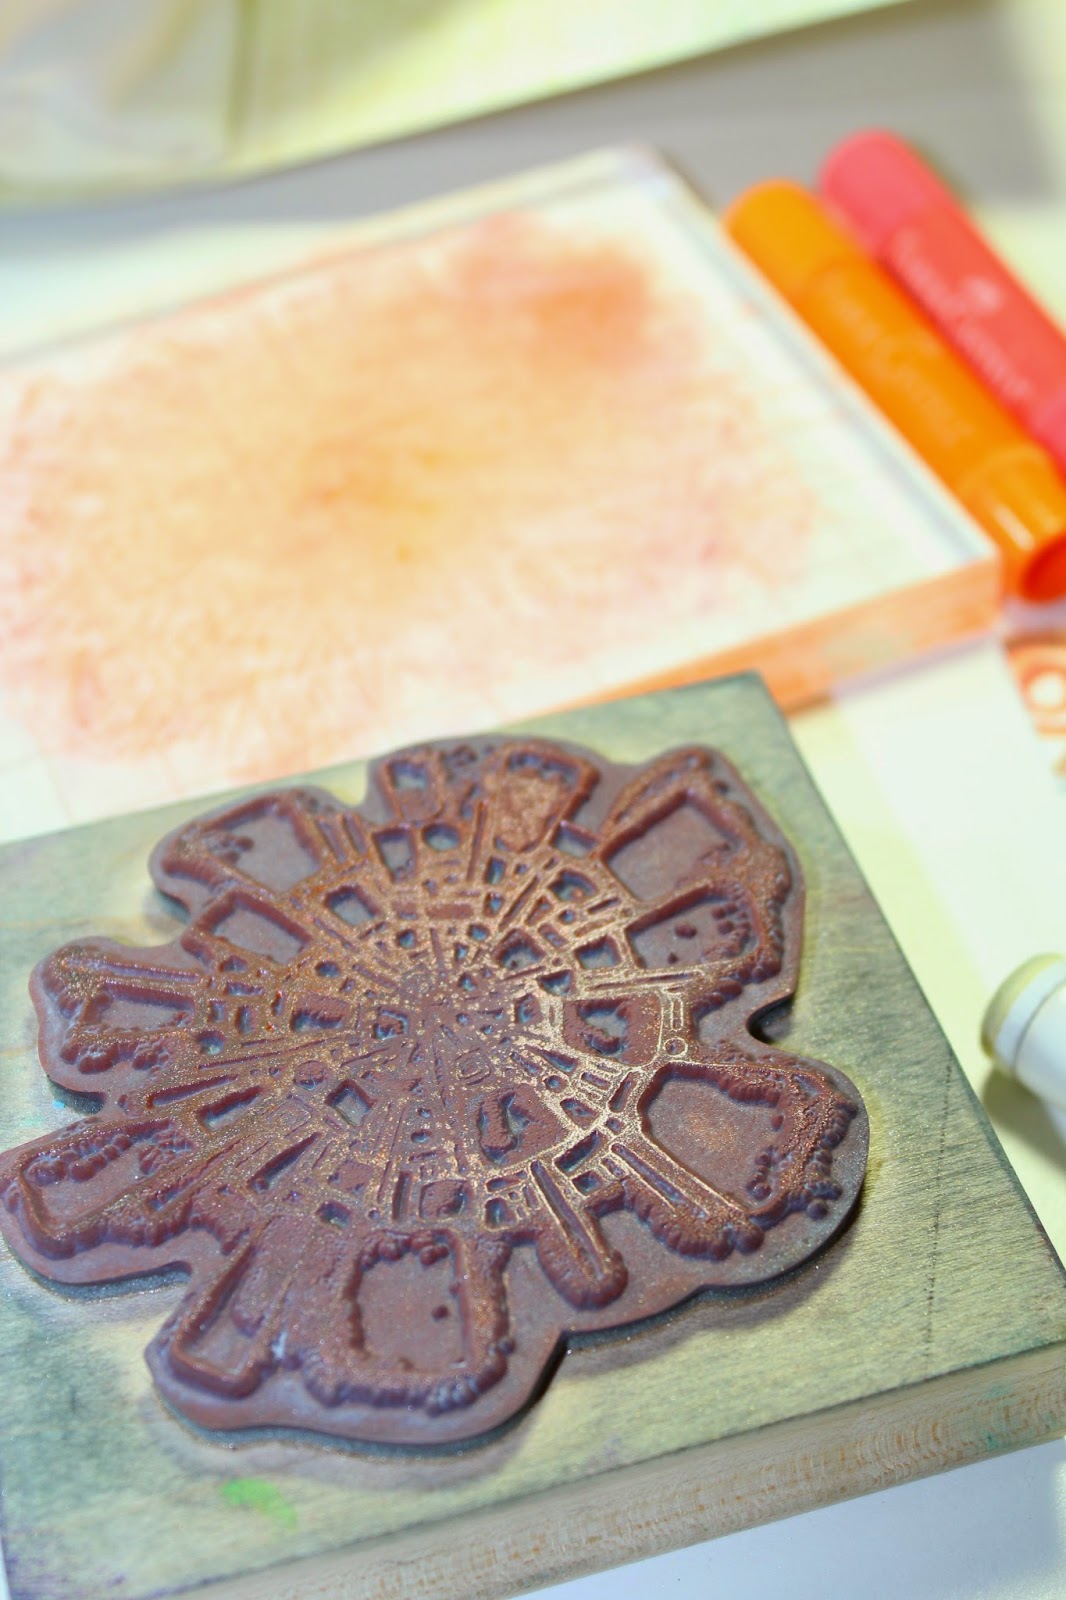
Scribble Gelatos on an acrylic block and mist with water.  Press the stamp onto the block to load with color. 

BONUS: In the process of creating this card, I discovered another background technique!

I noticed the acrylic block had a neat pattern on it after I loaded my stamp.


I took a piece of plain white paper and pressed it into the colors.


Voila, another background!


Don't you love the simplicity of this month's sketch? The "white" space allows the background technique to take center stage.

Have fun with this technique triple-play!

Julie

Thursday, July 31, 2014

Stamping on Stencils


I found a "new-to-me" technique video while browsing Pinterest the other day and couldn't wait to give it a go and then share the results with all of you.

I grabbed some simple supplies and got to work.

1. Geometrics stencil and a stiff bristled paint brush (hardware store find)


2. Time of your Life Borders and Backgrounds stamps


3. Hybrid Ink Pads: Lagoon, Leaf, and Amethyst


4. Wild Flowers distressed script stamp.


5. Follow the video instructions and admire the amazing results!

Tip: Select a stencil with large open areas.
6. Create a card with a layout design by Gloria found here.

Versailles blue, Wisteria purple and Ornamental shimmer green circles
Gear stamp from Time of your Life Part Deux UM set
I hope you like this fun technique and will give it a try.

Julie

Wednesday, July 23, 2014

Oopsie Daisy Greetings to Go Guest Artist


To start with, daisies are my favorite flower -- and I LOVE all flowers! In fact, way back in 1966, before it was even “done," I had fresh daisies on my wedding cake. So I was thrilled when I was asked to play with this kit! And what a stunning kit it is! I love line drawing-type stamps for coloring or other treatments.


Now, being honest, I was a bit disappointed when I saw Tricia and Kay's creations earlier this month -- 'cause they were just the kind of style cards I wanted to make. Well, that forced me to think about the various supplies I have on hand, and it turned out to be great fun to pull them out and play, play, play. 


I’ll also say that the artwork/artistry in the embellishment side order is flat out gorgeous and I couldn’t help defaulting to those pieces. So beautiful! The copper on black -- stunning. Wait until you see what bleach does to the black paper! (Looks like a wood cut to me.)


Set A: 5x7” Caramel Gate Fold Cards


Embossing folders add texture. (Folders used are from Picnic and Spellbinders "Quiltwork")
Spellbinders dies (Gerber daisy/Aster). Paper flowers painted with Twinks.
Iris folded mason jar.
Iris folding pattern from Paper Wishes.
Rectangles trimmed using craft knife, layered with fun foam and copper metallic paper from stash. Colored with Gelatos, Prima Metallic Chalk Edgers. Liquid pearls used for flower center.
Spellbinders die on card edge layered with rick rack ribbon. Twinks on petals. Self-adhesive pearls from stash.
I guess I would say Twinks are my all time favorites -- can’t beat the blendable water color looks with the lovely shimmer. I like it better than markers, and feel I have better control with a brush.

Set B: 4¼x5½” Grey Cards


Main panel created using dye inks on glossy paper over clear embossed stamped images. Chipboard flower was painted, stamped and edged with black pen.
Close-up of clear-embossed stamp image "resist" on glossy paper, colored with dye ink.
Colored in outline stamp with black Sharpie to create a "silhouette." Stencil and pearls from stash.
Embellishment cutaparts panel, "colored" using . . . get this . . . bleach!
Close up of bleach on black panel. So much detail!
Background painted with Sparkle Gel Crayons and water brush.
Trio of flowers stamped multiple times, layered using 3-dimensional adhesive.
Image stamped with watermark ink and traced using Scrap Happy Sheer Glue. Copper Foil rubbed over dried glue. Copper thread and Liquid Pearls from stash.

Set C: 3½x5” Green Mini Easel Cards


Flower stamped, cut out, and traced using stylus onto copper sheet.
Antiqued with Ebony Rub 'N Buff. Copper triangle brads from stash.
Twinks on flower petals and caterpillar.

Used B&B sentiment with 3/4" and 1-1/2" circle punches to create round embellishments. Cape Cod stencil.
Friends stencil background. Flower image stamped and embossed with white EP. Stripe stamp from
Short Sleeve Pants in CS White Pigment Ink.
Traced Oopsie Daisy masking stencil onto panel and added zentangles to each petal.
Background is colored with watercolor pencils. Hydrangeas "LOVE" stamp.
So once the box of these fifteen cards was on its way to Club Scrap, what did I do? I grabbed the rest of the embellishment kit images and made more! I have parts for another fifteen cards partly assembled. Once you get rolling, it's quite addictive!


Enjoy!
Cyndy


********************

Greetings to Go Guest Artists are given the current month's Club Scrap materials to work with:
  • Greetings to Go Pack
  • Embellishment Pack
  • Collection Unmounted Rubber Stamp sheet
  • Greeting Unmounted Rubber Stamp sheet
  • Art Nouveau Unmounted Rubber Stamp sheet
  • Extra 8.5 x 11" plain papers from the monthly kit
The artist may also choose to incorporate items from their own craft stash, as well as different inks and art mediums. We do our best to make note these additions in the card descriptions whenever possible.