Showing posts with label Oopsie Daisy Scrap Rap. Show all posts

Thursday, July 24, 2014

Creating a Digital Layout in Three Easy Steps


Each CS Digital Kit comes with six Quick Drop Digital Layouts (QDDLs). These template make it easy to create layouts by just adding photos. But sometimes you just want to make something that's more "your own."

The digital clusters that are part of each kit can help you accomplish that. Clusters are pre-assembled groupings of various parts and pieces of the digital kit, even including the appropriate shadows. This helps add detail to your layout without having to do a lot of work. In fact, you can make your own digital layout in just three steps.

Using this month’s Oopsie Daisy Digital Kit, let me show you how!

1. Open one of the digital backgrounds.


2. Add a cluster.


. . . or two!

3. Add a photo, cropping if necessary.


Done! Wasn't that simple?

The next time you want to make a quick and easy digital layout, check out the clusters in the kit. They can make light work of building a layout of your own . . . as easy as 1, 2, 3!

Until next time, thanks for stopping by.


-Ron

Wednesday, July 23, 2014

Oopsie Daisy Greetings to Go Guest Artist


To start with, daisies are my favorite flower -- and I LOVE all flowers! In fact, way back in 1966, before it was even “done," I had fresh daisies on my wedding cake. So I was thrilled when I was asked to play with this kit! And what a stunning kit it is! I love line drawing-type stamps for coloring or other treatments.


Now, being honest, I was a bit disappointed when I saw Tricia and Kay's creations earlier this month -- 'cause they were just the kind of style cards I wanted to make. Well, that forced me to think about the various supplies I have on hand, and it turned out to be great fun to pull them out and play, play, play. 


I’ll also say that the artwork/artistry in the embellishment side order is flat out gorgeous and I couldn’t help defaulting to those pieces. So beautiful! The copper on black -- stunning. Wait until you see what bleach does to the black paper! (Looks like a wood cut to me.)


Set A: 5x7” Caramel Gate Fold Cards


Embossing folders add texture. (Folders used are from Picnic and Spellbinders "Quiltwork")
Spellbinders dies (Gerber daisy/Aster). Paper flowers painted with Twinks.
Iris folded mason jar.
Iris folding pattern from Paper Wishes.
Rectangles trimmed using craft knife, layered with fun foam and copper metallic paper from stash. Colored with Gelatos, Prima Metallic Chalk Edgers. Liquid pearls used for flower center.
Spellbinders die on card edge layered with rick rack ribbon. Twinks on petals. Self-adhesive pearls from stash.
I guess I would say Twinks are my all time favorites -- can’t beat the blendable water color looks with the lovely shimmer. I like it better than markers, and feel I have better control with a brush.

Set B: 4¼x5½” Grey Cards


Main panel created using dye inks on glossy paper over clear embossed stamped images. Chipboard flower was painted, stamped and edged with black pen.
Close-up of clear-embossed stamp image "resist" on glossy paper, colored with dye ink.
Colored in outline stamp with black Sharpie to create a "silhouette." Stencil and pearls from stash.
Embellishment cutaparts panel, "colored" using . . . get this . . . bleach!
Close up of bleach on black panel. So much detail!
Background painted with Sparkle Gel Crayons and water brush.
Trio of flowers stamped multiple times, layered using 3-dimensional adhesive.
Image stamped with watermark ink and traced using Scrap Happy Sheer Glue. Copper Foil rubbed over dried glue. Copper thread and Liquid Pearls from stash.

Set C: 3½x5” Green Mini Easel Cards


Flower stamped, cut out, and traced using stylus onto copper sheet.
Antiqued with Ebony Rub 'N Buff. Copper triangle brads from stash.
Twinks on flower petals and caterpillar.

Used B&B sentiment with 3/4" and 1-1/2" circle punches to create round embellishments. Cape Cod stencil.
Friends stencil background. Flower image stamped and embossed with white EP. Stripe stamp from
Short Sleeve Pants in CS White Pigment Ink.
Traced Oopsie Daisy masking stencil onto panel and added zentangles to each petal.
Background is colored with watercolor pencils. Hydrangeas "LOVE" stamp.
So once the box of these fifteen cards was on its way to Club Scrap, what did I do? I grabbed the rest of the embellishment kit images and made more! I have parts for another fifteen cards partly assembled. Once you get rolling, it's quite addictive!


Enjoy!
Cyndy


********************

Greetings to Go Guest Artists are given the current month's Club Scrap materials to work with:
  • Greetings to Go Pack
  • Embellishment Pack
  • Collection Unmounted Rubber Stamp sheet
  • Greeting Unmounted Rubber Stamp sheet
  • Art Nouveau Unmounted Rubber Stamp sheet
  • Extra 8.5 x 11" plain papers from the monthly kit
The artist may also choose to incorporate items from their own craft stash, as well as different inks and art mediums. We do our best to make note these additions in the card descriptions whenever possible.

Monday, July 21, 2014

Club Stamp Ships Today


Hurray, hurray, Club Stamp ships today!

I'm so glad there are more Oopsie Daisy papers and designs to share with the release of Club Stamp! I'm a big fan of the text weight print included in the kit, so I've crafted a gift box and bracelet using this paper.

Club Stamp Oopsie Daisy Papers
It's a great presentation when the gift and gift box match, right?

To make the bracelet . . .

1. Cut the 8.5x11 Text Weight Print into fourths and then into strips. Roll paper strips around anything that's approximately 1/8" thick to create beads. Fasten with Book Binding Glue brushed onto the last inch of the strip.


2. Thread paper beads onto elastic cord.


3. Tie a knot to secure and tuck ends into the beads.


To make the gift box . . .

1. Cut box base and lid from Book Board. The following dimensions were used for my box:

(1) 2-3/8x1-1/2" Box Base
(2) 2-3/8x2-1/2" Front & Back Walls
(2) 1-1/4x2-1/2" Side Walls
(1) 1-7/8x2-3/4" Lid Top
(2) 1/2x2-3/4" Front and Back Lid Walls
(2) 1/2x1-5/8" Side Lid Walls


2. Use Bookbinding Glue to attach Book Board pieces.


3. Refer to past Club Scrap projects and workshops for wrapping box with text weight paper. Use any method you like as long as the box is covered.


The four mini prints on one 8.5x11" make it so easy to give this little handmade box some character!


Club Stamp Oopsie Daisy Papers
I look forward to seeing what you'll do with your Club Stamp papers!

Kay at Club Scrap

Sunday, July 20, 2014

New Formulas for Oopsie Daisy

Hi, ya!

Shall we get some exceptional mileage out of our Oopsie Daisy Club Stamp collection? Our 12-pack of papers will make a beautiful batch of cards!


Before we get started, you'll have to do the "thinking" part. Let's get that out of the way.

1. Score one 8.5x11 Grey Print, one 8.5x11 Grey Plain, two 8.5x11 Green Plains and two 8.5x11 Caramel Plains vertically at 4.25". Trim horizontally at 5.5". Fold each 5.5x8.5 along the scoreline to create a card base.


2. Trim one 8.5x11 White Text Print vertically at 4.5 and 4". Cut each 4x11 horizontally at 5.75 and 5.25".


3. Oh, crap. What was I thinking?
  • Trim one 8.5x11 Text Weight Print horizontally at 10.5, 9, 7.5, 6.5, 5.5, 4.5, 3.5, 2, and .5".
  • Cut two 1.5x8.5 strips horizontally at 7 and 1.5". (Be sure the strips have different artwork.)
  • Trim two 1.5x8.5 strips horizontally at 7, 5.5, 3 and 1.5".
  • Cut each 1x8.5 strip horizontally at 5.5 and 3".
  • Fold each 1x3 piece in half. (You can stack up to four strips at a time.) Cut a "v" into the folded edge to create banner-style pieces.
  • If you like, punch a few daisies from the 1x2.5" pieces.


Here is the same cutting diagram superimposed onto the print.


If you are unsure about the cutting, this rescue video will help.


4. Cut one 8.5x11 Charcoal Plain vertically at 8, 5.75 and 3.5". Trim the 3.5x11 horizontally at 10.5, 7 and 3.5". Cut each 2.25x11 horizontally at 9, 6.75, 4.5 and 2.25".


5. Trim one 8.5x11 Charcoal Plain horizontally at 10 and 5". Cut each 5x8.5 horizontally at 7.5 and 3.75". Trim each 1x5 horizontally at 4". Cut the 1x8.5 horizontally at 8 and 4".


6. Cut one 8.5x1 Grey Print horizontally at 10.75 and 5.25". Trim the 5.25x8.5 horizontally at 8 and 4". Score and fold the 5.5x8.5 horizontally at 4.25".


7. Trim one 8.5x11 Grey Plain horizontally at 9.25, 7.25 and 5.25". Cut the 5.25x8.5 horizontally at 8 and 4". Trim each 2x8.5 horizontally at 8, 6, 4 and 2".


Now you can sort out the pile of wonderful pieces and turn them into some great cards!


Alternate the patterns of eight banner pieces onto the Charcoal panels.
Stamp the sentiment with White Pigment ink.
Staple a piece of ribbon to the lower left banner.

Stamp onto the patterned paper with a large daisy and India Black ink.
Add a punched daisy, if you like.
Place mini brads in each corner of the stamped Grey panel. 
These will make great anniversary cards!

Layer one each of four different 1.5" squares on the Charcoal square and add a matted sentiment.
Stamp and emboss the large framed image onto the Charcoal panels with gold powder.
Trim around the frame with a craft knife; cut around the daisy petal on the outside of the frame.
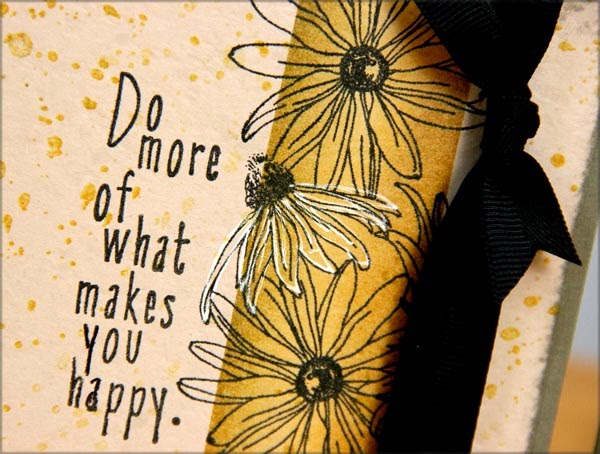
Mask a vertical and horizontal area of the Grey panels and sponge with Topaz ink to create a band. I used washi tape for my mask. I have a roll with a design I probably wouldn't use for anything else . . .
Stamp an image over the inked band. Outline with glitter glue.
Enhance one of the stamped daisies with a white gel pen and add ribbon.
Thirteen great cards from twelve sheets of paper.
That took some effort, but I think it was worth it! I hope you'll give it a whirl. But rest up and have some coffee first.

Tricia