Showing posts with label Mini Album. Show all posts

Thursday, August 7, 2014

Lemonade Stand Mini Album

Since Tricia and the rest of the CS staffers are at Retreat, they invited me share a new project with you.

I was visiting a friend the other day, and her daughter noticed my personalized license plate, "SCRPBKR." When she asked about it, my friend told her I was a famous (yeah, right ;) ) stamper and scrapbooker. The daughter got all excited, as she is quite the little artist herself. At the time, she was busy painting signs for a lemonade stand. They were really, really nice signs! (She has the gift!)

When the little girl asked me where I get my inspiration, I told her I get it just about anywhere, "For example, I see your signs for your lemonade stand using bright, bold, gorgeous colors, and I could totally see myself making a lemonade stand-shaped mini scrapbook with the Picnic kit from Club Scrap."  

Soooo, after I left their house, that thought just mulled over in my mind for a while until I came up with this:


I can't wait to show her! I plan to give her this adorable little album in the hopes she'll have photos taken while she's selling lemonade and put them in this album!!

To make your own, gather the following supplies:
Mat board
Picnic cardstock
Picnic rubber stamps
Picnic embellishments
Bookbinding glue
Waxed linen thread

Lemonade Stand "Frame"
1. To create the lemonade stand framework, cut the following pieces from mat board:


2. Glue the back edge of the "counter" piece to "back side of lemonade stand" piece using book binding glue. Let dry thoroughly before moving onto next step.

3. Glue "upper front section" to the front edge of the "counter" piece. Allow to dry thoroughly.

4. Glue the top edge of "back side of lemonade stand" to the back side of "roof" piece. Set aside to dry thoroughly before moving onto next step.

5. Glue the top edge of "upper front section" to the front side of the "roof" piece.  Let this dry. Here is what the final frame of the lemonade stand should look like:


Lemonade Stand Mini Album
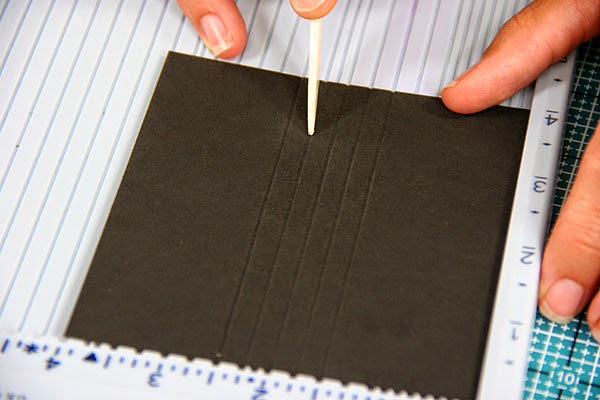
1.  To create mini album, cut eight 3.5 x 10" pieces of cardstock, using all four colors from the Picnic kit.


2.  Fold each in half horizontally to create four 3.5 x 5" signatures.


3.  Pierce holes along the fold of each signature .5 and 1" from the top and bottom edges:


4. Stitch the signatures together using waxed linen thread. With first page in hand, thread waxed linen from the outside down into hole 1, come back up through hole 2, down through hole 3, up through hole 4. Add the second signature by stitching into the matching hole and repeat pattern. When you get to the last stitch, tie the loose thread ends together. Repeat stitching pattern with third folded page. When you get to the last hole of this page, do a kettle stitch. Repeat with fourth page. Tie off waxed linen at the very end.


(You can watch this video to see how to do the similar stitch, just without the ribbon and 2 fewer holes).


5.  Cut striped printed paper to 4.5 x 6" for front cover. Use bookbinding glue to adhere and wrap around the mat board.

6. Use bookbinding glue to adhere the first page of the album to the wrapped cover.


7.  Attach the last page of the album to the 'back side of the lemonade stand' mat board, under the 'counter.'


It should look like this:

8.  Trim three pink and two blue cardstock to 1 x 2" each. Round two of the corners as shown.


9.  Attach to the roof. (See below.)


10. Spritz Thickers letter stickers that spell "lemonade" and "25" with Lemon Zest ink spray. I used a "c" along with an apostrophe (cut in half) to create the "cents" symbol.


11. To make a banner from the checkered patterned paper, cut rectangular pieces to 1 x 1.5", then trim into triangles.
Attach triangles to white cord and adhere to the lemonade stand just below the roof line. Add gems to the roof line as shown:


12.  To further embellish, add stamped lemon slice and glass of lemonade, and use a marker to color counter top yellow.

Voila!


I hope you enjoyed this project. Thanks for joining me today!

Debbie Weller
http://debduzscrappin.blogspot.com/


Wednesday, August 6, 2014

Tin Tiles Doorway Mini Album

Hello everyone, Debby here. I am so excited to be your guest blogger for today. I've been a member for three years now and I am constantly awestruck with the designs, quality products, and variety in every Club Scrap collection. Recently Club Scrap celebrated its 15 year anniversary by releasing the Tin Tiles Anniversary Collection.

Club Scrap Tin Tiles Collection
The imagery reminds me of ornate historic buildings and antique architecture. The collection comes with directions to make ten beautiful 12 x 12 scrapbook pages, however, I like to make mini albums, so I decided to make a doorway mini album inspired by one of the cutapart quotes. The doorway cover features the dry embossing folder included in the collection. The inside pages feature collection papers, cutaparts and tags decorated with the stencil included in the collection.
Tin Tiles Doorway Album Cover 
The doorway cover is made from chipboard with a cut out window and transom. I painted it with silver acrylic paint as a base for additional embellishment.
  • The "tin" accents are foil sheets embossed with the Tin Tiles embossing folder, antiqued with Distress Paint.
  • Punch Collection papers with the EK Success Scroll Pattern punch and add as accents.
  • The window is an acetate sheet with an antiqued jewelry medallion adhered with Glossy Accents.
  • The door knob is a Tim Holtz Ideology hitch post.
  • Behind the transom is an acetate sheet dry embossed and antiqued with bronze Distress Paint.
  • The door was finished with black marker lines and black inked edges.
Inside cover with the cutapart quote that inspired the project.
Internal pocket pages
The binding is a Stack the Deck Binding designed by Laura Denison. The pockets were made from ivory #10 envelopes cut on the diagonal and slit on the side.
  • Each pocket is attached to the spine tab with Club Scrap Bookbinding Glue, and covered with Tin Tiles collection papers and Gold Foil Handmade paper from the Trees collection.
  • Pockets are further decorated with Tin Tiles Cutaparts, papers, and left over embossed foil accents.
  • Ribbon accents were added to the flaps and some of the pages.
Tags created as inserts for the pockets
The pocket tags are decorated with stencil techniques or papers and accented with ribbons from the collection.
  • Dark blue tag: Emboss with Tin Tiles embossing folder and ink raised areas with Club Scrap white pigment ink
  • Light blue tag: Stencil with watermark ink, emboss with clear EP then antique with Distress Ink
  • Grey tag – Ink Tin Tiles stencil with Club Scrap white pigment ink.
  • Manila tag: Reverse stencil image from grey tag (place over white inked stencil and rub the back to transfer). When dry, antique with Mahogany Distress Ink and rub with a damp cloth to reveal the reverse stencil image. 
I hope this gives you an idea of the possibilities with the Tin Tiles Anniversary Collection. It was so easy to make a delightfully coordinated project, adding just a few optional embellishment from my stash. To see more of my Club Scrap projects see my blog listed below.  
Thank you for reading and happy crafting!

Debby H

Monday, August 4, 2014

Page-in-a-Pocket Album Instructions


The Page-in-a-Pocket Album included in the CS Cinema collection is a quick project to assemble. Once you learn how easily it comes together, you'll want to make more!


Supply List:
Page-in-a-Pocket Album Kit
Adhesive or CS Bookbinding Glue/Foam Brush
Bone Folder
Scissors or Craft Knife and Cutting Mat
Envelope Punch Board
Score-Pal
Cinema Embellishment Pack

1. Nest the "Now Showing" portion of the White Cutapart from the Embellishment Pack onto the 3.75x4" Black Matte included in the project kit and set aside.


2. Score each Wine pocket page horizontally at 2.5 and 6.75" and vertically at .75".


3. Place the Black Spine vertically into the Score-Pal and score at 1.5, 1.75, 2, 2.25, and 2.5".


4. Move the spine 1/8" to the right, and add a score between each existing scoreline.


5. Use a craft knife or scissors to remove the outer scored corners from each Wine pocket page. Cut along the inside of the scoreline to remove the line itself. This will allow the pocket page to function properly.


6. Fold along scorelines and burnish with a bone folder.


7. Glue or adhere the flaps to form the pocket.


8. Fold the 3/4" flap along the scoreline to form the base of the pocket. Apply adhesive to the flap.


9. Place the glued flap onto the non-seamed side of a second pocket, aligning the bottom edges.


10. Continue to glue the remaining pockets together in the same manner.


11. Adhere the final flap to secure.


12. Apply adhesive to one 1.5" non-scored area of the Black spine.


13. Place the glued area onto the stack of pocket pages, aligning the 1.5" scoreline with the left edge of the first page.

14. Apply adhesive to the second 1.5" flap of the spine and attach to the back pocket page with the scoreline aligned with the edge of the back cover. There will be a gap between the edges of the pockets and spine.


15. Center the nested cover panel onto the front page of the book.


16. Place an Aqua page insert vertically on an Envelope Punch Board. Center the left corner onto the board and punch.


17. Slide the paper left to the 2.75" measurement and punch.


18. Use a scissors or craft knife to remove the strip of paper past the punched area to create a tab.


19. Punch the upper right corner of each page with the corner rounding side of the punch. Repeat steps 16-19 for all Aqua page inserts.


20. Flip every other Aqua page to alternate the direction of the tabs.


21. Adhere the tab labels from the White Cutapart included in the Embellishment Pack to the tabs.


22. Slide the Aqua page inserts into the Wine pockets.


23. Decorate the cover, pockets, tabs, and inserts as you wish!


The end. 

We hope you enjoy this sweet little project. Be sure to share the results with us!
Tricia