Showing posts with label Scrap Rap Magazine. Show all posts

Monday, September 15, 2014

Blueprints Lite Layouts


Our Blueprints Lite collection is sure to find a happy home with your pictures! Let's take a look at the pre-assembled pages you can make by following our instructions . . .


Use the zero center of our grid ruler to help with placement of the three mattes in the lower right corner. It will help keep everything nicely aligned and equally spaced.

Layouts 1&2
The layout below uses one of my favorite "oldie but goodie" formulas featuring a 12x12 paper trimmed at 7" in each direction.

Layouts 3&4
The "before, during, after" cutaparts can be used with all sorts of themes. I used this pair of pages to feature an area before, during and after a snowstorm.

Layouts 5&6
The 1.5" brown ombre ribbon is soft, pliable and gorgeous.


Layouts 7&8
The Ledger Washi Tape came in handy when decorating the pages. I have all sorts of plans for the tape remaining on the roll.


I know we have quite a few newbies, so I thought it might be helpful to have a video workshop to help complete your pages. Those with more experience will likely be able to enjoy the workshop without having to press pause!


Thanks for building new memories with us . . .
Tricia

Thursday, September 11, 2014

Digital Stencil Crackle Paint Technique, Part 1


Recently, Julie published a great blog entry on using crackle paint with stencils. Then, CS Member Norma posted a question in the forum asking if this could be accomplished digitally. Since I love a challenge, I thought I’d try this using Club Scrap’s Blueprints Digital Kit. Like many things digital, there isn’t any one right way, but I’ll show you how I achieved a similar look.

Although this isn’t difficult to do, it does require quite a few steps, so I’m only going to cover two parts today - creating the stencil, and creating a crackle texture. My next post (appearing later this month) will cover how to create a layout similar to Julie’s.

CREATE A STENCIL

1. Open 0914BlueprintsCSD_Overlay7.png.


2. Select the Magic Wand tool in the Tool palette and set the tolerance to 35. Make sure ‘contiguous’ is not checked.

3. Click in an empty area of the overlay. If you’re having trouble distinguishing the blank areas, add a new white layer under the overlay layer.

4. Select -> Inverse to select the letters.

Notice the 'marching ants' - that's what you want to see!
5. Fill with Black.

Voila! You've created a stencil!
6. Delete the white layer you created in step 3.

7. Save this as 0914BlueprintsCSD_Stencil.png so you can use it whenever you’d like.

CREATE A CRACKLE TEXTURE

1. Create a new document about 8 inches by 6 inches, with a white background.

2. Open a texture stamp; I used 0311RakuCSD_StampGraphic04.png.

You can use any image with an interesting texture, but Raku is rather crackly!

3. Using the Marquee Tool, select the portion of the image that you want.


4. Drag that portion of the image to your new document.

5. Duplicate and tile the image, repeating as needed to fill the canvas.
As is, the repeat is quite obvious, but you won't notice it once it's applied.
6. Delete the white layer.

7. Merge the layers together and save the file.

That's all for now. Remember, these digital stencils and textures can be used for a variety of techniques, so if you've got a chance to play with them, you might come up with some neat results!

Visit again later this month, and we'll use the components we made to create a cool crackle stencil layout.

Get crackin', and I'll see you soon!


 -Ron

Thursday, September 4, 2014

Stencil Crackle Paint Technique


Crackle paint adds so much dimension and texture when paired with the Blueprints masking stencil. Check out these amazing results.


Don't you just love how crisp and clean the edges are and all that wonderful crackled goodness?

Grab some Blueprints papers, the mask and some crackle paint, and I will show you how it's done.

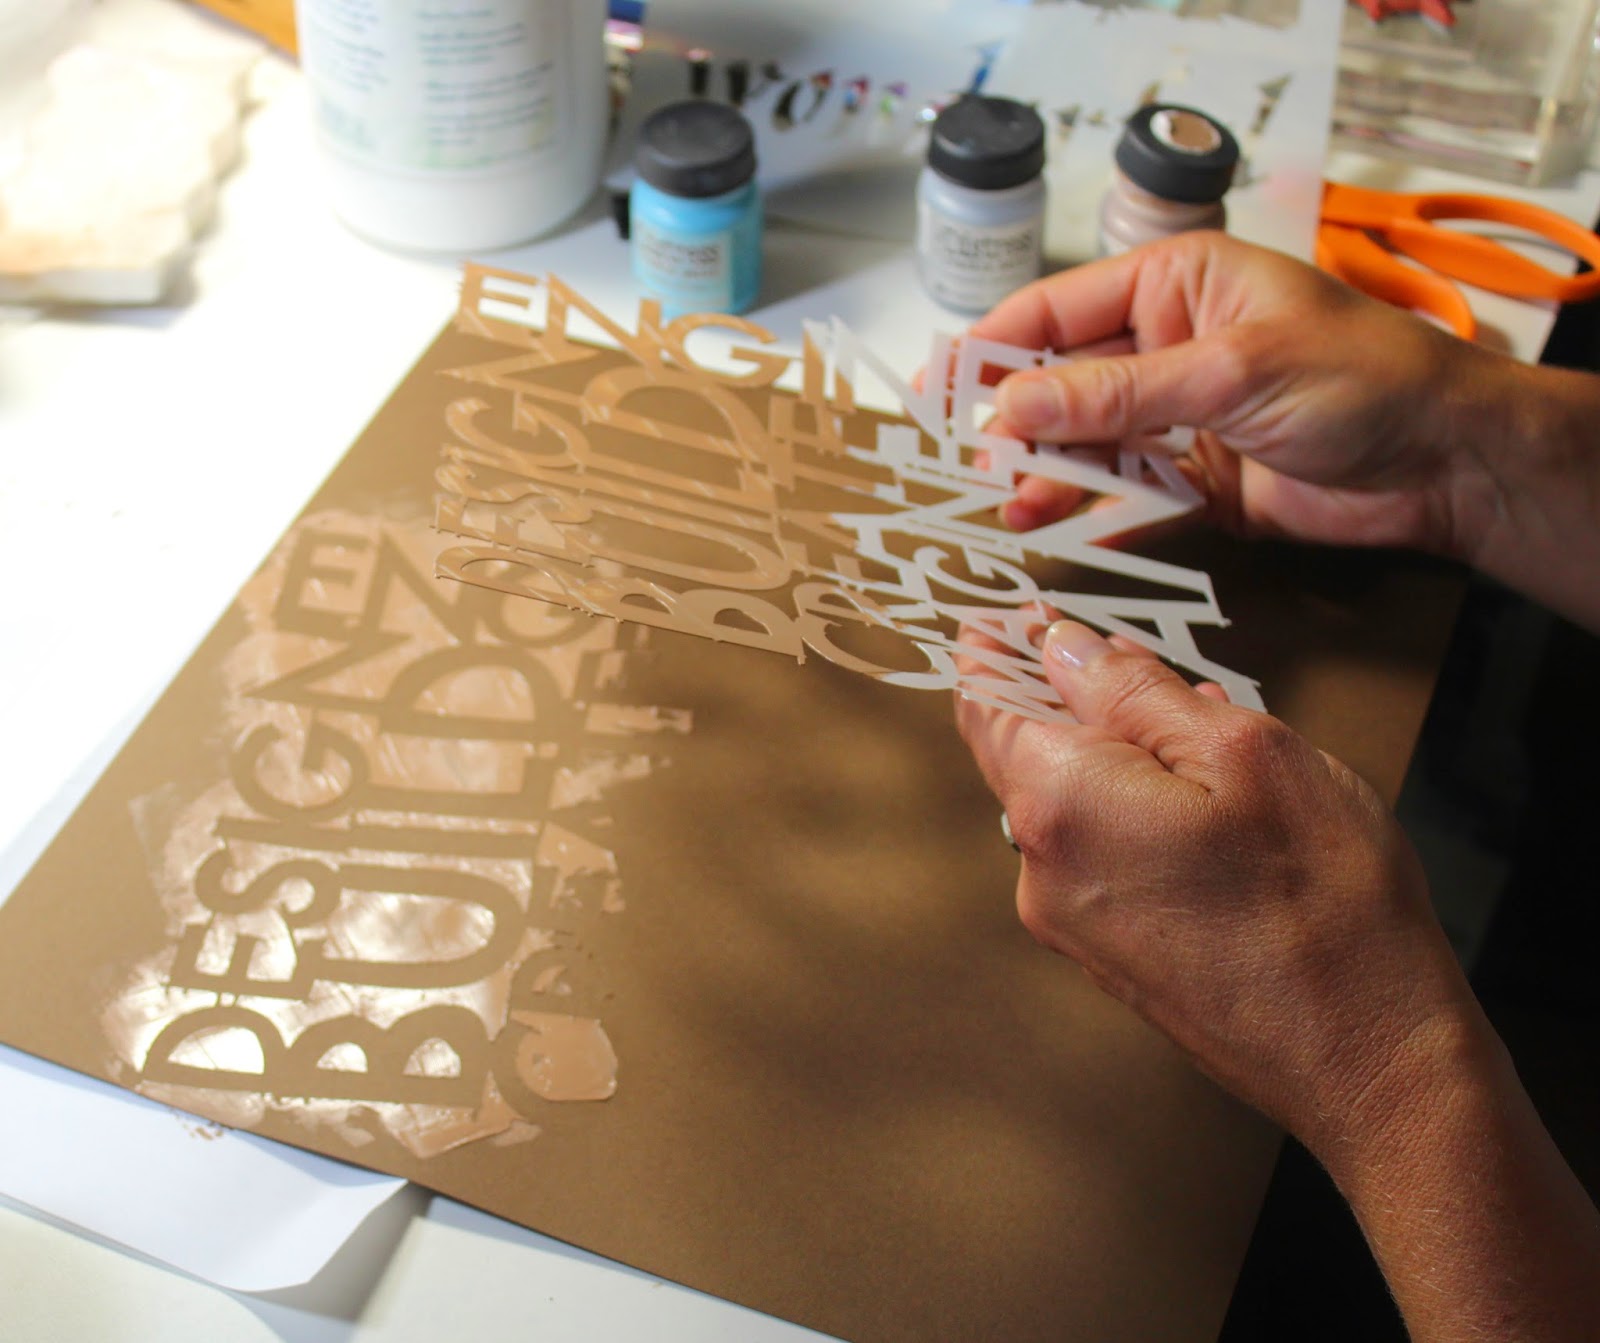
1. Lay the masking stencil down onto brown paper. Paint over the stencil with the crackle paint.

I used a complimentary color of brown - Distress "Vintage Photo" Crackle Paint from Ranger.
2. Swipe over the paint using firm pressure and a scraping motion with an old credit card. This will spread the paint across the stencil and ensure proper coverage.

Note: You don't have to use the entire image when painting on the medium. I chose to highlight certain words.
3. Carefully remove the mask. Allow the crackle paint to dry and reveal the texture.

Run the masking stencil under warm soapy water immediately to remove the excess paint.
Now it's time to use this carefully crafted paper in a layout.

Our daughter Shannon had fun helping us build this dribble sandcastle over the Labor Day weekend. Fits the theme quite nicely, don't you think?


Stamp a gold photo mat, Kay Williamson style!


Add crackle paint to the gold anchor strip, stamp a compass image border, and mat a clever quote to tie the two layouts together.


Let's get cracking on those layouts!

Julie

Monday, August 18, 2014

Four New Ways to Use Cutaparts


Just wait until you get your hands on the prints and cutaparts inside the Cinema Lite Kit! If you use them up doing the pre-assembled pages, you may want to pick up a few extras.

Club Scrap Cinema Lite Layout

Occasionally I'll order miniature collage prints from Walgreen's, and I always have a few leftovers after completing the intended project. This layout features black and white photos spanning several years. They worked perfectly with the filmstrip.


I cropped and adhered photos that were small enough to fit the 1x1.25" filmstrip spaces on the Stone cutapart. The strip was then used to complement the right edge of my layout.


Rather than saving the journaling blocks on the Stone cutapart for journaling, I used them as frames for additional photos.


I had some unique plans for the White cutaparts, as well!


Instead of using this element as a border strip, I repurposed the numbers for photo embellishments.


I also trimmed a 12" border strip to use as a caption . . .


. . . and stamped a quote on the other half.


Here's lookin' at the Lite cutaparts in a whole new way! Enjoy!

Kay at Club Scrap


Friday, August 15, 2014

Cinema Lite Details

Introducing . . . the Cinema Lite collection!


Let's take a closer look at the pairs of pages you can make by following the assembly instructions. Double click on any image to see an enlargement.

Layouts 1&2
The ticket on the right is trimmed from the Stone cutapart.

Simply slide the ticket beneath the matted anchoring strip.
The luxurious stitched satin ribbon selection reminds me of a filmstrip. Perfection.
Layouts 3&4
The partial star image was framed on the Stone cutapart. Simply trim and place on the right edge of a journaling box. 
My classic little trick of cutting around artwork on the base print to allow it to stay "up front" works well with these designs.
Layouts 5&6
Jacqueline cleverly designed the filmstrip on the Stone cutapart to fit the adorable Alphabeans alpha stickers we've included.
Made loops of ribbon and tape the ends to the back of an anchoring strip. It looks great and uses very little ribbon. And that masking stencil rocks!
Cut slits into the base page and slide an anchoring strip beneath the highlighted artwork.
I adore those alphabet stickers! They're small, and it works well to remove them from the base sheet with a tweezers.
Layouts 7&8
Here are those ribbon loops again!
 The "millions of memories" cutapart strip really pops when matted with Black and the plain side of an unused cutapart. More details in the instruction document.
Whether you choose to adhere to the assembly instructions or simply follow your own creative inspiration, this collection is sure to be a show-stopper!

Action!
Tricia