Showing posts with label layout. Show all posts

Tuesday, September 9, 2014

Upcycled Instructions

When Aspen Lite was released back in December, Tricia created her super-efficient instructions for the kit and I shared them on the blog HERE.

Tricia's layouts 1&2
Just for fun, I grabbed some papers from my stash and created another double page spread by duplicating the instructions from the layout above.


I set these assembled pages aside waiting for just the right pictures to come along. My husband and I took our daughter Shannon on a whale watch this summer and the photos were the perfect fit.


Don't be afraid to look into your stash and create unique pages using the plethora of assembly line instructions created by Tricia. The possibilities are endless!

Julie

Thursday, September 4, 2014

Stencil Crackle Paint Technique


Crackle paint adds so much dimension and texture when paired with the Blueprints masking stencil. Check out these amazing results.


Don't you just love how crisp and clean the edges are and all that wonderful crackled goodness?

Grab some Blueprints papers, the mask and some crackle paint, and I will show you how it's done.

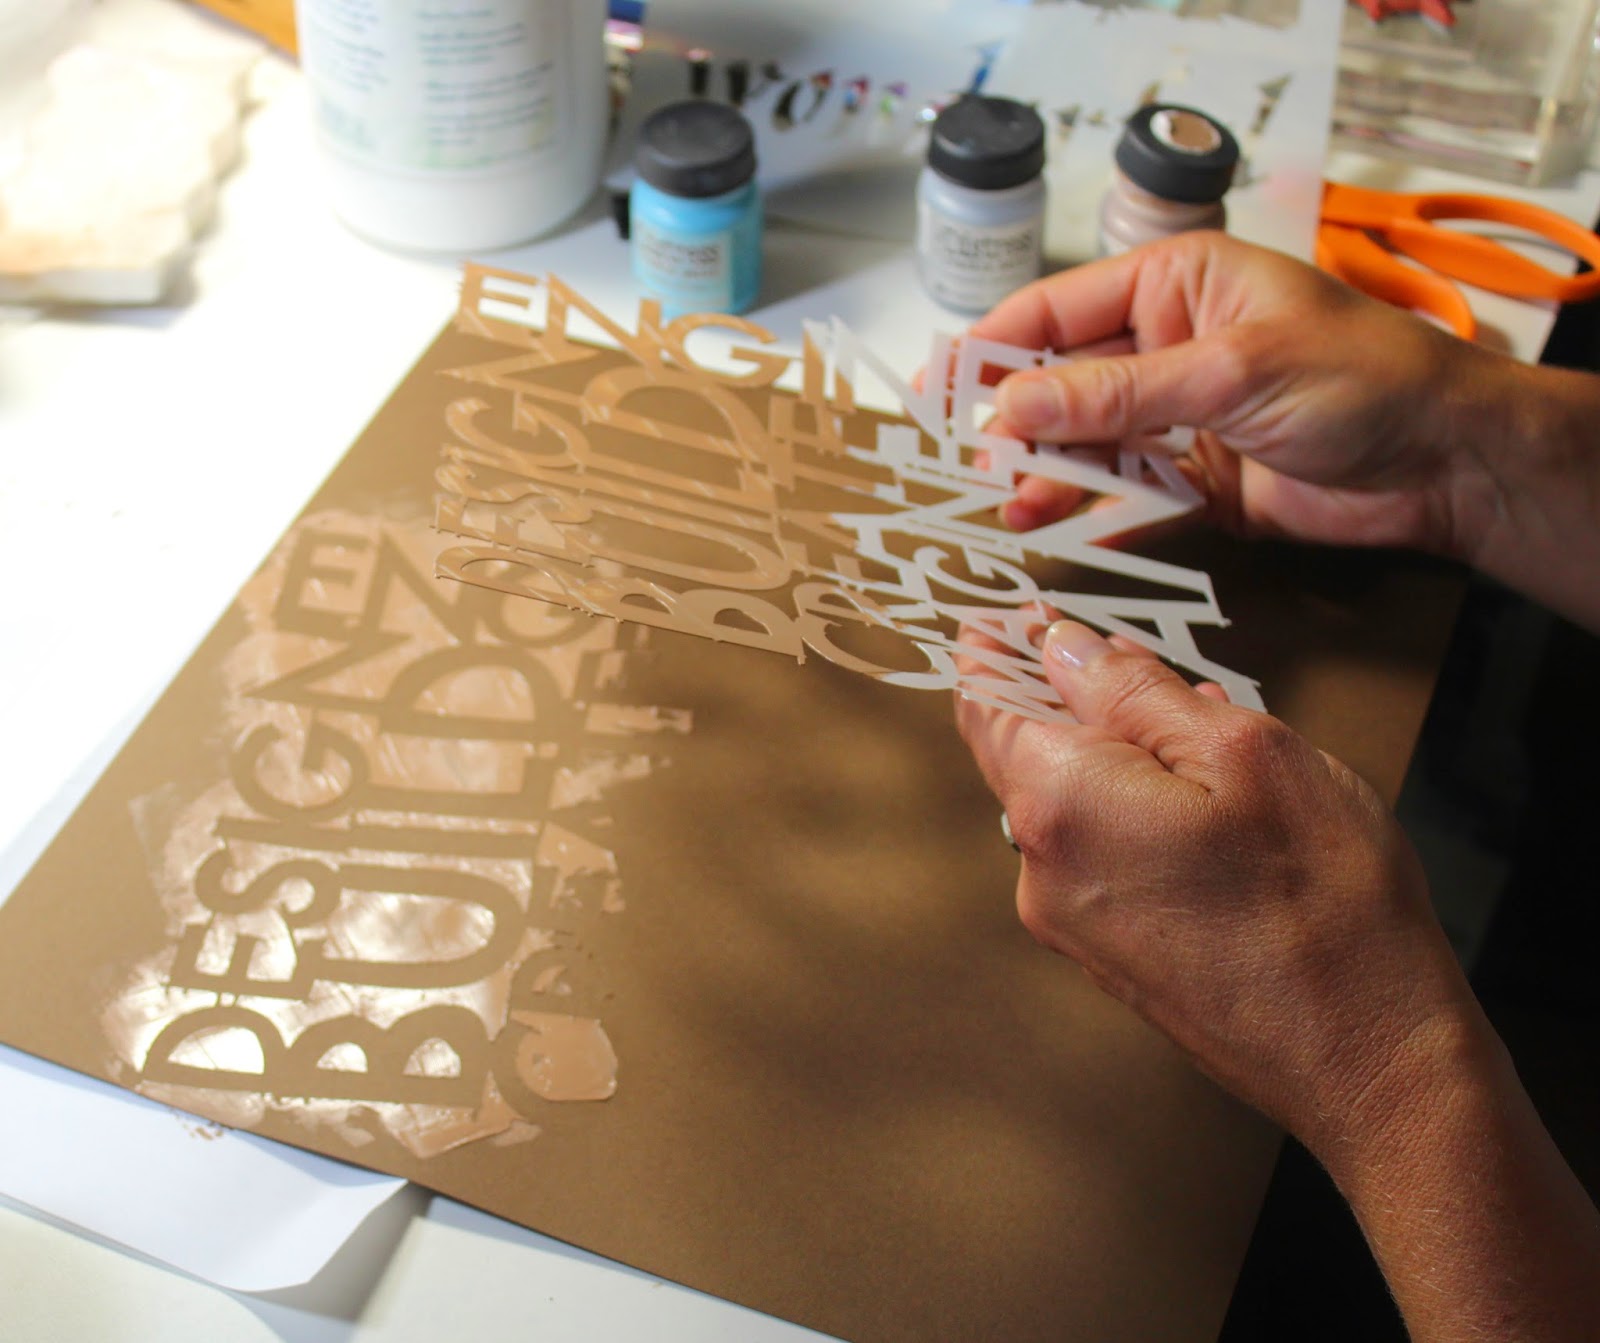
1. Lay the masking stencil down onto brown paper. Paint over the stencil with the crackle paint.

I used a complimentary color of brown - Distress "Vintage Photo" Crackle Paint from Ranger.
2. Swipe over the paint using firm pressure and a scraping motion with an old credit card. This will spread the paint across the stencil and ensure proper coverage.

Note: You don't have to use the entire image when painting on the medium. I chose to highlight certain words.
3. Carefully remove the mask. Allow the crackle paint to dry and reveal the texture.

Run the masking stencil under warm soapy water immediately to remove the excess paint.
Now it's time to use this carefully crafted paper in a layout.

Our daughter Shannon had fun helping us build this dribble sandcastle over the Labor Day weekend. Fits the theme quite nicely, don't you think?


Stamp a gold photo mat, Kay Williamson style!


Add crackle paint to the gold anchor strip, stamp a compass image border, and mat a clever quote to tie the two layouts together.


Let's get cracking on those layouts!

Julie

Monday, August 18, 2014

Four New Ways to Use Cutaparts


Just wait until you get your hands on the prints and cutaparts inside the Cinema Lite Kit! If you use them up doing the pre-assembled pages, you may want to pick up a few extras.

Club Scrap Cinema Lite Layout

Occasionally I'll order miniature collage prints from Walgreen's, and I always have a few leftovers after completing the intended project. This layout features black and white photos spanning several years. They worked perfectly with the filmstrip.


I cropped and adhered photos that were small enough to fit the 1x1.25" filmstrip spaces on the Stone cutapart. The strip was then used to complement the right edge of my layout.


Rather than saving the journaling blocks on the Stone cutapart for journaling, I used them as frames for additional photos.


I had some unique plans for the White cutaparts, as well!


Instead of using this element as a border strip, I repurposed the numbers for photo embellishments.


I also trimmed a 12" border strip to use as a caption . . .


. . . and stamped a quote on the other half.


Here's lookin' at the Lite cutaparts in a whole new way! Enjoy!

Kay at Club Scrap


Wednesday, August 13, 2014

Filmstrip Fun


Okay, I am even surprising myself here! I used my filmstrip die twice in one month, WOW. Check out this blog post where I made a homemade embossing plate.


Next I will use it to create an embellishment for layouts 7&8 from the Cinema ALSB.

1. Create an 8.5x11 print using Time of Your Life and Cinema digital kits.


2. Print image onto plain white paper.


3. Trim a 1.75x11" strip and attach to one sticky side of a piece of double sided sticker paper (goodie included in the Fire and Ice kit).


4. Die cut the filmstrip from hybrid paper + sticker sheet.


5. Remove backing paper and attach to your layout. TIP: I reattached my filmstrip "sticker" to the uncut backing sheet and inked the edges to create more dimension.


6. Adhere die cut embellishments to scrapbook pages.

Cinema ALSB layout 7
Cinema ALSB layout 8
7. Add photos to the completed layouts.


Have you ever found die cut shapes that work perfectly with your Club Scrap kits?
Share your favorite pairings in the comments section below.

Enjoy the rest of your week!

Julie

Monday, July 7, 2014

Masked Daisy Embellishment


My daughter Alicia turned 17 last month. Time flies the older our kids get, and I wanted to freeze this moment in time with a layout of my bee-autiful girl.

Jac's gorgeous artwork on this 8.5x11 Daisy Print in the Oopsie Daisy kit was the inspiration behind my layout.


1. Trace the large daisy using the masking stencil.

Add more details to the flower using a pencil.
2. Use a craft knife to trim out the small sections between the petals.

3. Cut out the daisy with scissors and add color with Gelatos and your white wax pencil picker upper. 


Did you know the wax pencil picker upper tool can double as a crayon? 
4. Spray the Gelatos with a bit of water to activate the color.


5. Fold the petals along the pencil lines to add dimension. Color the petals of the daisy using Topaz ink.


6. Use a fine tip black pen to add detail lines and dots to the center of the daisy.


 7. Punch 4 small daisies and add details using instructions above.


Add details in the center of only one daisy cluster.  
Stack daisies together and adhere.
8. Create the layout using Oopsie Daisy plain papers and based on Tiare Smith's Sketch from her January Pajama Party.


9. Create a title using the fabric Thickers included in this month's kit. Adhere to an acrylic block and add color with Topaz ink. This made inking a breeze!


10. Stamp the honey bee and "Beeeeeee happy!" sentiment from the Border and Backgrounds UM sheet with Black ink. Add detail to the wings with a white gel pen, and paint gold Gelatos onto the bee with a waterbrush.


11. Attach the striped grosgrain ribbon to the layout, and it is complete!


What other interesting ways have you used your Masking Stencils?

Here's to a wonderful week!

Julie