Showing posts with label Oopsie Daisy. Show all posts

Wednesday, July 30, 2014

Card Trio--Oopsie Daisy Blog Hop

Welcome to the blog hop! Today seventeen bloggers share awesome cards, pages and projects featuring Club Scrap's July collection.

I recently finished my Oopsie Daisy Greetings to Go, but I'm still on a card making roll. What's a girl to do? Time for a little Pinspiration! Below is a trio of Oopsie Daisy cards inspired by my Pinterest visit. 


Flower stamped, only half colored in watercolor pencil, trimmed with a craft knife.
Acrylic block frame in Leaf. Die cut flower folded in half with free-hand cut center.
UM stamped stem with watercolor pencil.
Trim your own "stencil" using a scrap of cardstock and a circle cutter.
Mask the daisy image before inking with Topaz ink. White and green watercolor pencils, India ink.
Shall we check out what our other bloggers are up to? Julie at Cape Cod Scrapper is next. If you get lost along the way, a complete list of bloggers is below: 


Hetty at Craft Chaos
Cathy at The Artful Gamut
Marya at A Notebook Novel
Annette at Digital Musings
Made by Wendy Bellino

Creatively yours,
Karen

Monday, July 28, 2014

Acrylic Block Stamping and Oopsie Daisy

I found this link a while ago, before Oopsie Daisy was released. While the post really isn't about the technique shared below, I liked the overall look of the soft inked "frame" and floral image together. Since I didn't really know quite what the Oopsie Daisy art would look like at the time, I bookmarked the post anyway, thinking it might be something to try.

I don't have a rectangular stamp like the blog author does, so I thought I'd try getting a similar "look" with my 3x4" acrylic stamp block. I was pretty pleased with the results.

The key to using the acrylic block (in lieu of a rubber stamp) is good cushioning underneath. My CS desk blotter is nice and thick so that worked for me, but if you don't have one you could try stamping on top of an old catalog or magazine--or even a mouse pad.

Start with a clean acrylic block. I assure you my block doesn't normally look like this . . . it's usually an inky mess . . . but some rubbing alcohol on a cotton ball took care of that, easy peasy.


Ink the edges of the acrylic block (make sure to ink the smooth side, if your block has a grid like mine). Starting from the outside, sweep ink toward the center. For added dimension, start with a light color and add a darker color around the outer-most edges, if desired.

Press the acrylic block onto paper. You will get different looks depending on the texture or finish of the paper. Experiment, have fun with it.


Since I love the look of watercolors paired with the Oopsie Daisy images, I tried the same technique with Gelatos.


Start by lightly misting the acrylic block with water, then add color. Use a light color first with a darker shade around the outer edges, if desired.


Press onto paper. If you're lucky, you might get a second impression.


Be sure to thoroughly clean your acrylic block after each use.

One advantage to using the same block to add rubber stamps is that positioning is a no-brainer!

Topaz CS Hybrid ink "frame"

Topaz CS Hybrid ink "frame"
Gray Gelatos "frame"
Yellow Gelatos edged with orange
Who knew you could use your acrylic block AS a stamp? Well, now ya know!

Creatively yours,
Karen


Friday, July 25, 2014

Six Tips for Layout Design

Have you ever had the sense that your layout designs felt a little "off"?

I stick with the following six principles when creating our monthly layout cards and pre-assembled page designs.

1. Focal Images
Think of your page as a theater production. Select the best photos to be the "leading characters." Those images will be featured on the full 4x6 single or double mattes. In our July Layout Sketch (included each month with your membership), there are two double-matted spots for focal images and two additional co-stars with single mattes.


2. Groups
Compliment focal images with groups of smaller items. These are the "supporting characters" of your theater production. This sketch has several sets of sub groups. The smaller spots can also be an ideal location for journaling or non-photo embellishments.


3. Anchoring Strips
This is the "backstage crew" of your production! Anchor elements on the layout with 12" strips to prevent that uncomfortable "floating" feeling. Anchors can vary in width and be created with strips of paper, ribbons or even a row of stamped images. I like to alternate with horizontal and vertical anchoring strips.
4. Anchoring Blocks
In addition to strips, another helpful grounding tool is a block of solid or printed paper beneath a group of items. I frequently use complete sheets of 8.5x11 paper as an anchoring block. It also subdivides the page into smaller areas and can make the space seem less overwhelming.


5. Spacing
I like to separate elements on the page with equal spacing within groups. Notice how all of the elements on the double page spread have a perimeter of roughly the same distance. This helps create a cohesive feeling within the group. Avoid trying to distribute the pieces to the top, bottom and outside edges.


Note the difference in the page below with the lack of anchoring, grouping, and spacing principles.


6. Tangents
A tangent simply indicates that two things are touching. And not in a good way. Avoid a tangent created by two corners/edges touching or aligning with one another. The first illustration below shows ideal placement of corners.


Study the differences in the layout below to discover the newly-formed tangents. The vertical anchoring strip is aligned with the edge of the anchor block, and the photo matte in the lower right corner forms a tangent with the right edge of the page. The other newly-formed corner tangents are not as problematic, but the above layout is a better arrangement.


Here is a real-life layout using July's Oopsie Daisy Layout Sketch with papers from the collection:


It translates quite well, doesn't it? Adapting the layout sketch is easy once you know the basic principles. I was able to preserve the tall water tower image by adding it to the grouping on the bottom half of the left page. The anchoring strip was also a terrific place for my page title.

Members, don't forget to download your layout sketches every month for instant inspiration and complete paper trimming instructions.

Have fun and design well!
Tricia

Thursday, July 24, 2014

Creating a Digital Layout in Three Easy Steps


Each CS Digital Kit comes with six Quick Drop Digital Layouts (QDDLs). These template make it easy to create layouts by just adding photos. But sometimes you just want to make something that's more "your own."

The digital clusters that are part of each kit can help you accomplish that. Clusters are pre-assembled groupings of various parts and pieces of the digital kit, even including the appropriate shadows. This helps add detail to your layout without having to do a lot of work. In fact, you can make your own digital layout in just three steps.

Using this month’s Oopsie Daisy Digital Kit, let me show you how!

1. Open one of the digital backgrounds.


2. Add a cluster.


. . . or two!

3. Add a photo, cropping if necessary.


Done! Wasn't that simple?

The next time you want to make a quick and easy digital layout, check out the clusters in the kit. They can make light work of building a layout of your own . . . as easy as 1, 2, 3!

Until next time, thanks for stopping by.


-Ron

Monday, July 21, 2014

Club Stamp Ships Today


Hurray, hurray, Club Stamp ships today!

I'm so glad there are more Oopsie Daisy papers and designs to share with the release of Club Stamp! I'm a big fan of the text weight print included in the kit, so I've crafted a gift box and bracelet using this paper.

Club Stamp Oopsie Daisy Papers
It's a great presentation when the gift and gift box match, right?

To make the bracelet . . .

1. Cut the 8.5x11 Text Weight Print into fourths and then into strips. Roll paper strips around anything that's approximately 1/8" thick to create beads. Fasten with Book Binding Glue brushed onto the last inch of the strip.


2. Thread paper beads onto elastic cord.


3. Tie a knot to secure and tuck ends into the beads.


To make the gift box . . .

1. Cut box base and lid from Book Board. The following dimensions were used for my box:

(1) 2-3/8x1-1/2" Box Base
(2) 2-3/8x2-1/2" Front & Back Walls
(2) 1-1/4x2-1/2" Side Walls
(1) 1-7/8x2-3/4" Lid Top
(2) 1/2x2-3/4" Front and Back Lid Walls
(2) 1/2x1-5/8" Side Lid Walls


2. Use Bookbinding Glue to attach Book Board pieces.


3. Refer to past Club Scrap projects and workshops for wrapping box with text weight paper. Use any method you like as long as the box is covered.


The four mini prints on one 8.5x11" make it so easy to give this little handmade box some character!


Club Stamp Oopsie Daisy Papers
I look forward to seeing what you'll do with your Club Stamp papers!

Kay at Club Scrap

Sunday, July 20, 2014

New Formulas for Oopsie Daisy

Hi, ya!

Shall we get some exceptional mileage out of our Oopsie Daisy Club Stamp collection? Our 12-pack of papers will make a beautiful batch of cards!


Before we get started, you'll have to do the "thinking" part. Let's get that out of the way.

1. Score one 8.5x11 Grey Print, one 8.5x11 Grey Plain, two 8.5x11 Green Plains and two 8.5x11 Caramel Plains vertically at 4.25". Trim horizontally at 5.5". Fold each 5.5x8.5 along the scoreline to create a card base.


2. Trim one 8.5x11 White Text Print vertically at 4.5 and 4". Cut each 4x11 horizontally at 5.75 and 5.25".


3. Oh, crap. What was I thinking?
  • Trim one 8.5x11 Text Weight Print horizontally at 10.5, 9, 7.5, 6.5, 5.5, 4.5, 3.5, 2, and .5".
  • Cut two 1.5x8.5 strips horizontally at 7 and 1.5". (Be sure the strips have different artwork.)
  • Trim two 1.5x8.5 strips horizontally at 7, 5.5, 3 and 1.5".
  • Cut each 1x8.5 strip horizontally at 5.5 and 3".
  • Fold each 1x3 piece in half. (You can stack up to four strips at a time.) Cut a "v" into the folded edge to create banner-style pieces.
  • If you like, punch a few daisies from the 1x2.5" pieces.


Here is the same cutting diagram superimposed onto the print.


If you are unsure about the cutting, this rescue video will help.


4. Cut one 8.5x11 Charcoal Plain vertically at 8, 5.75 and 3.5". Trim the 3.5x11 horizontally at 10.5, 7 and 3.5". Cut each 2.25x11 horizontally at 9, 6.75, 4.5 and 2.25".


5. Trim one 8.5x11 Charcoal Plain horizontally at 10 and 5". Cut each 5x8.5 horizontally at 7.5 and 3.75". Trim each 1x5 horizontally at 4". Cut the 1x8.5 horizontally at 8 and 4".


6. Cut one 8.5x1 Grey Print horizontally at 10.75 and 5.25". Trim the 5.25x8.5 horizontally at 8 and 4". Score and fold the 5.5x8.5 horizontally at 4.25".


7. Trim one 8.5x11 Grey Plain horizontally at 9.25, 7.25 and 5.25". Cut the 5.25x8.5 horizontally at 8 and 4". Trim each 2x8.5 horizontally at 8, 6, 4 and 2".


Now you can sort out the pile of wonderful pieces and turn them into some great cards!


Alternate the patterns of eight banner pieces onto the Charcoal panels.
Stamp the sentiment with White Pigment ink.
Staple a piece of ribbon to the lower left banner.

Stamp onto the patterned paper with a large daisy and India Black ink.
Add a punched daisy, if you like.
Place mini brads in each corner of the stamped Grey panel. 
These will make great anniversary cards!

Layer one each of four different 1.5" squares on the Charcoal square and add a matted sentiment.
Stamp and emboss the large framed image onto the Charcoal panels with gold powder.
Trim around the frame with a craft knife; cut around the daisy petal on the outside of the frame.
Mask a vertical and horizontal area of the Grey panels and sponge with Topaz ink to create a band. I used washi tape for my mask. I have a roll with a design I probably wouldn't use for anything else . . .
Stamp an image over the inked band. Outline with glitter glue.
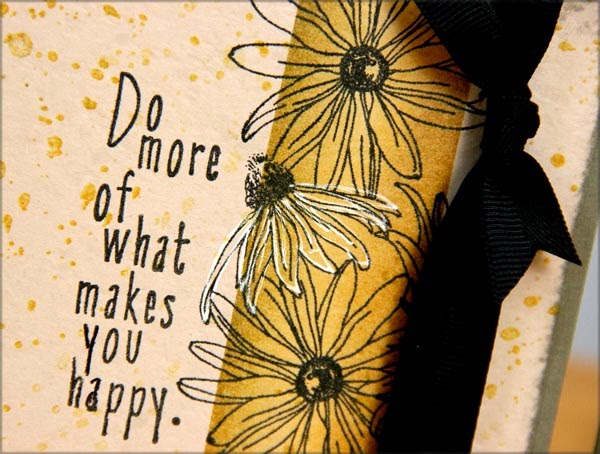
Enhance one of the stamped daisies with a white gel pen and add ribbon.
Thirteen great cards from twelve sheets of paper.
That took some effort, but I think it was worth it! I hope you'll give it a whirl. But rest up and have some coffee first.

Tricia