Showing posts with label Rubber Stamping. Show all posts

Tuesday, August 19, 2014

Inspiration Three Ways


We all know that inspiration can come from any number of places. Today's batch of cards were inspired by three sources . . . Karen's cool background technique, Kay's clever cutapart tutorial, and Marya and Ann Marie's super simple August Card Sketch Challenge.

Let's get started!

1. Create the background. I used Gelato as suggested by Karen in her tutorial.


Oops!  I stamped the sentiment on my background upside down... stay tuned to see how I fixed my boo boo. 
2. Stamp sentiment onto card base.

Second try at a background with sentiment stamped right side up ;)
Tribal sentiment
3. Select a cutapart that coordinates with the Gelato background.

Artifacts cutaparts, Feb 2009


Distress the edges of the cutapart for added interest.
4. Create the card using the August Card Sketch as your inspiration.


5. Admire the finished card!


Remember my upside down sentiment?

Turn card base on its side, layer with another cutapart (to cover up said boo boo), and stamp with the Picnic sentiment. I stamped the Artifacts sunburst image on the background using the Gelatos misted with a bit of water.
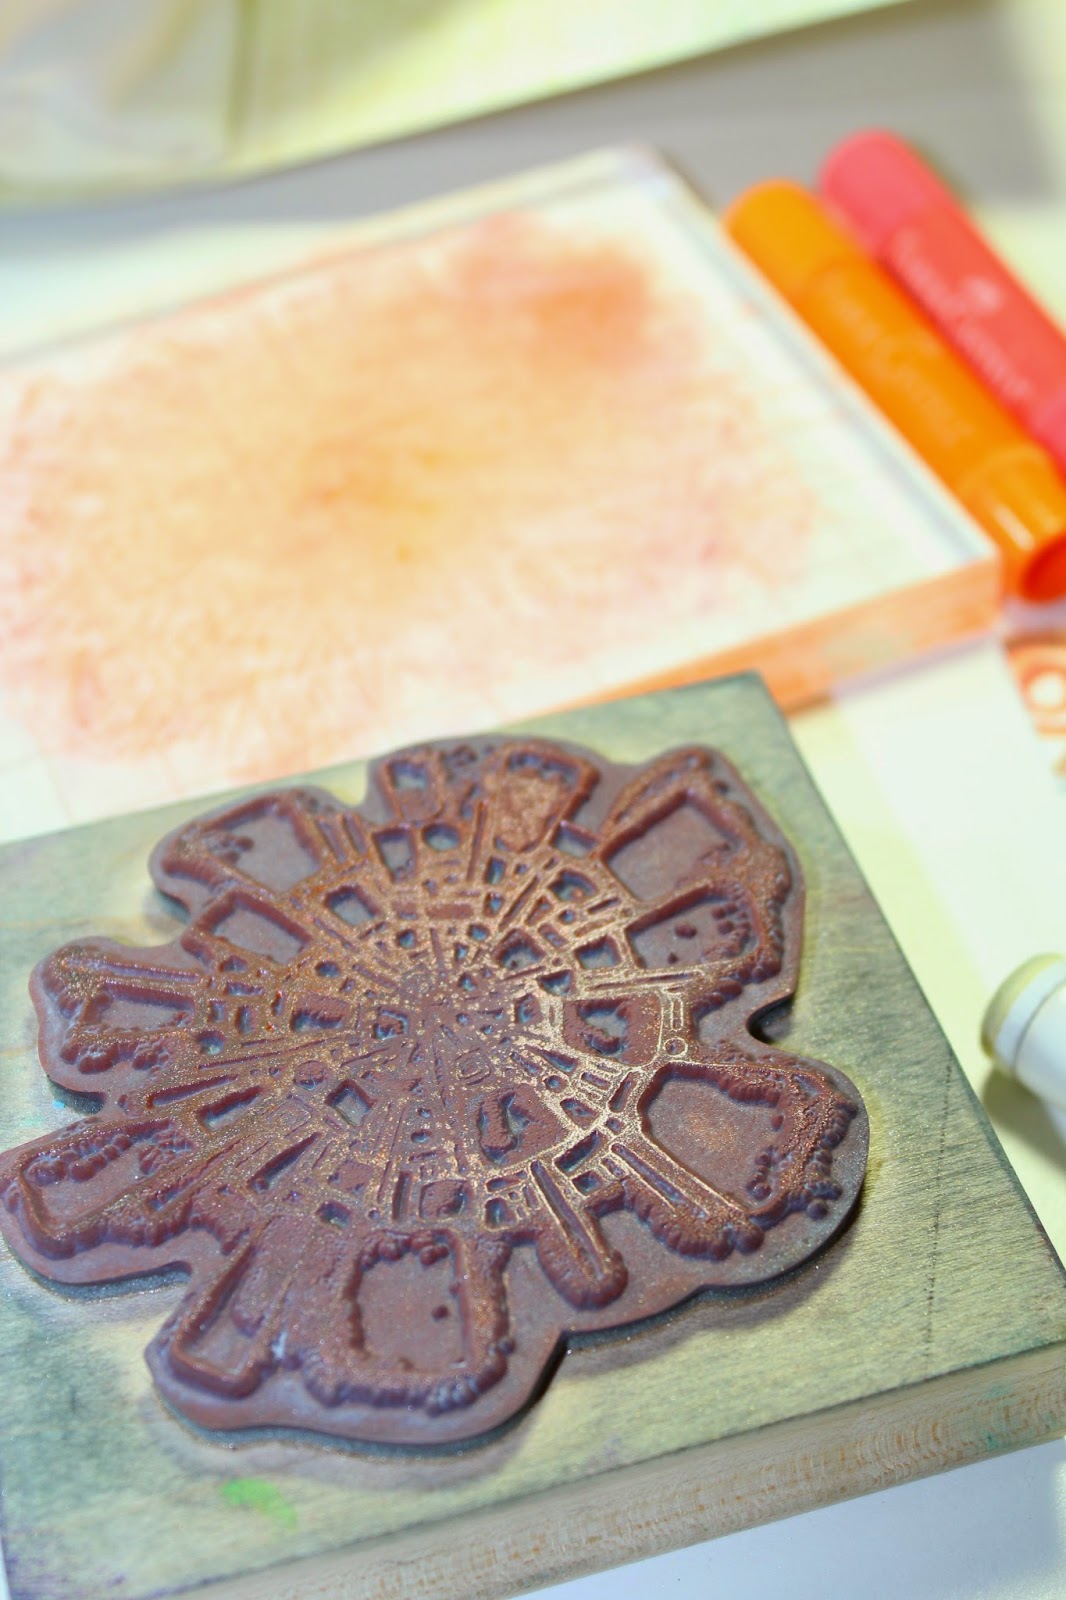
Scribble Gelatos on an acrylic block and mist with water.  Press the stamp onto the block to load with color. 

BONUS: In the process of creating this card, I discovered another background technique!

I noticed the acrylic block had a neat pattern on it after I loaded my stamp.


I took a piece of plain white paper and pressed it into the colors.


Voila, another background!


Don't you love the simplicity of this month's sketch? The "white" space allows the background technique to take center stage.

Have fun with this technique triple-play!

Julie

Monday, July 28, 2014

Acrylic Block Stamping and Oopsie Daisy

I found this link a while ago, before Oopsie Daisy was released. While the post really isn't about the technique shared below, I liked the overall look of the soft inked "frame" and floral image together. Since I didn't really know quite what the Oopsie Daisy art would look like at the time, I bookmarked the post anyway, thinking it might be something to try.

I don't have a rectangular stamp like the blog author does, so I thought I'd try getting a similar "look" with my 3x4" acrylic stamp block. I was pretty pleased with the results.

The key to using the acrylic block (in lieu of a rubber stamp) is good cushioning underneath. My CS desk blotter is nice and thick so that worked for me, but if you don't have one you could try stamping on top of an old catalog or magazine--or even a mouse pad.

Start with a clean acrylic block. I assure you my block doesn't normally look like this . . . it's usually an inky mess . . . but some rubbing alcohol on a cotton ball took care of that, easy peasy.


Ink the edges of the acrylic block (make sure to ink the smooth side, if your block has a grid like mine). Starting from the outside, sweep ink toward the center. For added dimension, start with a light color and add a darker color around the outer-most edges, if desired.

Press the acrylic block onto paper. You will get different looks depending on the texture or finish of the paper. Experiment, have fun with it.


Since I love the look of watercolors paired with the Oopsie Daisy images, I tried the same technique with Gelatos.


Start by lightly misting the acrylic block with water, then add color. Use a light color first with a darker shade around the outer edges, if desired.


Press onto paper. If you're lucky, you might get a second impression.


Be sure to thoroughly clean your acrylic block after each use.

One advantage to using the same block to add rubber stamps is that positioning is a no-brainer!

Topaz CS Hybrid ink "frame"

Topaz CS Hybrid ink "frame"
Gray Gelatos "frame"
Yellow Gelatos edged with orange
Who knew you could use your acrylic block AS a stamp? Well, now ya know!

Creatively yours,
Karen


Thursday, July 17, 2014

"Rockin" Oopsie Daisy Art


I am always on the look out for artwork inspired by the ocean. These stamped stones found on Pinterest really piqued my interest. I sat down with my acrylic paints and Oopsie Daisy Borders and Backgrounds stamp set and began creating.

Rocks from Cape Cod Bay
Stamp on rock using Archival ink (or other permanent ink). Tip: Do not use an acrylic block with the stamps. I use my fingers to ensure full contact with the rock. 
Add color to the image using a fine detail paint brush and acrylic paints. Do you like my acrylic block palette? 
Smooth Rock = clear stamped image
Textured rock = distressed stamped image
I couldn't resist using the cute Flip Flops from the Cape Cod stamp set.
What awesome stamp art will you create on rocks found on your next trip to the shore?

Julie

Thursday, July 3, 2014

Rubber Stamped & Colored


The Oopsie Daisy rubber stamps are ideal for creating custom scrapbook page backgrounds, not to mention the great cards they make!

Oopsie Daisy Rubber Stamps
I had more fun doing this than the paint-by-number projects I did when I was a kid!

1. Use India Ink Black to rubber stamp onto 12x12 Eggshell plain. Cut a mask for the rectangular stamp image, cover, and stamp away.


2. Add color with watercolor pencils and water brush. It certainly doesn't have to be perfect to be charming. (Take our husbands, for example!)


3. Add a photo, journaling and a few decorative elements.


What a fun way to make your own scrapbook paper, customizing the content and colors to coordinate with your photos. The simple technique looks great on greeting cards, as well!

Oopsie Daisy Art Nouveau Rubber Stamps

Oopsie Daisy Border & Background Rubber Stamps
 I hope you will take the time to enjoy a little stamping and coloring!

Thank you for stopping by.
Kay at Club Scrap

Wednesday, June 25, 2014

This Hop is a real Picnic!

Welcome hoppers! You are in for a treat today. We have 17 talented bloggers on hand sharing their creations made using the June Picnic collection.

Each year, Kay's daughter Marilee hosts a lemonade stand to coincide with an art festival in town. For many years, my daughter Emma has had the pleasure of being Marilee's sidekick. Kay always documents the event with wonderful photos, and I knew last year's pics would be perfect with Picnic!


Pages created using Picnic CS papers and Layout Card from Trees.
Add dimension with Pop Dots and a touch of sparkle on the ice cube with Stickles.
Picnic Lite Thickers custom-tinted with appropriately-named "Mango Lemonade" Memories Mist.

I couldn't resist making a few cards, too. My stash is severely depleted and I need to restock for my monthly Birthday Club card swap. By the way, we'd love to have you join us . . . there's nothing like getting a dozen or more beautiful cards from your fellow paper addicts crafters for your birthday!

A blatant scrap-lift of Janet's Greetings to Go card. I love the "bite" mark!

More fun with Pop Dots!
This sentiment from an old Aurora Borealis stamp sheet makes me giggle.

I don't know about you, but I'm having a blast with the Picnic kit. Are you ready to hop on over to the next blogger? Julie is next over at Cape Cod Scrapper, and there's a complete list below just in case you get lost along the way.

Karen for Club Scrap Creates
Hetty at Craft Chaos
Anne at Crzymom's Tidbits
Anne Marie at Artfully Balanced
Lisa at Carpe Memoria

Happy hopping!
Karen