Showing posts with label Artifacts. Show all posts

Tuesday, August 19, 2014

Inspiration Three Ways


We all know that inspiration can come from any number of places. Today's batch of cards were inspired by three sources . . . Karen's cool background technique, Kay's clever cutapart tutorial, and Marya and Ann Marie's super simple August Card Sketch Challenge.

Let's get started!

1. Create the background. I used Gelato as suggested by Karen in her tutorial.


Oops!  I stamped the sentiment on my background upside down... stay tuned to see how I fixed my boo boo. 
2. Stamp sentiment onto card base.

Second try at a background with sentiment stamped right side up ;)
Tribal sentiment
3. Select a cutapart that coordinates with the Gelato background.

Artifacts cutaparts, Feb 2009


Distress the edges of the cutapart for added interest.
4. Create the card using the August Card Sketch as your inspiration.


5. Admire the finished card!


Remember my upside down sentiment?

Turn card base on its side, layer with another cutapart (to cover up said boo boo), and stamp with the Picnic sentiment. I stamped the Artifacts sunburst image on the background using the Gelatos misted with a bit of water.
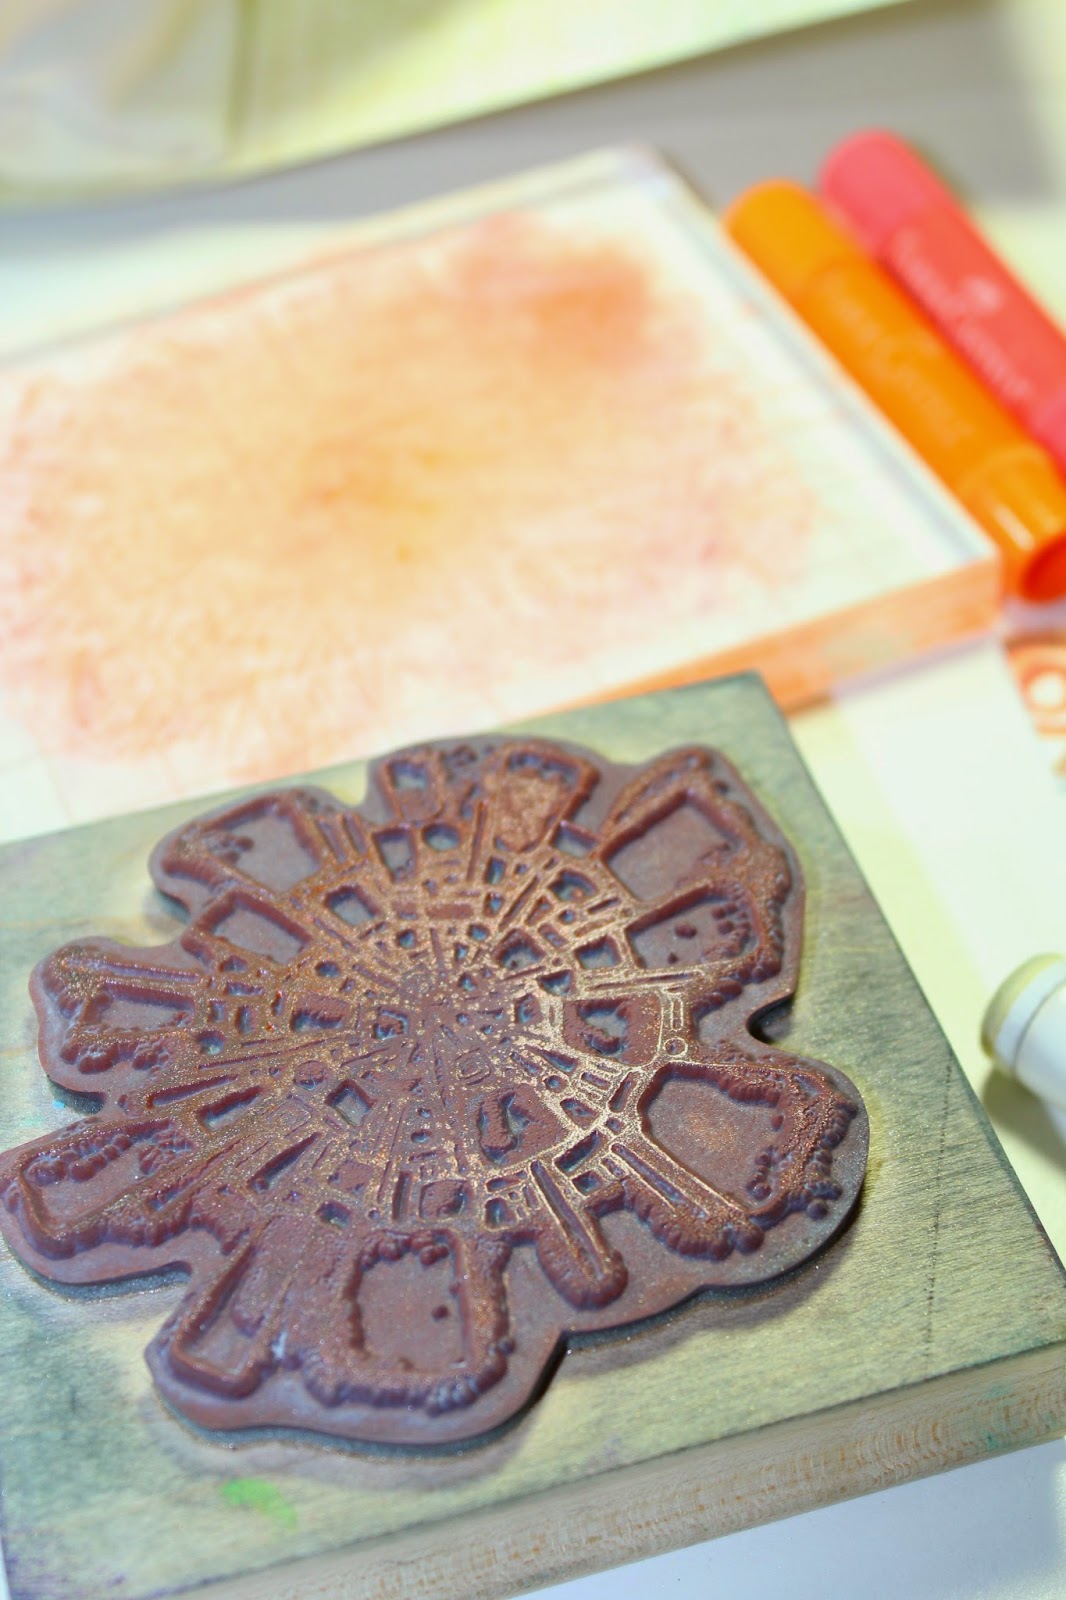
Scribble Gelatos on an acrylic block and mist with water.  Press the stamp onto the block to load with color. 

BONUS: In the process of creating this card, I discovered another background technique!

I noticed the acrylic block had a neat pattern on it after I loaded my stamp.


I took a piece of plain white paper and pressed it into the colors.


Voila, another background!


Don't you love the simplicity of this month's sketch? The "white" space allows the background technique to take center stage.

Have fun with this technique triple-play!

Julie

Monday, December 9, 2013

"Pinspiration" Strikes Again!

Good Monday Morning, Everyone!

I found some really interesting cards on Pinterest since joining that site. There are so many techniques to try and gorgeous pieces of artwork to recreate using my Club Scrap stash.

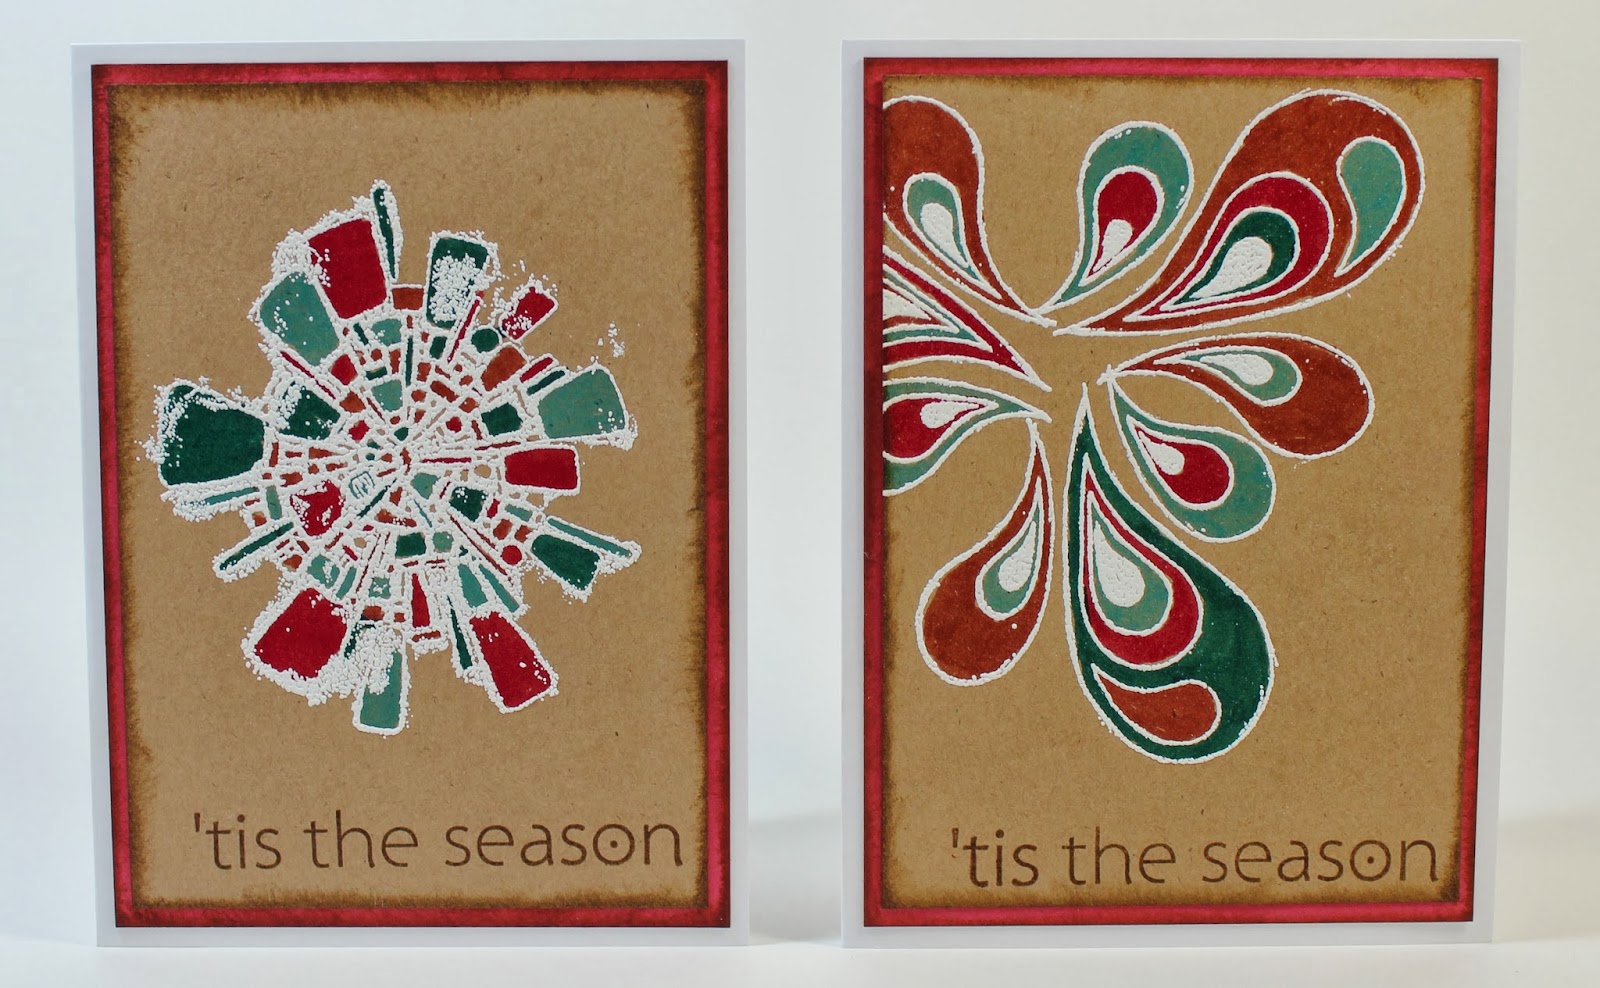
I knew as soon as I saw the white heat embossed images on kraft colored cardstock that I wanted to make some panels using my collection of line image stamps. Once the images are embossed, you simply color them in using your favorite markers.

I chose to use stamps from the Artifacts Feb 2009 kit, Ornamental Dec 2009, Adobe Sept 2010, and Bandanarama Retreat 2009.

Here are the cards I created.

Ornamental Medallion stamp on kraft panel, white card base, red Tahiti panel, and Old World Christmas 2008 sentiment.
Artifacts and Bandanarama stamps on kraft panel, white card base, red Tahiti and red Arts and Crafts panels, and Holiday 2011 sentiments.
Adobe stamp on kraft panel, white card base, red Tahiti panel, and Holiday 2011 sentiment.
Hope you like my Pinterest inspired cards, and maybe you will be inspired to give this technique a try.

Thanks for stopping by and enjoy the rest of your week.


Julie


**********THIS GIVEAWAY IS NOW CLOSED**********

It's time for another giveaway! Today's vintage kit is the May 2006 Nature's Wonders Club Scrap kit. Our floral kits are always very popular, and you'll love the soft watercolor feel of this collection. This kit includes premium 8-1/2 x 11" and 12x12" printed and plain papers (with the most lovely texture!), pre-cut photo mattes, charms, cutaparts, a cool mini-album pendant project and more.


To qualify for the random drawing, leave a comment on today's blog post sharing your favorite flower with us. A winner will be chosen and announced on the December 10 blog post by 10am Central. Best of luck!

The Day 8 Giveaway random drawing winner was comment #42, Candy Hazzard. Congratulations! Watch your email inbox for a message soon!

Thursday, March 7, 2013

Digital Stenciling With a Twist

Happy Thursday! Ron here with another digital tutorial. We're gonna look at digital stenciling again, but this time with a little twist!

Before we get started, I have to share how this blog post came to be…

A few weeks ago, I blogged about how to create a stencil effect digitally. If you'd like a refresher, click HERE.

Shortly after that blog entry, Winter PSL started and the second week challenge was to use stencils. During that challenge, CS Member Melissa (sarala557), posted a message to her PSL "Pixels" digital team about how she thought of using the digital stencil technique in reverse and posted a couple of cool samples. It just so happened that during that same week, I was thinking about that same thing one morning on my drive to work. Yeah, my mind wanders a bit on my drive and I often come up with some crafting ideas! I told Melissa that I was planning on blogging about this, and here we are!

Here's one of Melissa's layouts showing the reverse technique:


To recap digital stenciling, all you do is drag a stencil or stamp onto your canvas, command or ctrl+click on the thumbnail of the stamp/stencil layer to select it with marching ants, hide the layer, create a new layer and then 'paint' with a fuzzy brush inside the stencil/stamp area, changing colors and varying opacity as you will to get the desired effect.

To reverse stencil, just add 1 step - AFTER you create the new layer, but BEFORE you start to paint, choose 'Inverse' from the Select menu (Shift-CTRL-I in Windows, Shift-Command-I on a Mac) - this will select everything except the stamp/stencil image.

When you paint, you're coloring the background and leaving the image untouched. This can create some really cool looks. Here are a couple of ideas to get you started:

For this first one, I used a stencil file from Artifacts and used a spatter brush in a fairly large size in 4 or 5 different colors at a very low opacity (39%):

Then I decided to turn the stencil layer white, add a little inner shadow for depth, layered it on black and one of the Jubilee backgrounds, add a sentiment stamp and came up with a digital birthday card in about 15 minutes!


In this next sample, I used a Wildflowers background, added 3 stamp images, merged the stamps into a single layer and reverse stenciled in white at 29% opacity using a huge (2500 pixel) chalk brush. This took less than 10 minutes to make.


And for more ideas, check out Melissa's forum post HERE.

Okay, enough inspiration - now go create some wonderful digital stencil art of your own!