

The Club Scrap kit features different goodies each month. September's Blueprints collection includes a 12-pack of Jumbo Photo Corners. Let's take a closer look. . . .
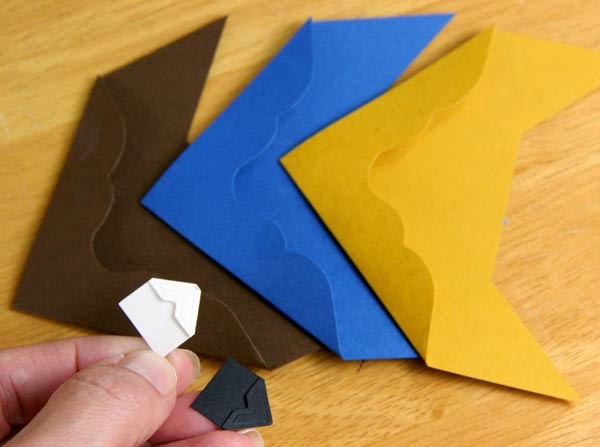
They're quite jumbo in comparison to your run-of-the-mill photo corner. In fact, if regular photo corners were to challenge our Blueprints Jumbo Photo Corners to an arm wrestling match, I'm pretty sure I know who would win!

They might look a bit strange and unidentifiable when first received and unfolded. Follow these simple steps to assemble . . .
1. Position the paper on your work surface with the "bump" of the score facing up. Fold the small flap on the score line.
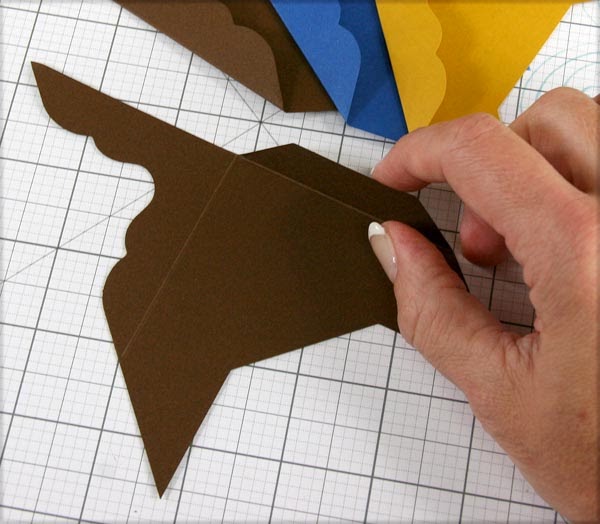
2. Add double sided adhesive or bookbinding glue to the flap.

3. Fold the larger flap on the score line.

4. Press down on adhesive to secure.

5. The photo corner is now ready for action.

The photo corners are alterable. I swiped this one with Earth Ink before attaching to my layout.


Stamp artwork onto the photo mounting corners for a neat effect.

White Pigment ink coordinates perfectly with the Blue papers in this collection.


These Jumbo Photo Corners will be a big hit in your scrapbook!

Thanks for stopping,
Kay at Club Scrap

Kay, thanks for giving me more ideas and inspiration on the jumbo photo corners. Can't wait together them.
ReplyDeleteKay, I really love these giant corners! So much fun and love how you decorate them to add more interest.
ReplyDeletepretty layouts
ReplyDeleteGreat ideas - looking forward to playing!
ReplyDeleteGreat idea to stamp and ink those jumbo corners.
ReplyDeleteWOW! Those things are giant! I didn't realize how big they were till you see them beside normal photo corners. What fun!
ReplyDeleteTFS!!
Love this. Especially stamping on the corners.
ReplyDelete