Showing posts with label HPOPs. Show all posts

Monday, November 18, 2013

It can't be winter yet...can it?

Well it sure felt like it last week on Cape Cod. We had a day filled with the big fluffy white stuff. I just don't know if I am ready for it yet. Ready or not it arrived, and I couldn't resist taking pictures. The snow looked so pretty covering all the brightly colored fall foliage still clinging to our trees. Dusty, our cat, wasn't too sure about it. She loves going out side with my hubby, but it was a bit too chilly on this day.

November 2013 Scrapbook PJ Party Sketch
iClassygirl aka Tiare, hosts a fun Scrapbooking PJ party once a month and features the current Club Scrap monthly kit.  This month's sketch featured a double page spread. My wintery photos were the perfect fit for the sketch.
Here are some of the ways I chose to make the sketch my own.
Tear the edges of the Pattern Basics Pastel dots paper. Add chipboard snowflakes painted with Creative Concoctions Gesso and clear glitter glue. A silver sequin and gemstone add interest to the centers. Use strips of rhinestones from the Spring Chorus kit for further embellishment.
Ink the outside edges of your layouts with WOW Red and Blue Neon Inks.  Mat your photos using HPOPS. Fossils orange and Avant Garde green were used on the double page spread. Choose quote and sentiment stamps for a title and added interest on the spread. 
Thanks again to Tiare for hosting this fun online get-together. It is always nice to share crafting time with folks, even if they are spread out all across the country.

Hope you will check out the video of her event and give this double page layout sketch a go!

Thanks for stopping by and have a great week.


Julie


Other products used in the layouts.

Club Scrap Fire & Ice Navy and Red cardstock - background papers
Club Scrap Fire & Ice UM Collection stamp sheet - "Enjoy change." quote
Club Scrap Holiday 2010 UM stamp sheet - Let it Snow sentiment

Monday, July 22, 2013

Cape Cod Glow Lamp Project

Good Monday Morning Everyone!

The ProScrapbook's League (PSL) Summer Camp has been in full swing the past few weeks and I am the proud Counselor of the Jewel Beetles Project Cabin. This was the first time Club Scrap has formed Project making teams. It has been a great motivation for members to take out all of their Club Scrap projects and complete them for points during Camp. Kay's Lacewings Project Cabin has been giving us a run for our money. Everyone agrees, it has been a welcome addition to the PSL lineup of team choices.

As a Counselor,  I am not allowed to submit projects to my team's gallery for points, but it didn't stop me from creating a project this week. When I first received my Cape Cod kit back in May, I knew I wanted to use it to make one of Kay's Holiday Glow Lamps. We were introduced to that project during the Holiday WOW 2010.

here is my Cape Cod version

stamped translucent paper with Cape Cod UM stamps and colored with markers

glued torn strips of tan cardstock to the exposed book board base to mimic sand

hot glued shells, beach glass and beach grass to base


Supplies used:
Club Scrap - Scholarship Tan HPOPs
Club Scrap - Memoirs Green cardstock inked with Distress Peeled Paint ink for beach grass
Club Scrap Bookbinding Glue
markers for coloring
shells and beach glass from my stash

Hope you enjoyed this beachy version of a fun Club Scrap project.

Have a fantastic week!

Julie


Monday, July 8, 2013

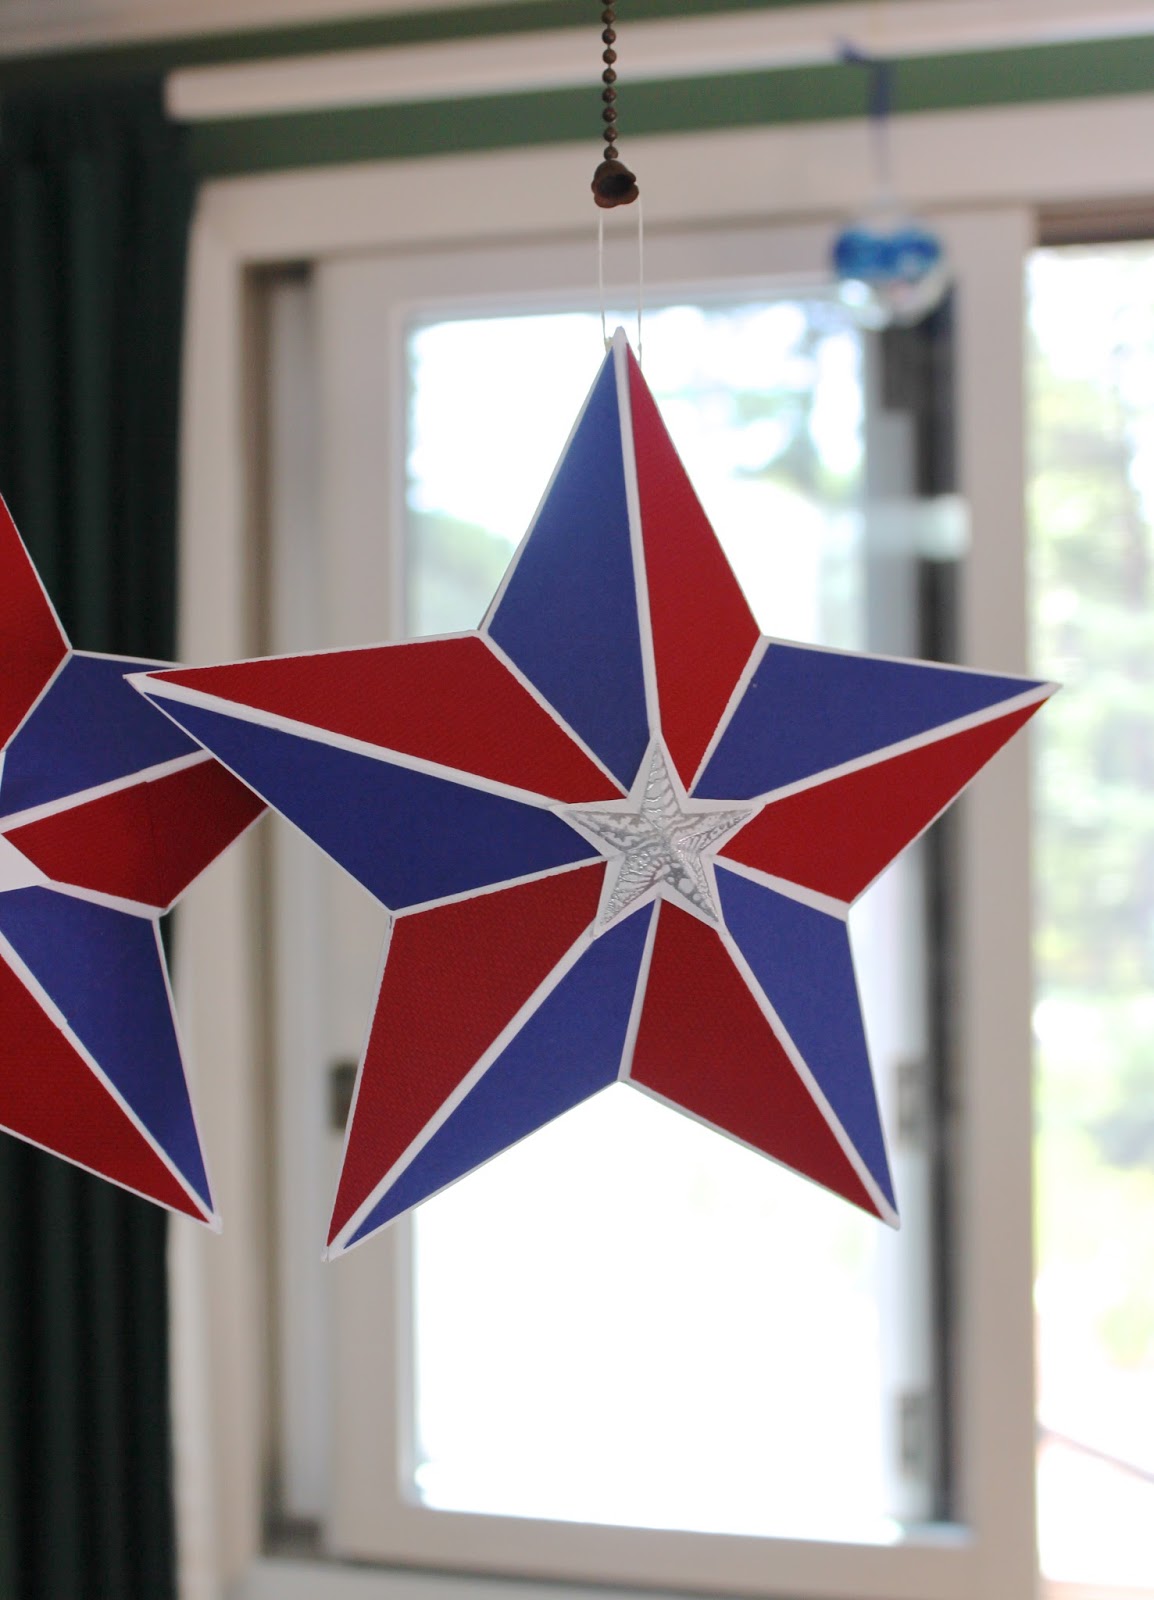
Patriotic 3D Star

Good Monday Morning Bloggers!

Hope you all had a fantastic 4th of July holiday weekend.

Metal Barn Stars have gained popularity over the past few years. I never purchased one as a home decor piece, but always loved the simple country look.

I found a tutorial on how to make them with paper and thought they would make great 4th of July decorations.

Cut large stars on white cardstock using a Silhouette SD.

Score the stars using a Scoreboard.
mountain folds on points, valley folds between points

Cut HPOP's to fit into the spaces. A little bit of measuring never hurt anyone, right?
HPOP's cut and adhered to both sides of large stars

I used Wheel and Sprocket red and Steppin' Out blue HPOP's (half pounds of paper).

When I completed my cuts, I had some scraps left over. I discovered that those pieces when placed side by side, created the exact same shape. I was able to create a second star with the left overs.
scraps matched up and ready to be adhered

Attach the 2 sides together using hot glue.
side view of stars 

Michael Strong star stamped and embossed for embellishment

Add a white wax linen thread loop between the stars for hanging.
great for holiday decorating

These stars are fun to make and if you don't want to bother with all the measuring,  grab your favorite Club Scrap stamps and decorate them however you like.

Enjoy your week!

Julie

Monday, July 1, 2013

Carpet Tape Chronicles Revisited

Good Monday Morning Friends!

Last week, while browsing the DIY & Crafts area of Pinterest, I ran across this fantastic quilt design. Right away I knew I wanted to recreate it using an old favorite Club Scrap® technique.

quilt inspiration piece

A few years back Club Scrap made a video series that featured Carpet Tape, a super sticky double-sided adhesive tape used in laying carpet and found in most hardware stores. After refreshing my memory by watching the video on the Herringbone technique, I set out to recreate the basic pattern I found on the quilt. 

Click HERE to see the video. 
  
Here are the step by step instructions.

my collection of HPops

1. Cut strips of light to dark green card stocks in .25, .5, and .75 inch widths. I chose Raku metallic, Asian Artisan light green print, and All that Jazz dark green HPOPs. 

green cardstock strips

2. Cut strips of light to dark blue card stocks in .25, .5, .75 and 1.25 inch widths. I chose Versailles denim blue, Rhapsody blue, Written Word pale blue, and Scholarship navy blue HPOPs. 

3. Take a scrap of white copy paper (approx. 5x7 inches) and completely cover in carpet tape. Trim this sheet in half horizontally at 3.5 inches.

carpet tape adhered onto copy paper

4. Remove the carpet tape backing paper and carefully lay down the strips of card stock in a diagonal fashion, starting with the greens first.

piece trimmed and blue carpet tape backing removed

front of piece showing blue strips adhered to carpet tape

back of piece showing green strips adhered

5. Repeat with the blue card stock strips.

6. Trim the excess card stock from the perimeter of each of the carpet taped rectangles.

blue and green panels after trimming

7. Using a paper trimmer, cut into varying width strips. Lay them next to one another alternating between blue and green strips. The angles of the papers should run in opposite directions (all green stripes running one way and blue stripes running in the other.)

blue and green strips 

8. Using ATG tape adhesive, attach these strips to another piece of copy paper and trim off excess white paper. Tip: Attach the adhesive to the copy paper and then lay down the strips. I chose not to use more carpet tape for this step as it is quite thick and I didn't want to add any more weight to the panels.

strips adhered to copy paper backing

*I had leftover green strips which I put together by themselves.

Now that you have created these panels, you can create any type of project you choose.
I made three thank you cards with my carpet tape pieces.


Additional Club Scrap Products used:
Thanks. - Body and Soul Unmounted Rubber Stamp sheet
Green Handmade Cardstock - Evergreen Kit
Spruce Green - CS Hybrid Ink 
Sapphire Blue - CS Hybrid Ink

Additional items: 
shimmer ribbon from stash
white card stock die cut on Silhouette SD
kraft and white card bases from stash

Thanks so much for stopping by, and have a wonderful week!!

Julie Heyer