Showing posts with label Oil Pastels. Show all posts

Tuesday, March 25, 2014

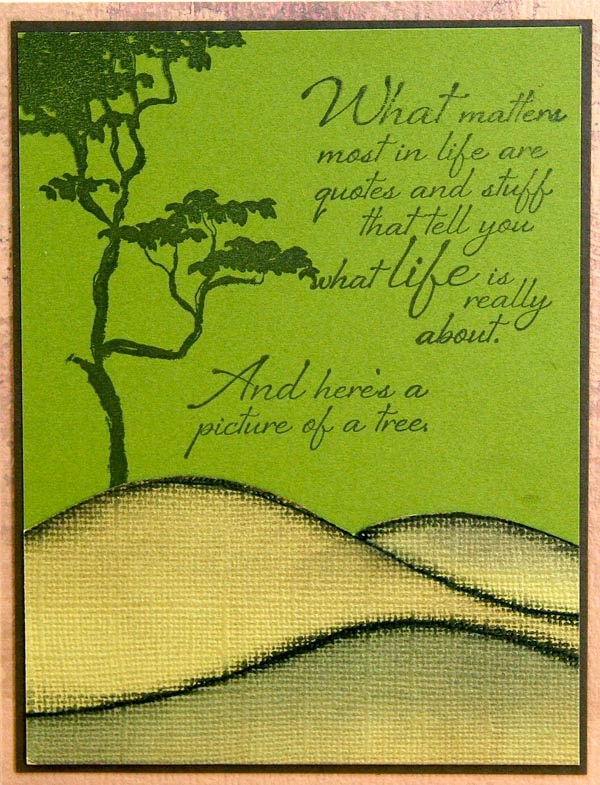
Faux Landscape Technique


I was inspired to create a layered landscape for my super-cool Trees stamp, but I didn't want my card base to get super-heavy with lots of paper layers.

Instead, I devised a pretty easy way to create a highly dimensional look that utilizes the texture of the Light Green paper in our Trees collection.


You'll need the following supplies:
Next, take less than two minutes to watch this video:


And there ya have it! I hope you enjoyed today's video tutorial.

Happy Landscaping!
Tricia

Tuesday, October 30, 2012

Oil Pastel Techniques

I challenge myself to explore a new technique every year for my Retreat workshop. It all begins by locking myself in the craft room for a play day. Typically, most of my experimentation ends up in the "circular file," but I'm okay with that. My art medium of choice for 2012 was oil pastels. I used colors from Faber-Castell's Creative Studio's 12-pack for the class, and we had some fun!

We explored four different techniques and made ten cards during our two-hour workshop. Once we finished trying each concept once or twice, everyone had a little extra time for play. (My favorite part!)

These were the supplies for the class:
Faber-Castell Creative Studio Oil Pastels, 12-pack
Mineral Oil
Heavy Duty Shop Towels
Water Brush
Watercolor Crayons (or Gelatos)
CS® India Black Inkpad
CS® Unmounted Leaf Stamps (designed just for the workshop)
Cards, Panels and Envelopes
CS® Grid Ruler
Permanent Fine Tipped Marker

One advantage to teaching the workshop four times is that I'm able to make a whole bunch of samples for demonstration. Now I've got a huge pile 'o cards for Christmas gifts. And it's only October. Check.

If you own some oil pastels, dust 'em off and book in some playtime. Watch for the class kit to become available later this week. It will include a video of my workshop so that you can learn the techniques we used at Retreat. It's the next best thing to being there!


Creatively Yours,
Tricia

Friday, August 3, 2012

Back-to-School. Seriously?

Oh, man. It seems like summer just started, and then I see it. . . those brightly colored aisles at the store with the school supplies. Summer just goes too fast for me. But I do look forward to those new school supplies, cooler fall air, and the comfort of a regular daily routine.

In the spirit of "learning," let's review some fun techniques with Club Scrap's Scholarship stamp. (And, while the stamp is out of stock, it works great with the other images from this collection, too!)


Artsy Apple
  1. Lightly tap the WM stamp with Onyx ink. Apply just enough ink to get an idea of the image onto the paper. Stamp onto White Plain. (If the image is too dark, stamp again without re-inking.)

  2. Color the background of the stamped image with oil pastels. We used Faber-Castell Oil Pastel Crayons. Leave the apple outline free of color.

  3. Use a paper towel or cleaning rag to blend the zones of color and to remove excess color.

  4. Outline the apple image with the black oil pastel crayon, keeping the line as thin as possible. Blend the black crayon line with the rag. Trim the image from the paper and layer onto a card or scrapbook page.


Flocked Apple

  1. Ink the half-tone background of the WM stamp with assorted CS® inks, starting with the lightest colors first. We used Amethyst, Sapphire and Ruby. Ink the remainder of the apple image with Onyx ink.

  2. Stamp the inked image onto White Plain.

  3. Outline the apple image with a Quickie Glue Pen.

  4. Sprinkle black flocking powder onto the glue and rub away excess powder; return the powder to the jar. Trim the image and layer onto a card, page or project.


Juicy Apple

  1. Spritz the WM stamp lightly with water. Using the heel of a watercolor crayon, apply color to the entire stamp.

  2. Use the tip of the black watercolor crayon to outline the apple image.

  3. Re-moisten the colored stamp with a light mist of water if needed and stamp onto White Plain. Mist again and stamp without adding color. You will be able to stamp about five times without re-coloring.

  4. If desired, blend the watercolors with a waterbrush. Splatter the piece with additional watercolors.
    What stamps do you have in your stash that will work great with these three great techniques? Don't wait for school to start--try it today, and show us what you've done in the Galleria!