Showing posts with label Dungarees. Show all posts

Friday, May 30, 2014

Dungarees - Cap and Gown Card


With graduation season quickly approaching, I thought it would be fun to share an origami folded card design. I found this clever video tutorial on Youtube and couldn't wait to try it. I plan to give this card to my cousin Courtney, who will be graduating from high school at the beginning of June.

Let's take a look at some of the details.

1. Trim Dungarees Dark Blue papers to 10x12 and 4x4". Trim the Cream Plain to 2-7/8x6-7/8". A 1/2" cream print belly band (not shown) was wrapped around the finished card and trimmed to the appropriate length.


2. Stamp the Big Deal quote and sentiment onto the cream paper with Sapphire hybrid ink.

I just loved how the open card forms a box!  Plenty of room for some cash or gift cards.

3. Stamp the Big Deal numbers onto the Cream print belly band with Sapphire ink. Tip: Match pen ink color to stamped image by rubbing the nib of a similar shade marker onto the Sapphire ink pad.


4. Create a tassel by wrapping white embroidery floss around two fingers. Before removing your fingers, carefully wind a section of the floss around and through your fingers to create the top of the tassel. Use a needle to thread the end up through the top of the tassel and secure with a knot. Leave a tail for threading through the cap. Don't forget to cut the long end loop to form the bottom of your tassel.


5. Secure the tassel with a metal brad and cover the brad prongs and tassel end with a bit of adhesive on the back of the "one size fits all" tag embellishment.


Thanks for stopping by and enjoy your weekend!


Julie

Wednesday, May 28, 2014

Dungarees Blog Hop

It's blog hop time! Thanks for hopping along with us today.

I'm still on a mini album kick. I started this Passport to Fun project at the beginning of the month, but travel and general busy-ness kept me from completing it until now.

This is a variation on the original instructions . . . instead of A7 envelopes, I tried my luck with 3-1/2 x 6-1/2" coin envelopes. The goldenrod color worked well with the colors in the Dungarees collection. I connected the envelopes using their flaps, which in the case of these envelopes, created a horizontal orientation. The mattes are 3.25 x 6.25", which means I only had to crop an inch off my photos (horizontally) to make them work for this mini book.

I kept the cover simple because I haven't worked out the closure yet.
I know I want to use the button, though. I'm open to suggestions! 

Embellishments added from the CS and Lite Cutaparts.

I added more inside pages with a simple pamphlet stitch. That garment tag is so much fun!

Love that Dungarees Lite Washi Tape!

Sentiments and quotes from the Dungarees unmounted stamps add the right finishing touch.
I just love the versatility of these envelope-based mini albums. Lots of pockets for memorabilia and display for more photos than you can imagine. I think I'm addicted!

Are you ready to see what our other bloggers have in store for us? If you get lost along the way, you can always come right back to this list of all of our participants.

Club Scrap Creates (you are here)
Hetty at Craft Chaos
Annette at Digital Musings


Happy hopping!
Karen

Tuesday, May 27, 2014

New Formulas for Dungarees Papers


If you have your hot little hands on a Dungarees Club Stamp paper pack, you're set to create six spectacular cards. All you have to do is follow the trimming and scoring instructions, exercise your craft knife skills, do a little origami-style folding, and stamp your heart out!

We'll make two 5.5x8.5" pop-up cards . . .


. . . and four great "dress shirt" cards just in time for Father's Day!


1. Trim one 8.5x11 Dark Blue, Russet, Kraft and Light Blue Plain horizontally at 10.75 and 5.5". Cut the 5.25x8.5 horizontally at 8.25 and 4". Trim the 4.25x5.25 horizontally at 4.5 and 2.5". Cut the 2x4.25 horizontally at 4 and 2.25". Score and fold the 5.5x8.5 horizontally at 4.25".


2. Cut one 8.5x11 Text Weight Print vertically at  4.75 and 3.75". Trim each 3.75x11 horizontally at 6 and 5".


3. Score (do not trim) one 8.5x11 Kraft and Dark Blue Plain horizontally at 5.5".


4. Trim each 8.5x11 Ivory Print vertically at 8.25". Score horizontally at 2.75, 5.5 and 8.25". Measure and mark 1-3/8" from the top and bottom edge. Cut a vertical slit 2.75" from the left and right edges, stopping at the marked guideline. Score at 1-3/8" to connect the slits. Accordion fold the base sheet with valley folds on the outside and a mountain fold in the center. Accordion fold the inner section with folds reversed.


5. Trim one 8.5x11 Light Blue and Russet Plain horizontally at 10.25, 7.75, and 5.25". Cut the 5.25x8.5 horizontally at 8.25". Trim each 2.5x8.5 horizontally at 7.5, 5 and 2.5". Cut the .75x8.5 horizontally at 5.25".


6. Trim the remaining 8.5x11 Ivory Text Print vertically at 4.25". Cut each 4.25x11 horizontally at 5.5" to separate the artwork into four equal sections. Origami fold each 4.25x5.5" piece into a shirt. Click HERE to see a larger image of a folding tutorial, or simply search "origami shirt" in your browser. Work with your paper vertically, and the shirt will come out just fine.


Stamp the large rivet and cut a slot with a craft knife. Slide the .75" strip through for a neat look.
Enhance the sentiment with your white gel pen.
The 2.5" squares matte perfectly onto the 2-3/4" sections of the accordion-folded paper.
Stamp the squares, or add photos for a true keepsake!
Note how the folds of the center row are the opposite of the upper and lower rows.
Insert the pop-up mechanism into the folded 5.5x8.5" card base. Apply adhesive to the outside edges only to allow the pop-ups to function.
Distress the outside edges of the printed panel with a Tonic Paper Distressing Tool.
Interchange the pattern of the origami shirt with the pattern in the background.
Use a contrasting pen to add faux stitching. Cut a chevron onto the smallest panel.
Add buttons to the shirts with Dazzles Jewels Stickers, and attach accent buttons with blue jute.
The cards are a little "involved," but well worth the effort.

Happy cardmaking!
Tricia

Friday, May 23, 2014

Bottle Topper Gift

Here's a fun way to jazz up a bottle of ___________ for gifting. (Please fill in the blank with your ideas below!)


The free trimming formula I've designed makes eight toppers with just four 8.5x11" papers.


1. Score 8.5x11 Papers A and B vertically at 5.75". Trim horizontally at 8.25, 5.5 and 2.75". Use a die, punch or craft knife to remove a 2" circle or square from the center of the 2.75" scored area.


2. Trim 8.5x11 Papers C and D vertically at 7.25, 5 and 2.5". Cut each 2.5x11 horizontally at 5.5". Trim the 2.25x11 horizontally at 9, 6.75, 4.5 and 2.25". (I punched a 2" circle from the 2.25" squares to create my toppers.)


3. Interchange the paper colors to create the base of each bottle topper. Then, add elements from your stash and a stamped greeting to finish them.


Keep your toppers handy for a great last-minute gift idea. If you present a nice bottle of Cabernet to your child's 3rd grade teacher with a handmade topper like this, they will really know how much you appreciate them!

Happy bottle topping,
Tricia

Thursday, May 22, 2014

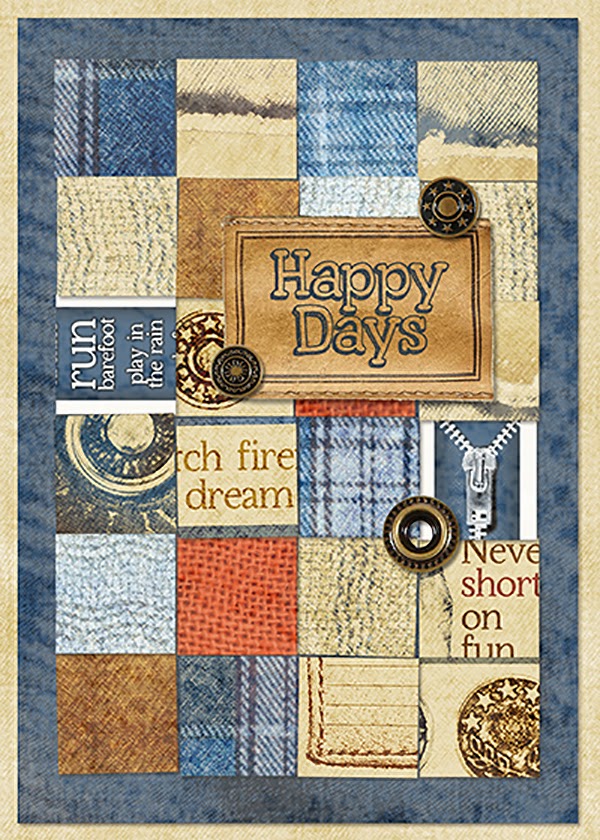
Digital Dungarees Squared

Did you see Kay's post yesterday? (Click HERE if you wanna check it out!) I was really inspired by her 'Club Stamp Squared' cards so I thought I'd share how you can recreate the look digitally. Let's get started . . .

Use your favorite program that supports layers (I'm using Photoshop CC).

1. Create a 5x7, 300ppi document to create the base of a card.

2. Add background and matte layers with the Club Scrap Digital Dungarees Kit.


3. Open a variety of Background & Xtra files including fibers. These will be the 1" squares.

4. Select the Marquee tool and adjust the Marquee settings to 'Fixed Size' with 1" width and height.

5. Select a Background or Xtra and click anywhere to select a 1 inch square.

6. Switch to the Move (pointer) tool and drag the square to your card.


7. Repeat steps 4-6 to select different squares. Note: you won't need to adjust the marquee settings once you've set it the first time.

8. Continue until you've created 24 squares.

9. Line up the squares, but don't worry about getting everything perfectly aligned. It actually looks a bit more natural if the columns and rows are a bit askew. You can also slightly rotate a few of the squares as well.

10. Add a slight drop shadow to one of the squares.

11. Copy the drop shadow layer style from the square in step 10: Layer -> Layer Style - Copy Layer Style.

12. Select all of the other square layers and the matte later and paste the layer style: Layer -> Layer Style - Paste Layer Style.

Next, create the acrylic paint wash:

1. Select a pale beige color.

2. Choose the Brush tool and select a large (approx. 450 pixels) chalk brush.

3. Create a new layer above all the square layers.

4. Click, move to a new location and click again, laying down color over the entire surface. Don't drag the brush, as that will apply too much color.

5. Repeat step 4 until the layer is well covered.


6. Select the matte layer and Command+Click (Mac) or CTRL+Click (Windows) in the layer thumbnail. You'll see marching ants around the matte layer.

7. Select the paint wash layer and Select -> Inverse.

8. Press the delete key.

9. Lower the opacity of the paint wash layer to around 25% (you may need a higher or lower opacity depending on the color you chose and how much coverage you had on the layer).


To finish the card, add a sentiment and some embellishments and you're done!


I hope you enjoyed this paper-inspired digital card. Thanks, Kay!!

Until next time,


-Ron