
Do you remember Kay's blog post from last week? I was seriously in love with the look of her D-ring album...so much so, that I couldn't wait to CASE it. (CASE = Copy And Steal Everything)

So, over the weekend, I pulled out a post-bound album kit I had lying around. This one came with the papers already cut for me (in this case, I only used the binding papers and inside covers).
Anyhoo, the dimensions of our post-bound albums are a teensy bit different from the D-ring, and I'm so spoiled because our talented designers do all the measuring for me. For this project, though, I was kinda on my own. Unfortunately my mantra is "math is hard", too, so I had to get creative about how I was going to achieve Kay's nifty patchwork look.
I thunk on it, and thunk on it, staring at my work surface until it came to me. Guess what I was staring at? My handy-dandy desk blotter! Aha! I could use my desk blotter to measure out a template of the dimensions of the outside cover piece.
So I took the measurements from the instruction sheet...and sketched it out on my desk blotter.
 |
| Outside cover measurements straight from instruction sheet. |
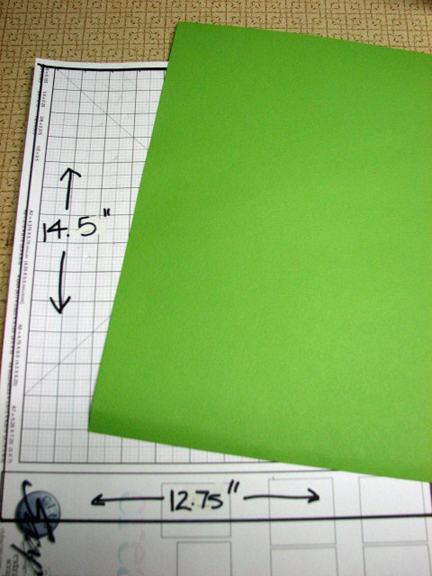 |
| If your kit came with paper, like mine, simply trace the paper outline onto your desk blotter. |

From there, just follow the instructions included in the kit. You can use the patchwork method for the back cover and inside covers, too, if you don't want to use the papers included in your kit (or if you purchased a nekkid version). Here's the finished product again...ain't she a beaut?
Just so you don't think I'm a TOTAL hack, I feel the need to tell you that I HAVE done this patchwork thing before, but I used much larger pieces. So I thought I'd share that, too, just in case you were interested.
This time I used a nekkid post-bound album kit...nekkid means it comes without pre-cut papers. Don't have the oversized papers the instructions call for? No problem!
The first step, again, is to sketch out the measurements of the cover piece. (This time my desk blotter wasn't big enough on it's own, so I taped 2 pieces together, using the back sides.)

Next, I selected a 12x12 print to use as my "focal" piece. (Starting with the largest piece is easiest.) Because of the design on this print, I placed the 12x12 in the upper right corner...I wanted to sacrifice as little of that large poppy as possible in the wrapping process. Depending on the print you choose, you could just as easily go with the upper left...it's really up to you.

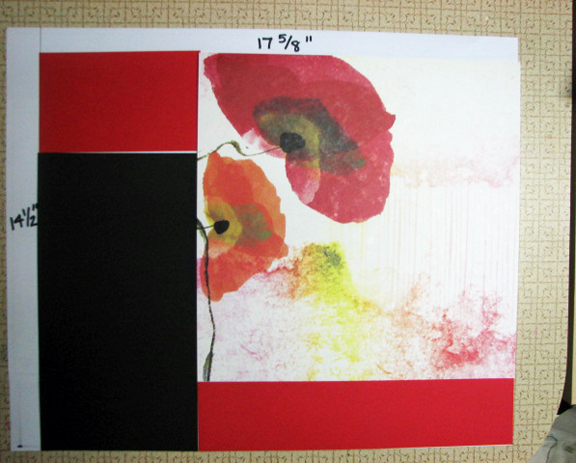
From there, I followed the rest of the steps included on the instruction sheet until the album was complete.
Here's the finished album cover...isn't it pretty?

This is a great way to really customize any special album. I've done this exact same technique for baby albums, wedding albums...I even color coordinated my Disney albums to match the individual parks! (Yes, I have FOUR albums from my Disney trip...one each for Magic Kingdom, Animal Kingdom, Epcot, and Hollywood Studios!)
I hope you'll give this method a try. It sounds like a big job, but these handmade albums are much easier than they look to make...especially with the written instructions AND free video tutorial. To

Karen
I LOVE making my own albums, so many kits, so little time, but I LOVE the Bold Blooms. Using the larger piece of paper is a little less daunting than quite as many little pieces ;)
ReplyDeleteWowee, wow, WOW! Those are beautiful, Karen. Now you've got me wanting to make loads of these. Maybe I should start with the one I bought at Retreat....
ReplyDeleteKaren, this is so fantastic! LOVE your versions and had a kind of DUH moment. Of course you don't need COLOSSAL papers for these projects, what a revelation. Thanks for the head slap. LOL
ReplyDeleteWonderful inspiration, nice job Karen!
ReplyDeleteThanks for sharing.
pat-czap
Karen this is so pretty - you did a wonderful version of this. Thanks for sharing.
ReplyDeleteAnnetteD
Karen, thanks for the "laugh out loud" on your blog entry today. Love the albums!
ReplyDeleteKaren, I'd have never thought to use my CS blotter for a template; how creative!! I've been ALSBing my heart out on Julie's monthly kit challenge and have used up most of my Bold Blooms. Fortunately I took a break to do two other kits so I am sooooooooooo casing your cover!!!! I would have been really bummed if I'd already have used that sheet, not sure theres any BB in GHM. You've done one WOW creation, Karen. Thanks for shaing it! Saving that paper for the album which I also fortunately bought at Retreat!!! Thank you!!
ReplyDeleteCher C-W
I'm loving your albums too Karen! They're so awesome.
ReplyDeleteUsing the desk blotter in the way you did is such a good idea, of course...love how your project turned out. I want to make more creative album covers too...it's hard to stop at the one D-Ring Binder I did for last weeks blog, gotta do the post bound album now too! We've got the 12x12 handmade album fever! and they are such a good deal right now for we blog readers!!!
ReplyDeleteGorgeous Karen. Blood Blooms is smashing on the cover
ReplyDelete