Showing posts with label albums. Show all posts

Monday, July 15, 2013

Stylin' Tilin' Album Cover

Good Monday Morning Everyone!

A few years back, Club Scrap celebrated its 10th Anniversary with a special edition kit called The Perfect Ten. Featured in this kit was a fun project designed by Tricia Morris called the The Stylin' Tilin' Project.

Stylin' Tilin' Perfect 10 project

I used the template to create an album cover for my Retreat 2010 album cover and now am finally getting my pages into an album from Retreat 2011 using the same idea.


 Retreat 2010 Stylin' Tilin' album cover

Here is a visual of some of the steps I took in creating my Retreat 2011 album cover.


stamped on white cardstock using CS hybrid inks with my By the Numbers UMs

created a background alternating the direction of the number stamps

matched ink color to cardstock

stamped on an angle and off the page

trimmed pieces to size after stamping following the template below
and began adhering to the album cover using Book Binding Glue

created this digital image of the album cover using the Stylin' Tilin' template as a guide

cut the cardstock to fit around the center accent area in the album cover using a ruler, pencil, and scissors

added embellishments and stamped a quote on white cardstock in the center accent area

Supplies used:
Club Scrap Book Binding Glue
Club Scrap Hybrid Inks in Lagoon Blue, WOW Red, Tangerine, Topaz (inked edges with Earth)
Club Scrap Wheel and Sprocket Red cardstock
Club Scrap Peacock Blue Cardstock
Club Scrap By the Numbers Retreat 2012 Kit - Ribbons, Dazzles, Yellow, Orange, and Dk. Brown Cardstocks, and UM stamps
American Crafts 12x12 D-Ring Album (Kraft)


Thanks so much for stopping by and hope you enjoy the rest of your week.


Julie

Friday, March 22, 2013

A Bunch Of Paper In Stitches

Friday Greetings from Kay here at Club Scrap!


While walking through the Club Scrap warehouse this week, I stumbled onto this Study in Red Paper Bundle. It's a lot of paper at an amazing deal, so I thought to myself, "I should be using this!" And this kettle stitched Study In Red mini album was born.


There are different sizes of paper in this big bundle and plenty of each size to work with, so I scored and pierced stitching holes in three sizes. In the picture below, you can see how I clipped same-sized groups of papers together to help me get organized. I also made Z-shaped pages to serve as connectors.


Next, I unleashed the stitching bonanza! I first stitched the same-sized pages together and then added the Z-folded connectors. If you've never stitched a book, it's not very difficult. Check out Tricia's technique video to see how it's done.


It's probably a better idea to add the supportive paper strips in the binding while stitching. But no . . . I had to do it the hard way and wait until after the stitching was done! I used my handy wiggling technique and guided the support strips beneath the stitches with a needle. (Speaking of support, this is sort of like putting on a bra while wearing a shirt. Wiggling technique works there, too.)


What a fun handmade album! I like the repetition of the same colors throughout the project, so even though I have different sized pages, the consistent color scheme makes it all work.


Go get your own big bundle and make one, too. Thanks for stopping by!
Kay

Wednesday, January 16, 2013

I'm on the CASE

Greetings blog readers!

Do you remember Kay's blog post from last week? I was seriously in love with the look of her D-ring album...so much so, that I couldn't wait to CASE it. (CASE = Copy And Steal Everything)


So, over the weekend, I pulled out a post-bound album kit I had lying around. This one came with the papers already cut for me (in this case, I only used the binding papers and inside covers).

Anyhoo, the dimensions of our post-bound albums are a teensy bit different from the D-ring, and I'm so spoiled because our talented designers do all the measuring for me. For this project, though, I was kinda on my own. Unfortunately my mantra is "math is hard", too, so I had to get creative about how I was going to achieve Kay's nifty patchwork look.

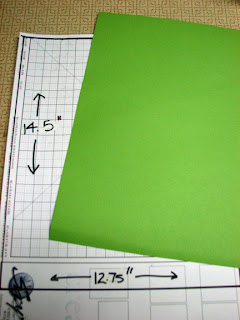
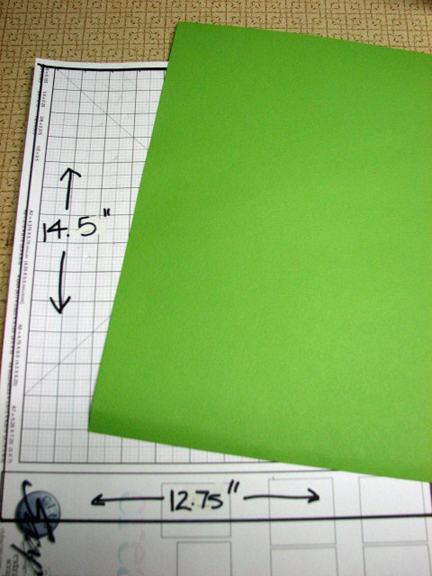
I thunk on it, and thunk on it, staring at my work surface until it came to me. Guess what I was staring at? My handy-dandy desk blotter! Aha! I could use my desk blotter to measure out a template of the dimensions of the outside cover piece.

So I took the measurements from the instruction sheet...and sketched it out on my desk blotter.

Outside cover measurements straight
from instruction sheet.
If your kit came with paper, like mine, simply trace
the paper outline onto your desk blotter.
Next, I gathered some coordinating cardstock and started stamping away...using quote stamps from my stash along with some of my UM fonts (just like Kay!) As I laid the stamped pieces out on my template, I was able to arrange (and rearrange) until I was happy with the look. Then it was just a matter of gluing the pieces onto the book board; transferring the pieces, one by one, from the template to the cover (remembering to leave 3/4" past the edge of the book board for wrapping). Easy peasy!


From there, just follow the instructions included in the kit. You can use the patchwork method for the back cover and inside covers, too, if you don't want to use the papers included in your kit (or if you purchased a nekkid version). Here's the finished product again...ain't she a beaut?


Just so you don't think I'm a TOTAL hack, I feel the need to tell you that I HAVE done this patchwork thing before, but I used much larger pieces. So I thought I'd share that, too, just in case you were interested.

This time I used a nekkid post-bound album kit...nekkid means it comes without pre-cut papers. Don't have the oversized papers the instructions call for? No problem!

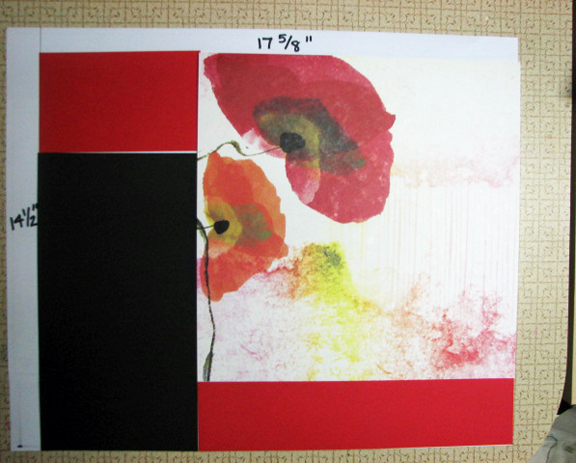
The first step, again, is to sketch out the measurements of the cover piece. (This time my desk blotter wasn't big enough on it's own, so I taped 2 pieces together, using the back sides.)


Next, I selected a 12x12 print to use as my "focal" piece. (Starting with the largest piece is easiest.) Because of the design on this print, I placed the 12x12 in the upper right corner...I wanted to sacrifice as little of that large poppy as possible in the wrapping process. Depending on the print you choose, you could just as easily go with the upper left...it's really up to you.


I chose 2 coordinating colors from the Bold Blooms collection for the remaining pieces, and trimmed them to fit the measurements of remaining open areas. A quick "dry fit" on my sketched template confirmed I had cut the pieces correctly.


From there, I followed the rest of the steps included on the instruction sheet until the album was complete.

Here's the finished album cover...isn't it pretty?


This is a great way to really customize any special album. I've done this exact same technique for baby albums, wedding albums...I even color coordinated my Disney albums to match the individual parks! (Yes, I have FOUR albums from my Disney trip...one each for Magic Kingdom, Animal Kingdom, Epcot, and Hollywood Studios!)

I hope you'll give this method a try. It sounds like a big job, but these handmade albums are much easier than they look to make...especially with the written instructions AND free video tutorial. To enable encourage you, we're offering a special discount exclusively for Club Scrap Creates blog readers, good for 60% off our selection of 12x12 handmade albums!!! This includes the post-bound albums used above, as well as the D-ring Album Kay used in her post last Friday. When shopping online, enter promo code CASE60 during the checkout process to receive your discount (expires January 23, 2013).


Creatively yours,
Karen

Monday, July 30, 2012

Olympic Fever continues...

Happy Monday, everyone!

Now that the 2012 Summer Games are now fully under way, so are the Club Scrap Craftalong Olympics! We've had some folks take on the "Craftalong" challenge, and you can read all about it on our Coffeehouse Chat forum. Check it out HERE. Several gorgeous and inspiring projects are already on display. I just love seeing what others have created, don't you?

So, what, you may ask, is MY goal for the Craftalong Olympics? I have set a goal to complete three gifts I started a few weeks ago. My best friend's daughter got married last year in Las Vegas, and had a reception last summer to celebrate with friends and family. Her son just got married in a small, private ceremony on June 18. She sent me the photographs from both occasions asking if I could do "something cool" with them.

So, I came up with an awesome idea of how she could have photos from both wedding in albums, yet on display. I wanted the albums to be similar (you gotta do the "same" thing for each kid and keep things as equal or "fair" as possible, right?), yet different enough to represent the individuality of each couple. And, because I just happen to have full access to the photos, I thought I might as well make a photo keepsake for her son and his new wife, as my gift to them. So, that's 3 projects to finish before the end of the Olympics...whew!

Well, I'm happy to report that the photo keepsake for her son is completed, and I'm about half-way done with the 2 albums. I can't wait to take pictures of the projects and share them with you...but since these are gifts that haven't been given yet, I'll have to wait until after they are shipped.

So what projects do you have "in progress"? I'd love hear what you're working on!