Good Monday Morning Everyone!
Club Scrap introduced a new line of
Neon Dabbers at this year's annual
Retreat. These colors are so amazing and I had so much fun experimenting with different ways to use them. I found this fun technique called
Stained Glass using Crystal Effects (which I did not have). I decided to substitute
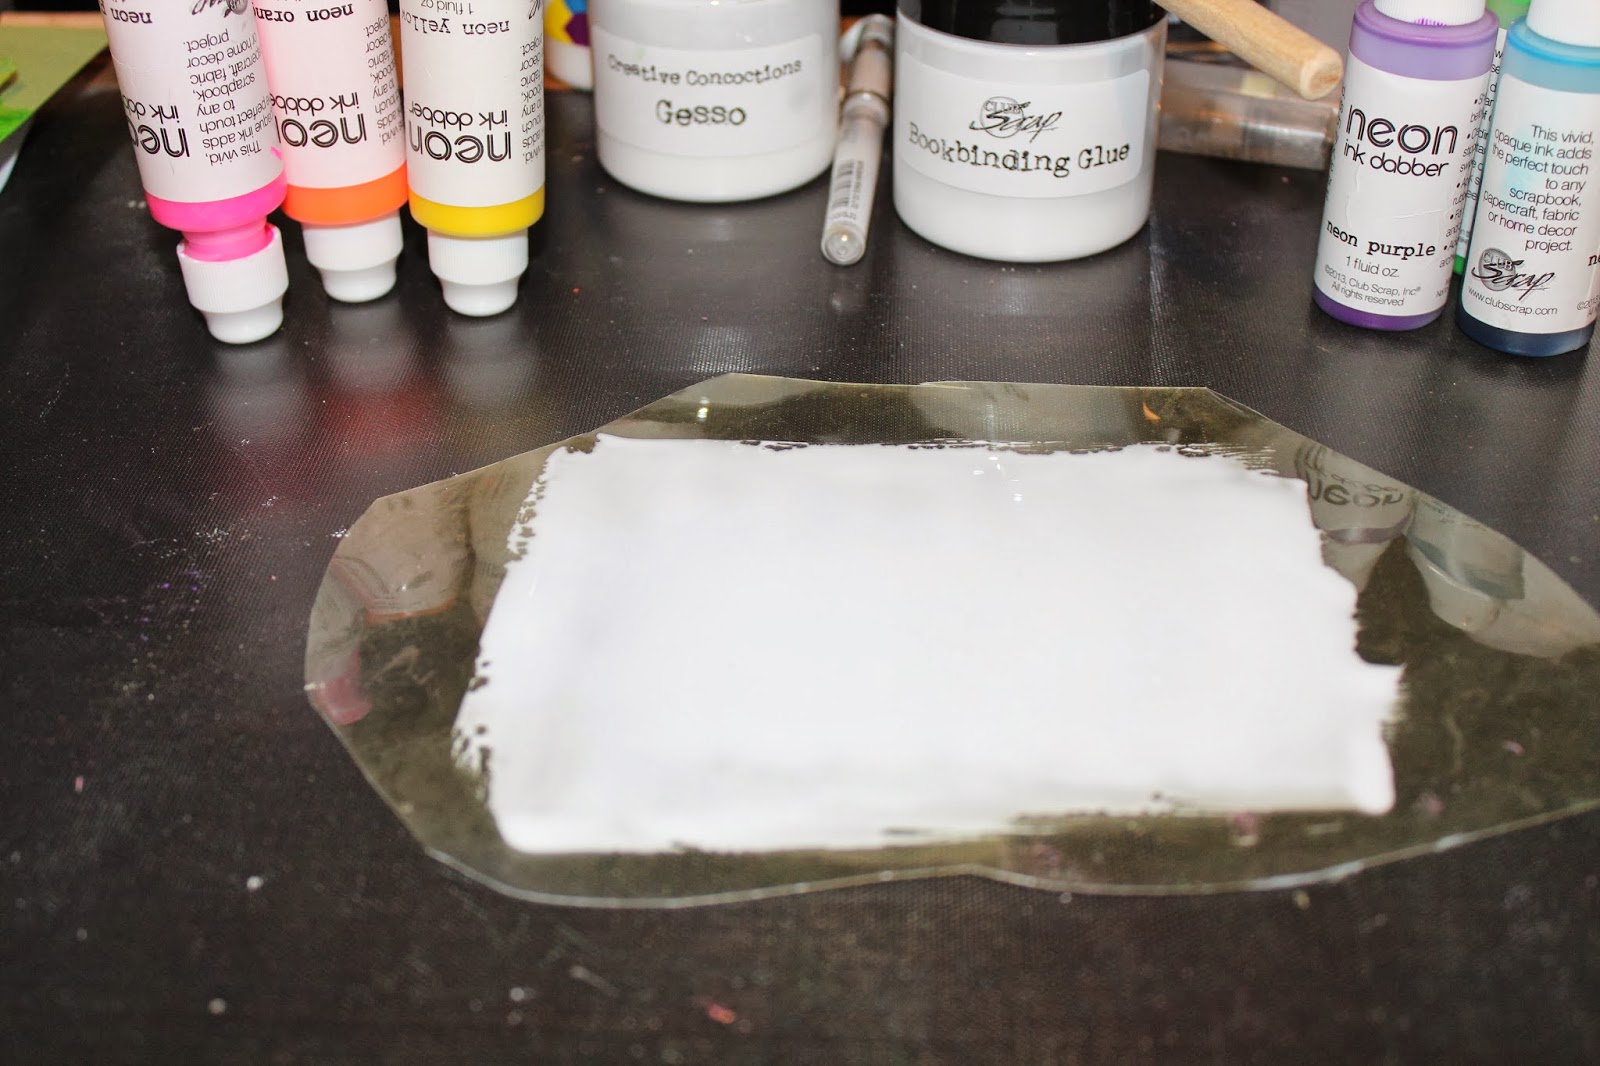
Club Scrap's Book Binding Glue and was thrilled that it worked perfectly. I took this technique in a different direction and came up with my own spin on it.
Here are the steps I took in creating my version of the Stained Glass technique.
* NOTE - if you want to save this blog post as a PDF or Print it out for future use click on the icons at the bottom of my post under my photo. If you don't see them, make sure you are only viewing this post by clicking on the Blog Title.
 |
| Squeeze out drops of neon inks onto the glue. |
 |
| Drip white gesso (Retreat 2012 Creative Concoctions workshop) onto neon inks. |
 |
| The inks and gesso move and blend together. |
 |
| Precut four glossy cardstock panels 4 x 5.25" and place each panel one at a time face down onto the plastic. |
 |
| Carefully peal away and set aside to dry. |
 |
| Continue the same process with all 4 panels. |
 |
| Create a new palette using the purple, blue and green neon dabbers. |
 |
| Each panel is unique and when dry has a glossy shine. |
 |
| Choose 2 panels, ink the edges using a coordinating neon ink pad. |
 |
| Create two A2 card bases using the Fire and Ice blue and yellow cardstocks. |
 |
| Stamp the Fire and Ice quote onto a white panel. Stamp images onto the Stained Glass panel using a black permanent ink. Add a coordinating fiber from the kit. |
Thanks so much for stopping by and hope you will give this fun technique a try.
Julie


Oh, my gosh, Julie! This technique is SO incredible!!! Thank you for the detailed steps and instructions!
ReplyDeleteThis is so cool Julie! And I have everything to recreate - yay! This is such great take on the card sketch as well. Hope I can play with this technique soon!
ReplyDeleteYou'll need some baby wipes after that one!
ReplyDeleteLOL Janet, I just ran that piece of plastic under warm water added a little soap and I was good to go for the second set of colors. :)
DeleteJulie you never cease to amaze me. Great technique!!
ReplyDeleteDid you use the dabbers to add the ink, or dripped re-inkers? When you say "drip" them, I wasn't sure how to do that with the dabbers...or do you just pounce them?
ReplyDeleteHi Pam, I used the dabbers and squeezed the bottle while depressing the "dabber" mechanism using a craft stick. I didn't purchase the re inkers. They would be a lot easier to drip. LOL
DeleteThat is so cool! I'm debating what I can buy from the Pro Shop right now.
ReplyDeletehow cute
ReplyDeleteWay cool! Hope to try this soon! :)
ReplyDeleteStaci, it worked!! :) Glad you are able to leave a comment now!!
DeleteThis absolutely awesome! I gotta try it!
ReplyDeleteGreat technique, Julie and it makes wonderfulcards!Thanks for teaching us how to do this.
ReplyDeleteThis is SO VERY COOL...I love having more great techniques for my Neon Ink Dabbers. Can't wait to play this weekend!
ReplyDeleteGreat cards thanks for the tut!!
ReplyDeleteWow, fantastic technique, and I'm thrilled that we can now save these posts as PDFs. I have links stashed all over the place to blog posts I wanted to keep. Now I'm going to go back and turn them all into PDFs. :)
ReplyDeleteIsn't that so great Lucy, I Love this new feature too!
DeleteI've spent the last 1.5 hours going back and PDFing older posts. blush
DeleteOOOOOH!! Can't wait to play with this one!!! Thanks, Julie!!
ReplyDeleteGorgeous! Can't wait to try this!
ReplyDelete