

Your 12-pack of 8.5x11 papers and Red Pearl Bonus Panels included in the Big Deal Club Stamp collection will make fourteen nifty cards. Twelve are standard A2, and two are A7s. Let's begin with the trimming preparations.
1. Trim each 8.5x11 Text Weight Print vertically at 4.5 and 4". Cut each 4x11 horizontally at 5.75 and 5.25".


3. Trim one 8.5x11 Yellow Plain vertically at 7". Cut the 7x11 at 10". Trim the 1.5x11 horizontally at 9, 7, 4.75 and 2.5". Score and fold the 7x10 horizontally at 5".

4. Score one 8.5x11 Tan Plain, one Grey Plain, two Red Plains and two Tan Prints vertically at 4.25". Cut each paper horizontally at 5.5". Fold each 5.5x8.5 in half to make a card base.


6. Cut one 8.5x11 Yellow Plain horizontally at 8.75 and 5". Trim the 5x8.5 horizontally at 7.5 and 3.75". Cut the 3.75x8.5 horizontally at 5". Trim the 2.25x8.5 horizontally at 8 and 4".

7. Trim one 4.25x6.25 Red Pearl Panel horizontally at 5.75 and 3". Cut the 3x4.25 horizontally at 4 and 2". Trim the 2.75x4.25 horizontally at 3.5 and 1.75".

Now that you have a big 'ole pile of pieces, the fun can begin!
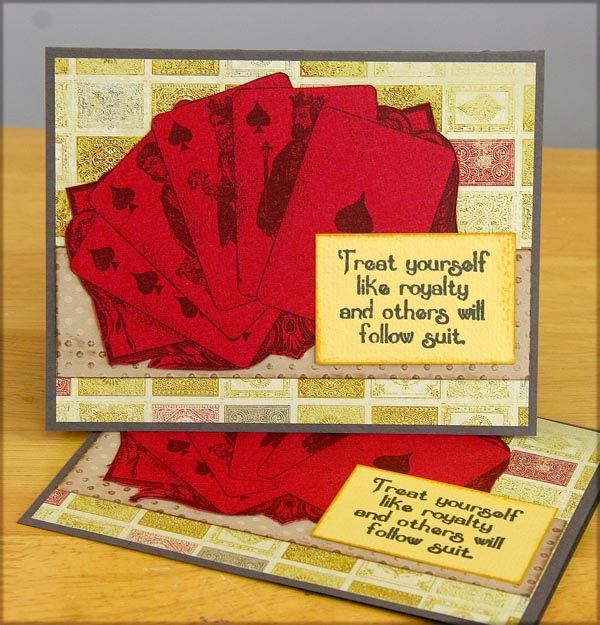
The pre-printed text weight panels were stamped with the large images from the Collection UM sheet. I like how the transparency of the ink allows the pre-printed pattern to show through.
 |
| CS Ruby and India Black ink used. |

The collection comes with a 5-pack of Red Pearl panels. Here, I stamped onto the dark red side and trimmed out the image. It's a fun combo with the quote.

I think this pair is my favorite. I used the large punch on the Crop-A-Dile to create tiny red circles from a scrap of the Red Pearl panel and attached them to the Bingo image with Bookbinding Glue. These cards appear to have lots of dimension but will mail nice 'n flat!


The White Pigment ink from Club Scrap did a splendid job transferring the nice detail on the UM image of the cards featured on the Greeting UM sheet.


This is where things got "dicey." The Tan Print helped these cards fall together in a shake. I used a cute heart-shaped brad to accent the "o" in "love."


There's something about a rounded corner that just makes me feel happy. And I love that neutral scroll image from the UM Borders & Backgrounds sheet. I'll be reaching for that one frequently.


I'm usually running out of steam by this point, but simply had to use that hysterical joker. I think it's the perfect card for my dad. I'll have to set that one aside. Note the pretty gold-laden sheer white ribbon we picked out for the set. Such a nice addition!


Time to get busy. Be sure you're playing with a full deck before you tackle the paper trimming!
Tricia
I am really liking these monthly card formulas, I have been making a ton of cards and I really love it. Thanks!!
ReplyDeleteThanks for more terrific instructions Tricia! Love the cards!
ReplyDeleteI rarely play with a full deck but I'll try!! Thanks for the formulas as always!
ReplyDeleteSuggestion - I love these formulas so much. I was thinking it might be nice to have a quickly-downloadable PDF version available, rather than having to piece it together myself. Yes, I know you can sorta do it with the PDF program, it would just be nice to have. You could link it back on the Instructions page of the website, with the GTG and kit instructions. Thanks for listening!
ReplyDeleteLove the cards, thanks! I second Pam's suggestion, and would add that making any set of instructions into an easily downloaded and/or printed PDF would be fantastic.
ReplyDeleteI third Pam's suggestion. I can never get things to print right from the blog. But thanks for a new formula! I want to give it a try!
ReplyDeletesdscrapper
P.S. Just downloaded this and it came out perfect. No extraneous stuff.
ReplyDeleteThese card formulas are so helpful and also work with older kits prior to GTG instructions.
ReplyDeleteI love these formulas. And your sense of humor.
ReplyDeleteI'm not sure that I am ever playing with a full deck, but this kit sure is fun.
I like these cards and the formulas.
ReplyDeleteOk. I use to get a "pdf" link at the bottom of the post. How do you download these?
ReplyDeleteI also enjoy getting these formulas.
OOps.....I posted that comment and then looked up and see the pdf link. Don't know why I could see it before.....
ReplyDeleteTo activate the "Print PDF" button, it is necessary to be "in" the post and not just browsing the blog. You can get there by simply clicking on the title of the post, and the print option will appear.
Delete