
Use your favorite program that supports layers (I'm using Photoshop CC).
1. Create a 5x7, 300ppi document to create the base of a card.
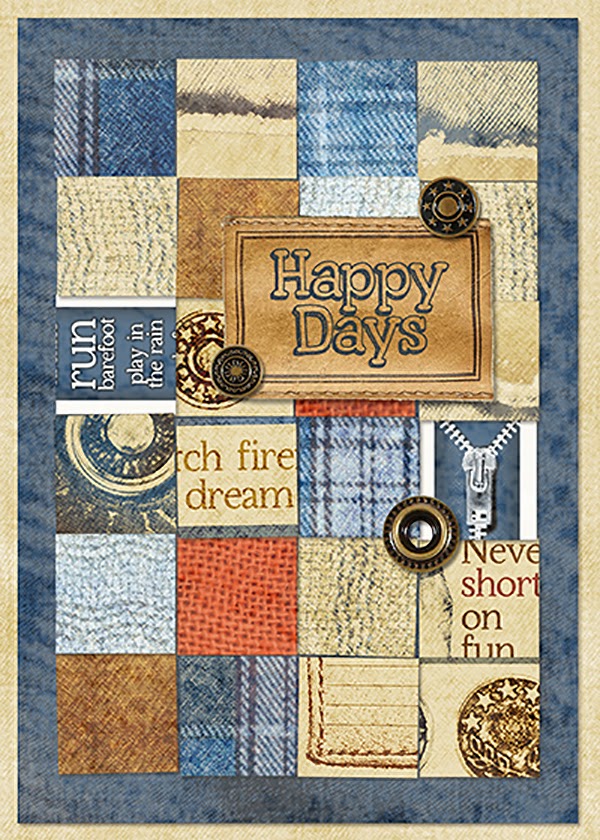
2. Add background and matte layers with the Club Scrap Digital Dungarees Kit.

3. Open a variety of Background & Xtra files including fibers. These will be the 1" squares.
4. Select the Marquee tool and adjust the Marquee settings to 'Fixed Size' with 1" width and height.
5. Select a Background or Xtra and click anywhere to select a 1 inch square.
6. Switch to the Move (pointer) tool and drag the square to your card.

7. Repeat steps 4-6 to select different squares. Note: you won't need to adjust the marquee settings once you've set it the first time.
8. Continue until you've created 24 squares.
9. Line up the squares, but don't worry about getting everything perfectly aligned. It actually looks a bit more natural if the columns and rows are a bit askew. You can also slightly rotate a few of the squares as well.

10. Add a slight drop shadow to one of the squares.
11. Copy the drop shadow layer style from the square in step 10: Layer -> Layer Style - Copy Layer Style.
12. Select all of the other square layers and the matte later and paste the layer style: Layer -> Layer Style - Paste Layer Style.

Next, create the acrylic paint wash:
1. Select a pale beige color.
2. Choose the Brush tool and select a large (approx. 450 pixels) chalk brush.
3. Create a new layer above all the square layers.
4. Click, move to a new location and click again, laying down color over the entire surface. Don't drag the brush, as that will apply too much color.
5. Repeat step 4 until the layer is well covered.

6. Select the matte layer and Command+Click (Mac) or CTRL+Click (Windows) in the layer thumbnail. You'll see marching ants around the matte layer.
7. Select the paint wash layer and Select -> Inverse.
8. Press the delete key.
9. Lower the opacity of the paint wash layer to around 25% (you may need a higher or lower opacity depending on the color you chose and how much coverage you had on the layer).

To finish the card, add a sentiment and some embellishments and you're done!
I hope you enjoyed this paper-inspired digital card. Thanks, Kay!!
Until next time,

-Ron
AMAZING RON!! I just love this tutorials, really makes it looks so easy. The card is wonderful!
ReplyDeleteLOVE it Ron! You digital mastermind you! Great idea!
ReplyDeleteI don't do digital, but it looks Awesome!
ReplyDeleteawesome!
ReplyDeleteAmazing design. Love the technique!
ReplyDeleteLove it Ron! Thanks for sparking my creativity!
ReplyDelete