
Shall we get some exceptional mileage out of our Oopsie Daisy Club Stamp collection? Our 12-pack of papers will make a beautiful batch of cards!

Before we get started, you'll have to do the "thinking" part. Let's get that out of the way.
1. Score one 8.5x11 Grey Print, one 8.5x11 Grey Plain, two 8.5x11 Green Plains and two 8.5x11 Caramel Plains vertically at 4.25". Trim horizontally at 5.5". Fold each 5.5x8.5 along the scoreline to create a card base.

2. Trim one 8.5x11 White Text Print vertically at 4.5 and 4". Cut each 4x11 horizontally at 5.75 and 5.25".

3. Oh, crap. What was I thinking?
- Trim one 8.5x11 Text Weight Print horizontally at 10.5, 9, 7.5, 6.5, 5.5, 4.5, 3.5, 2, and .5".
- Cut two 1.5x8.5 strips horizontally at 7 and 1.5". (Be sure the strips have different artwork.)
- Trim two 1.5x8.5 strips horizontally at 7, 5.5, 3 and 1.5".
- Cut each 1x8.5 strip horizontally at 5.5 and 3".
- Fold each 1x3 piece in half. (You can stack up to four strips at a time.) Cut a "v" into the folded edge to create banner-style pieces.
- If you like, punch a few daisies from the 1x2.5" pieces.

Here is the same cutting diagram superimposed onto the print.

4. Cut one 8.5x11 Charcoal Plain vertically at 8, 5.75 and 3.5". Trim the 3.5x11 horizontally at 10.5, 7 and 3.5". Cut each 2.25x11 horizontally at 9, 6.75, 4.5 and 2.25".

5. Trim one 8.5x11 Charcoal Plain horizontally at 10 and 5". Cut each 5x8.5 horizontally at 7.5 and 3.75". Trim each 1x5 horizontally at 4". Cut the 1x8.5 horizontally at 8 and 4".

6. Cut one 8.5x1 Grey Print horizontally at 10.75 and 5.25". Trim the 5.25x8.5 horizontally at 8 and 4". Score and fold the 5.5x8.5 horizontally at 4.25".

7. Trim one 8.5x11 Grey Plain horizontally at 9.25, 7.25 and 5.25". Cut the 5.25x8.5 horizontally at 8 and 4". Trim each 2x8.5 horizontally at 8, 6, 4 and 2".

Now you can sort out the pile of wonderful pieces and turn them into some great cards!

 |
| Alternate the patterns of eight banner pieces onto the Charcoal panels. Stamp the sentiment with White Pigment ink. Staple a piece of ribbon to the lower left banner. |

 |
| Stamp onto the patterned paper with a large daisy and India Black ink. |
 |
| Add a punched daisy, if you like. |
 |
| Place mini brads in each corner of the stamped Grey panel. |
 |
| These will make great anniversary cards! |
 |
 |
| Layer one each of four different 1.5" squares on the Charcoal square and add a matted sentiment. |
 |
| Stamp and emboss the large framed image onto the Charcoal panels with gold powder. |
 |
| Trim around the frame with a craft knife; cut around the daisy petal on the outside of the frame. |
 |
| Mask a vertical and horizontal area of the Grey panels and sponge with Topaz ink to create a band. I used washi tape for my mask. I have a roll with a design I probably wouldn't use for anything else . . . |
 |
| Stamp an image over the inked band. Outline with glitter glue. |
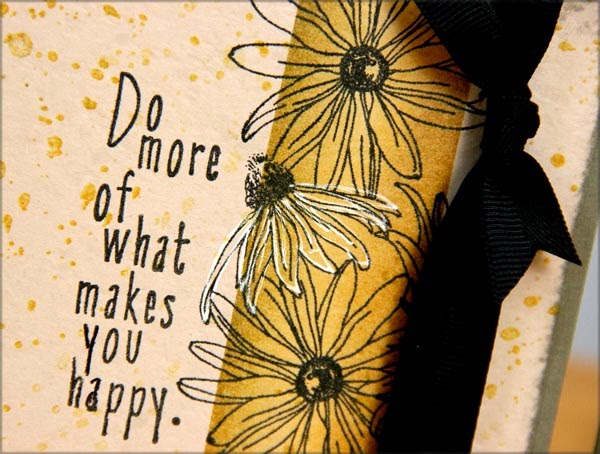 |
| Enhance one of the stamped daisies with a white gel pen and add ribbon. |
 |
| Thirteen great cards from twelve sheets of paper. |
Tricia

OMG! These cards are amazing!
ReplyDeleteWOW!!! just lLOVE this formula!!! Great cards,Tricia.
ReplyDeletelove the cards with this formula!
ReplyDeleteTricia, love the video first of all, need that with all those fun cuts, and secondly your cards are AMAZING! Love that you used the scraps for punched flowers and the cutting of those banners, brilliantly efficient!
ReplyDeleteAmazing!
ReplyDeleteOooh, I love these! I'll be needing the Stamp paper... again....
ReplyDeleteThe cards are wonderful. I love how you went beyond the usual way of using the CS stamp text weight paper. TFS
ReplyDeleteI think this is one of my new favorite formulas, even with the "break yer head" cutting instructions. Worth the effort. And Oopsie Daisy is one of my mostest favoritest recent kits. Every time I see them (even months down the road, like now), I still sigh with contentment. I hope this kit is resurrected again in some form again, sooner than later. :)
ReplyDelete