Showing posts with label Serenity. Show all posts

Monday, September 16, 2013

Let's Take A Walk

Good Monday Morning Everyone!
Let's take a walk.

Last Wednesday night was another fun Scrapbook Pajama Party hosted by the talented Tiare of iClassygirl.com. She posted a sketch for us to follow and I created my layout based on her ideas and that sketch. 

Check out this LINK for more details on the sketch and on how to watch the recorded show.

Here are the steps to complete the layout.
Choose papers from the Patterned Brights collection,
two 4x6 dk. gray photo mats and a 12x12 blue cardstock from the Serenity kit.
Print out butterfly collage stamp from the Papillon digital kit.
Color with water brush and coordinating metallic Gelatos.
Detail of the painted butterfly.
Fussy cut your butterfly and "ink" the edges using a brush tip black marker.
I love these butterflies!  
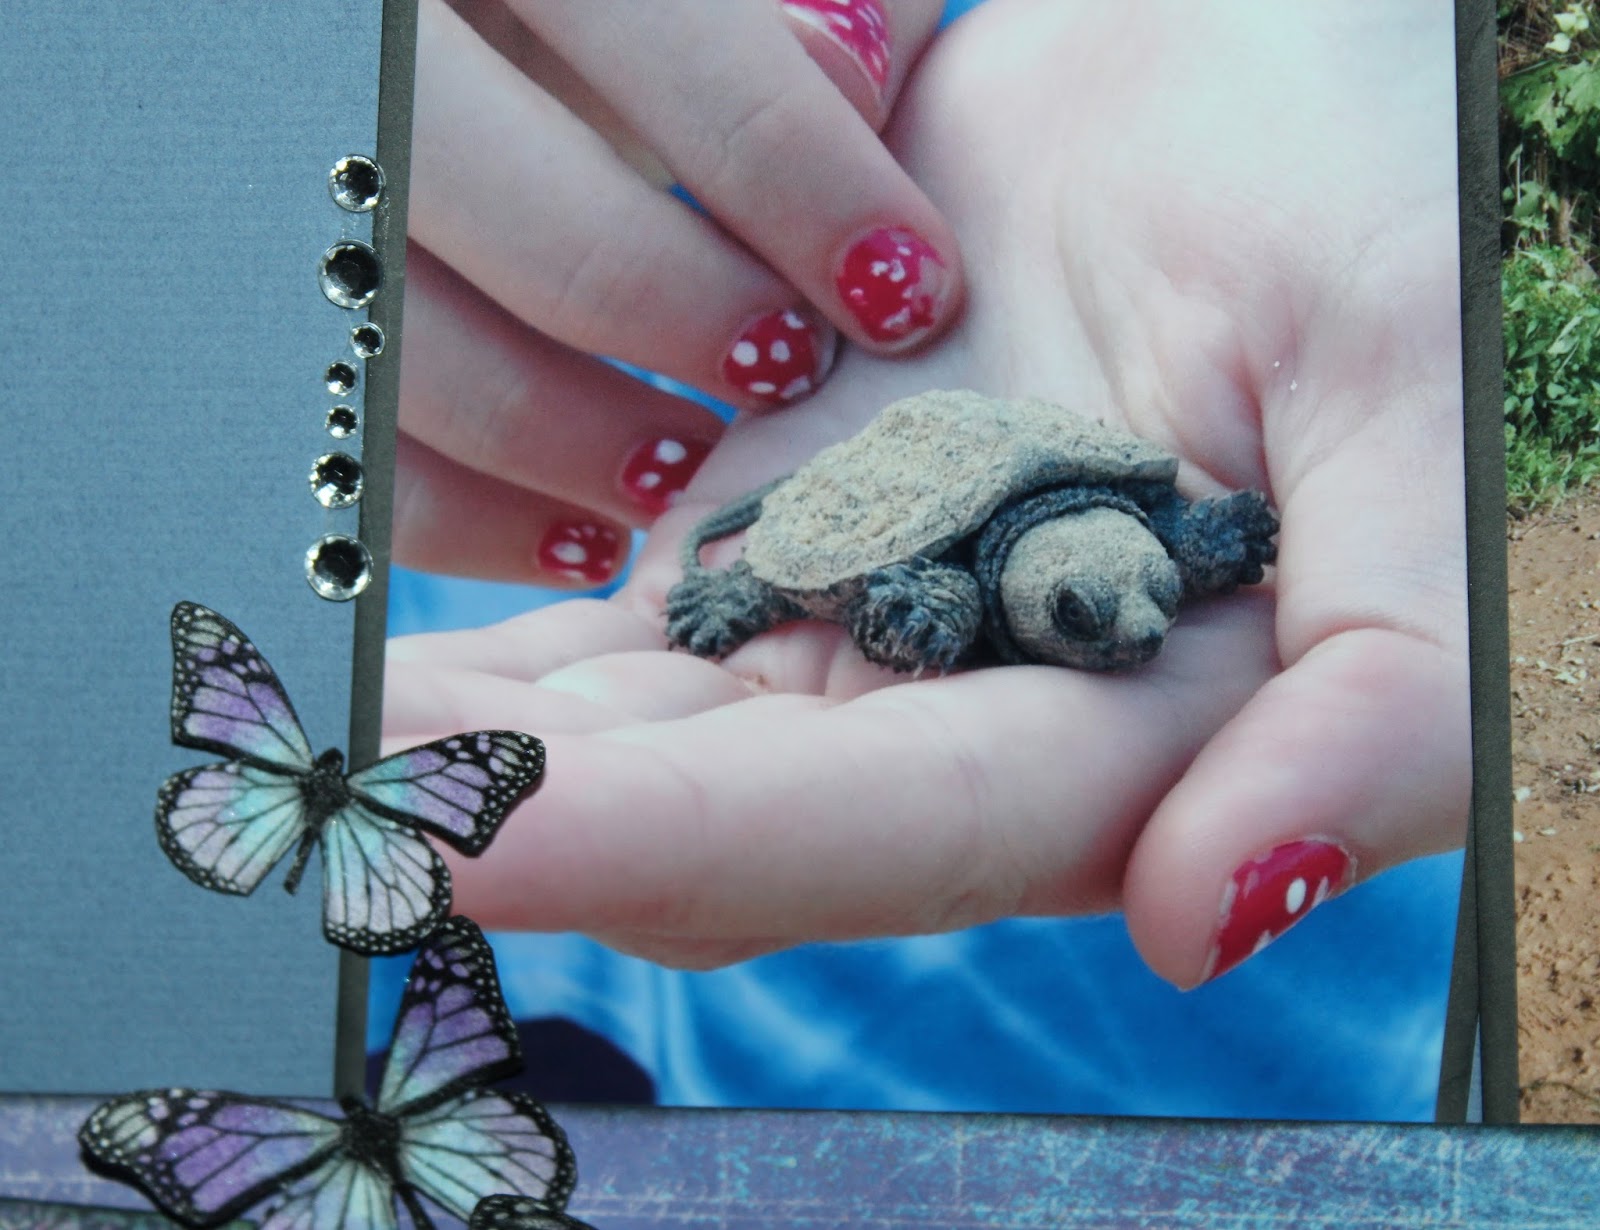
Baby snapping turtle
The back story of my layout:
My niece, daughter and I took a walk last weekend around the cranberry bog and pond by my home. We were amazed to find this tiny snapping turtle on the dirt road path around the bog.  My niece is a turtle lover and was just captivated by this little one. We decided to make his journey to the pond a little shorter by giving him a lift. What an amazing experience.

Other supplies used in this layout:
Thickers from Club Scrap 2010 Jubilee kit
Recollections rhinestones
Black cat's eye chalk ink by Colorbox
Uniball Signo white journaling pen

Thanks for stopping by and hope you have a great week!


Julie

Tuesday, December 25, 2012

Merry Christmas, Bloggers!


Most of you are probably all snuggled in for the day with your families, but eventually you might hop online and check in with the outside world. Just in case, we wanted to have something here for 'ya!

First of all, Merry Christmas!

In case you're new around here, CS® creates formulas that help make efficient use of your time and supplies. In addition to the Assembly Line Scrapbooking instructions made specifically for each collection, your membership also includes a monthly layout card.

(When your kit ships on the 1st, 15th or 20th of the month, members receive an email containing a link so that you can view/print the instructions.)

The fun part is that you can use any formula with any set of papers, embellishments, stamps, etc. These little instructions are a great resource for when you're experiencing a creative drought. Gather up the papers listed for making the layout, trim according to the instructions, and assemble. By then, your inspiration is sure to kick in, and you'll be able to add photos, journaling, a title and a few embellishments.

So, here's how it went for me today. I'll note the time stamp on the photographs I took during the process so you can see how quickly it works!

11:30am Select photos from the stash and confirm that they'll fit will onto the layout plan.

11:33am Select the paper collection to match well with the photos. I chose to go with the Serenity kit and picked out the four sheets required for the layout.


11:35am Next, trim the papers according to the instructions/diagrams.

11:37am Arrange the trimmed elements onto the page while consulting the diagram.


11:40am Trim the photos to fit onto the mattes. (Subtract 1/4" from the length and width of the matte.)

11:44am Adhere everything to the page.


11:49am Creativity is kicking in . . . look at how those circular Dazzle stickers from Aurora Borealis fit onto the 12x12 White Print from Serenity!

11:50am Add the sweet "serenity" ribbon from the JR collection beneath the featured photo.

11:54am Add a few captions to the photos and stamp a UM Serenity image above the border strip on the left side. And . . . done!

Tah-dah! Two pages completed in less than 30 minutes. Time for lunch!


With the Pro-Scrapbookers League (PSL) coming up, think about pre-making several batches of layouts inspired by the instructions you already have on hand.

Best wishes for a creative holiday and a happy new year!
Tricia

Wednesday, November 21, 2012

November technique: GESSO

Happy Wednesday everyone!

Hetty here with a photo tutorial for using the gesso we made in the retreat Creative Concoctions workshop. Or maybe you have gesso on hand but never knew what to do with it!

Over at the Club Scrap forum, I post a technique every month for you all to try. This way you can see what others do with the same medium. You can find the technique of the month HERE.

There are many ways to use the gesso and here is one:

1. Begin with two pieces of cardstock trimmed to the same size. I used a 4-1/4x5-1/2" piece so that I could use it on a card. Put a blog of gesso on each piece of cardstock.

 2. I use an old credit card to spread the gesso on the cardstock. Not a too thin layer, make sure the gesso is everywhere.
 3. When still wet, put the two pieces on top of each other on the gesso side.
4. Rub it in gently and then slowly take them apart.
5. You see now that on both pieces you have structure in the gesso. Let it completely dry before going on. You can use your heatgun or do this before you go to bed and use the pieces the next morning.
 6. There are all kinds of mediums you can use to color the gesso. I love the new metalic stains and combined it with vintage distress ink to color this background.
7. Now stamp on it with black archival ink. You can also add some cut out pictures or photos. It is great for art journaling.
8. And here is the finished card. I added some glitter glue.
 9. Another way to color the gesso is with your watercolor crayons, a brush and water.
10. After you have colored the background, you can use your stamps in black or in colors.
11. This is the finished card.

Want to see some more gesso techniques? Please come and visit the technique challenge at the Club Scrap forum.

Have a creative day!


Thursday, September 27, 2012

Digital 'Adhesive'

Happy Thursday, everyone! Ron from Club Scrap here with a new digital tutorial for you today.

We all know that paper crafters use a variety of adhesives for making layouts, cards and projects, but you don't normally think about digital crafters needing adhesive, right? Well, today we're going to look at one way to make digital 'adhesive tape' that can be used to add an interesting bit of embellishment to your digital pages and cards.

As always, I'm using Adobe Photoshop 5 to do this, but any program that supports layers should work for you - you may need to modify the steps to accommodate the particular program that you're using.

1. Create a new document, 12x12, 300 ppi, transparent background.

2. Open a background of your choice - I'm using one of the backgrounds from the September Club Scrap Digital™ Kit, Serenity.

3. Drag the background onto your new document (in Photoshop, if you hold the Shift key while you drag, the background will center itself in your new document). Once you drag the background over, you can close the background file.

4. Create a new layer on top of the background.

5. Magnify your layout to zero in on an area - this will help you better see what you're working on.


6. Using your marquee tool, create a rectangle that's about 2 inches long and 1/2 inch high.

7. Use the Fill command (Shift-F5) to fill the rectangle with the color white.

8. Deselect the rectangle (Command/CTRL-D).

9. Use the Polygonal Lasso tool to select a zig-zag area on 1 edge of the rectangle, then delete the selection.

10. Repeat step 9 on the other edge of the rectangle.

11. Reduce the opacity of the rectangle - try around 30% opacity, but this may vary depending on the color of your background.

12. Use the Layer Style Command to set Inner Shadow, Bevel & Emboss, and Drop Shadow, using the parameters shown below. This will add depth and realism to your piece of tape.
Inner Shadow Settings

Bevel & Emboss Settings

Drop Shadow Settings

13. Place the 'tape' on the corner of a photo, rotating it as needed.

14. Make additional pieces of tape as needed for the other corners of the photo.

Tip: Make tape in different sizes and colors and save them all in a single PSD file to use as 'ready to go' elements. Experiment with different opacity, and Layer Style settings to vary the look of your tape pieces.

Hope you enjoyed this quick look at making and using your own digital adhesive! Now go and make something digital!

Tuesday, September 25, 2012

Serenity Shutter Box Project Video

Hey, Bloggers . . . Tricia here!

Once a month, Kay and I duck into the studio and create the Club Stamp Project together. It's always a good time. Sometimes we start having so much fun that Kay forgets to snap the picture!

We take tons of step out photos, and I always say, "Better to have too many than not enough."

Armed with more than seventy pictures, I started to write the instructions for the Serenity Club Stamp project. We were able to narrow it down to a mere 33 steps! The aim is to write steps that are clear, concise and brief supported by a photo that tells the story.


But a video just tells it so much better.

Even with agressive editing, the video didn't make it under YouTube's fifteen minute limit, so you'll find it hosted on Vimeo.

You can pick up the full Club Stamp kit or the "nekkid" components in the GHM! Dept. And don't forget the Bookbinding Glue!


Here's the video. We hope it helps make this project even more fun! (More fun than that heartbreaking loss against Seattle last night.)

Friday, September 7, 2012

Remember September

Happy Friday greetings from Kay today!

School is underway, fall is in the air already, and I don't want to let September slip away too quickly! So, I'm slowin' it down by revisiting Club Scrap Septembers.
First and most fresh in our thoughts is this month's Serenity. Have you gotten the chance to bust into your Serenity Kit yet? Don't let the month slip away without doing so.

My nephew was blessed with a baby boy recently, and the Serenity papers are perfect for the baby boy pics! Oh, and that's my dad. He'll be 94 in October, and he's finally a great Grandpa. Isn't he a handsome guy?


Then, backing up to just last September, the Orient Express Kit. This is Marilee's annual lemonade stand that we set up every year for Appleton's Art in the Park. She happens to be with Karen's daughter, Emma.


2010 September brought us Adobe. This 12x12 Adobe layout Tricia did made me smile when looking through the CS Community Art Galleria. That dog Flanagan just makes 'ya smile.

Emily and Flanagan

Hmmm, and what did 2009 September bring us?...can you remember?
Birds Of A Feather!!! Grandma Williamson always gets Marilee's birthday cakes. (I make the scrapbook pages.) I just loved that striped grosgrain ribbon in the embellishment pack. And I used the Unmounted Font from Birds of a Feather to make the page title.

Birthday #8 - 8.5x11 Layout

I hope you have some September favorites, too. After all . . . there are 13 years of them here at Club Scrap!

Wishing you a great September, enjoy the serenity of the month.
Kay Williamson of Club Scrap