Showing posts with label Wisteria. Show all posts

Wednesday, July 31, 2013

Wisteria Blog Hop!

Welcome to the Wisteria Blog Hop. This month is our sixth hop already, and our list of participating bloggers continues to grow! Please help us welcome two new bloggers: Tiare and Vicki. I can't wait to see what they have in store for us.

I've been making so many cards lately that I'm afraid my albums are feeling a bit neglected. With that in mind, I decided to make scrapbook pages this month.

I absolutely love ALSB (Assembly Line Scrapbooking). You can get so much done in so little time, but sometimes I forget about the Layout Cards designed for our membership each month. Much like our Idea Decks, the Layout Cards aren't "paper-specific", so you can use them with any papers in your stash.

Up, Up and Away Layout Card

While exploring the past few months' Layout Cards, Up, Up and Away's caught my eye, so I paired it with papers from the Wisteria Club Scrap kit. All I had to do is gather the appropriate papers, trim them according to the instructions, and assemble.


I just love how these pages came out, don't you? The photos of my daughter, Emma, paired with the Wisteria prints perfectly! I really didn't need to do much to finish up the pages; just tinted the white silk flowers from the CS kit with my hybrid inks, added the LOVE sticker from the Lite kit, and channeled my inner "Kay" by adding a wee bit of glitter glue. I think the whole process took me about 30 minutes, start to finish!

So are you ready to see what our other bloggers have in store for us today? I've listed all of our bloggers below, just in case you lose your way.

Club Scrap Creates (you are here)
Julie Heyer: Cape Cod Scrapper
Roni Johnson: Ink Stains with Roni
Deb Charlesworth: Lift Bridge Cards and Crafts
Wendy Bellino: Made by Wendy Bellino
Deb Weller: Deb Duz Scrappin
Jill Pechauer: JillP's Place
Tricia Morris: TheEfficient Crafter
Hetty Sanders: Craft Chaos
Kay Williamson: Kay's Keepsakes
Cathy Gray: The Artful Gamut
Anne Marie Healey: Artfully Balanced
Anne Hunter: Crzymom'sTidbits
Jen Rodgers: ScrapHappy Sisters
Debby Hernandez: MasculineInspirations
Janet Moran: Dishingwith Janet
Tiare Smith: iClassy Girl
Vicki Terlap: Joyful Whimsy


In the mean time, your next stop is the uber-talented Julie over at Cape Cod Scrapper. Enjoy the Hop!

Creatively yours,
Karen

Tuesday, July 30, 2013

Stamp-free Wisteria Card

I came upon a cool idea on Pinterest for a card that featured free-hand cut openings showing patterned papers beneath. I thought it would be fun to give it a try with the Wisteria papers (and the Tribal papers releasing on Thursday!)

Here's how the Wisteria version turned out . . .


Supplies used:
Wisteria Printed and Plain Papers
White Gel Pen
Craft Knife and Cutting Mat
Pencil
Tape
Scissors

See? No stamps!

1. Free-hand cut random shapes from a 4.75x6.75" Dark Purple Panel.
2. With the back side of the cut panel facing up, layer it onto the plain side of a print and trace assorted shapes onto the print with a pencil.
3. Trim out the shapes with a scissors, being sure to cut the shape slightly larger than the outline.
4. Tape the corresponding shape behind the opening in the panel.
5. Use a white gel pen to add stitch marks around the perimeter of each cut shape.
6. Add a decorative text panel. (I used an Ivory cutapart.)
7. Nest the whole works onto a folded 5x7" card.

Back side of the card panel with the shapes taped into place.
This card was tons of fun to make! And quick, too. What do 'ya say? Give it a try!
Tricia

Thursday, July 25, 2013

Playing with Wisteria Digital

You may not know this, but I was away on vacation for the past couple of weeks. I did write a few blog posts ahead of time and I got them all loaded up & scheduled so it still appeared that I was posting every week - I couldn’t leave you hanging on Thursday’s for 3 weeks now, could I?

I spent 2 weeks in the Mediterranean on a cruise aboard the brand new Royal Princess and I gotta tell you, I had a great time! But I didn’t take my laptop with  me - I was on vacation, after all! - and I really didn’t get a chance to play with the Wisteria Digital Kit before I left. So I thought I’d share a few layouts with you - they all use photos from that amazing cruise, too!

First up, a Wisteria Quick Drop Digital Layout (QDDL) of one of my favorite spots in the Med - Mykonos, Greece:


Next, another QDDL of dessert from one night on the ship:


I gotta tell you, I love to use QDDLs - they’re just so quick and easy to use - I made both of these layouts in about 10 minutes - it took longer to pick the windmill photos than it did to make the layout!!

Last, a layout from scratch - this time using my favorite subject matter - a door! This door is in the beautiful town of Le Castellet in the Provence region of France:


Whew! I feel much better now - I’ve played a bit with this amazing kit and I’ve started scrapping my photos from vacation! How cool is that?

If you haven’t picked up the Wisteria Digital Kit yet, what are you waiting for? Go get it and create something wonderful!


-Ron

Tuesday, July 16, 2013

Watercolor Window Frame Technique

This is a Pinterest-inspired idea I've been wanting to try for a while. It sort of took on a life of its own. I like it when that happens.

1. Ink a UM Wisteria image with Amethyst and Earth. Stamp into the lower left and upper right corners of a 4x6" White panel.


2. Use a grid ruler and purple watercolor pencil to draw a line 1/2" from the outside edge of the panel. Do not draw the line on top of the stamped images.


3. Lightly blend the line with a water brush. I love that new Faber-Castell water brush. Yep, I do.


4. Use a ruler and fine tipped PITT pen to draw a thin line over the blended line. (Totally optional.)


5. Stamp that sweet unmounted sentiment onto the panel with India Black ink.


6. Splatter the panel lightly with a purple Gelato and waterbush.


7. Shade the outside edges of the panel with Amethyst ink and a handy CS Ink Applicator. Nest the art piece onto a 4.25x6.25" Dark Purple matte and Light Purple card.


And you're done!

I hope you give this a try. It's pretty easy!


Creatively yours,
Tricia


Friday, July 12, 2013

One Reason To Look Forward to Monday!

Greetings Bloggers,

Monday is July 15th. Do you know what that means? It's Wisteria Lite shipping day!


I've taken a few kit spoiler pics to share my excitement about this collection. Don't peek if your kit is on the way and you want to be surprised!


Enjoy the Wisteria Lite Kit on its way to you soon!

If you aren't receiving the kit yet and would like to, click HERE to get things moving. As always, thanks for stopping by Club Scrap Creates!

Wishing you an inspiring and creative day.
Kay at Club Scrap


Tuesday, July 9, 2013

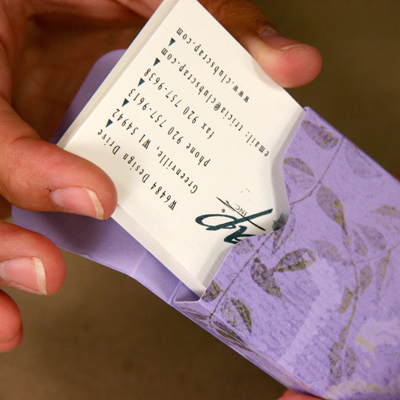
Business Card Holder Tutorial

I was having coffee with a new friend the other day and started searching my purse for a business card. Nothing there. Grrrr! In a pursuit of practicality, I thought it would be useful to make a simple template for a business card holder. I'd put it in my purse. And I'd be able to find the darn things.

It's super cute when made with the Wisteria paper, don't you think? I could make a bunch of them in different colors/themes so that I can have a business card holder wardrobe. I'd be stylin'.

Oooh . . . look at the yummy prints in this collection!
This is how it's done:

1. Trim the 12x12 Wisteria Light Purple Print to 4.75x10".

2. Score vertically at .75, 1.25, 3.5, and 4".

3. Score horizontally at 3.75, 4.25, 8, and 8.5".


Notice the orientation of the paper. The panel size at the top is longer than at the bottom.
4. Use a craft knife, cutting mat and ruler to cut along the score lines as indicated by the solid blue lines in the diagram.  Cut the angled lines with a scissors, if you like.

This photo looks a little funny, but I rotated it so that it would match the orientation of the diagram.
5. Make a notch at 2-3/8" (center) on the top of the paper with an Envelope Punch Board.


6. Use the corner rounder option on the punch board to round the corners of the narrow flap. (Can you tell that I sorta like that punch board?)


7. Fold along all of the score lines. Assemble the little box with your favorite adhesive and insert your business cards. Put them into your purse. You'll be happy the next time you have lunch with a new friend. Pretty soon you'll run out of business cards.


Use some skull sweat and modify the template measurements to create a wee box of your own. What could you use it for? Gift Cards, Scrip Cash, ATC's, etc. Any other ideas?

Have fun and be stylish.
Tricia


Tuesday, July 2, 2013

Scrapbook Layout Sketches Plus

You might not know that every month, in addition to the assembly instructions we provide with your collections, we create a layout sketch.


But this isn't just a sketch.

It's your very own assembly-line-style sketch with precise cutting instructions to help you finish it up in no time without waste! Oh, heavens, don't you hate wasting paper? It's almost as bad as never using paper and allowing it to languish unloved in your stash.

How 'bout we use the new Wisteria Layout Card to drum up some inspiration? (If you're a member of Club Scrap, a link to this sheet will arrive in your email inbox on shipping day.)

Select some brand spankin' new Wisteria papers from the "Gather" list:

8.5x11 Paper A - Light Purple Print
12x12 Paper B - White Print
8.5x11 Paper C - Celery Plain
12x12 Paper D - Dark Purple Plain
(2) 12x12 Paper E - Light Purple Plains

Trim the papers according to the step by step instructions and lay everything out as shown in the sketch. Just remember that this is simply a starting point. Rotating and changing things up is certainly your choice! I added several additional photos to the page. I like how I was able to use 11 pictures without it feeling too cluttered.

And my finished pages! Check out how this Virginia winery created a huge wall hanging above the tasting room bar by stringing corks through fishing line and hanging them to form the word "love."


For the title, paint Thickers with white acrylic paint, stamp with lettering and Amethyst ink, and layer onto a contrasting panel.

With Summer Camp happening right now, take your layout recipe cards for a spin! You'll rack up some points for your cabin in a jiffy!

Tricia

Friday, June 28, 2013

Wisteria Blooms!

July 1st is quickly approaching and the Wisteria Club Scrap Kit will be shipping on Monday! You don't have to wait long!


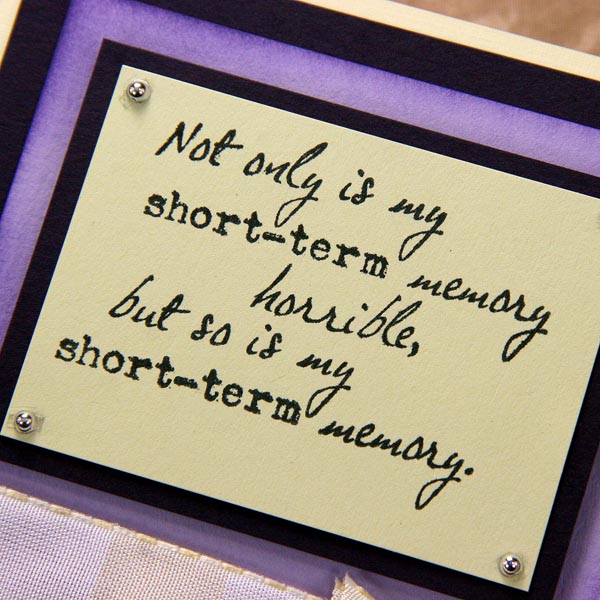
Tricia's fun post on Tues was showing off the great quotes included with the Wisteria unmounted stamps. Luckily, I've also gotten the chance to create a few projects for the Scrap Rap. I'm pretty sure this sneak peek doesn't let the cat out of the bag any more than the one previously shared, so I'm in the clear!


I'm really enjoying the beautiful Wisteria papers, rubber stamps and goodies! I hope you will JOIN us if you have't already so that you can enjoy this bloomin' kit!

Thanks for stopping by,
Kay at Club Scrap


Tuesday, June 25, 2013

Wisteria Spoiler

You're here because I said "Spoiler," right? Thought so.

Or was it because I said, "Wisteria?"

Either way, I'm glad you're here. I'm glad about how this kit is turning out. Like, really, really, really glad.

Wanna see?

I've got a few samples of some of the cards I made this past weekend. I played with watercolor crayons and inks. I also tried to incorporate a few things from my stash at home. If I fail in this endeavor, I will no longer be able to fit my body into my craft room. Can you relate?

From the Unmounted Borders & Backgrounds sheet.

Quote, numbers and images from the Unmounted FontArt sheet.

UM Greeting


All images from the UM Art Nouveau plate.

Part of the CS Collection 6.5x8.5" Unmounted Sheet.

Quote is on the UM Borders & Backgrounds sheet.

Quote from the UM FontArt. Watercolor crayons used.

UM Art Nouveau with watercolor crayons.

Image on background card from Collection UM stamped and embossed with "Purple Foil".  Foreground card images from the UM Borders & Backgrounds. (Rhinestone from my stash.)
Don't miss the boat on this bloomin' collection! Join us today! And if you're not getting every at least one sheet of rubber, you might want to. Just saying.

Spoilingly Yours,
Tricia