


I would bet that everyone has purchased something they just had to have and never got around to using it. For me, it was this filmstrip die by Sizzix & Tim Holtz. It sat in my craft room for years . . . alone . . . just waiting for this month's Cinema kit to come along. A match made in heaven.
I could simply die cut these strips and use them on my page or card, but instead I decided to create something unique and fun -- a homemade embossing plate! Check out this video for more details.
Follow these steps to create a filmstrip plate:
1. Die cut five film strips from sticker paper.


2. Adhere the strips together, stacking them one on top of the other. (Tip: I left the backing on the bottom one until I was ready to adhere to the base plate.)


3. Cut the film strip into three unequal parts.

4. Cut a piece of thin chip board (base plate) to 4x5.25"and adhere the film strip pieces to the board.


5. Create your embossing "sandwich" and run paper through an embossing machine.
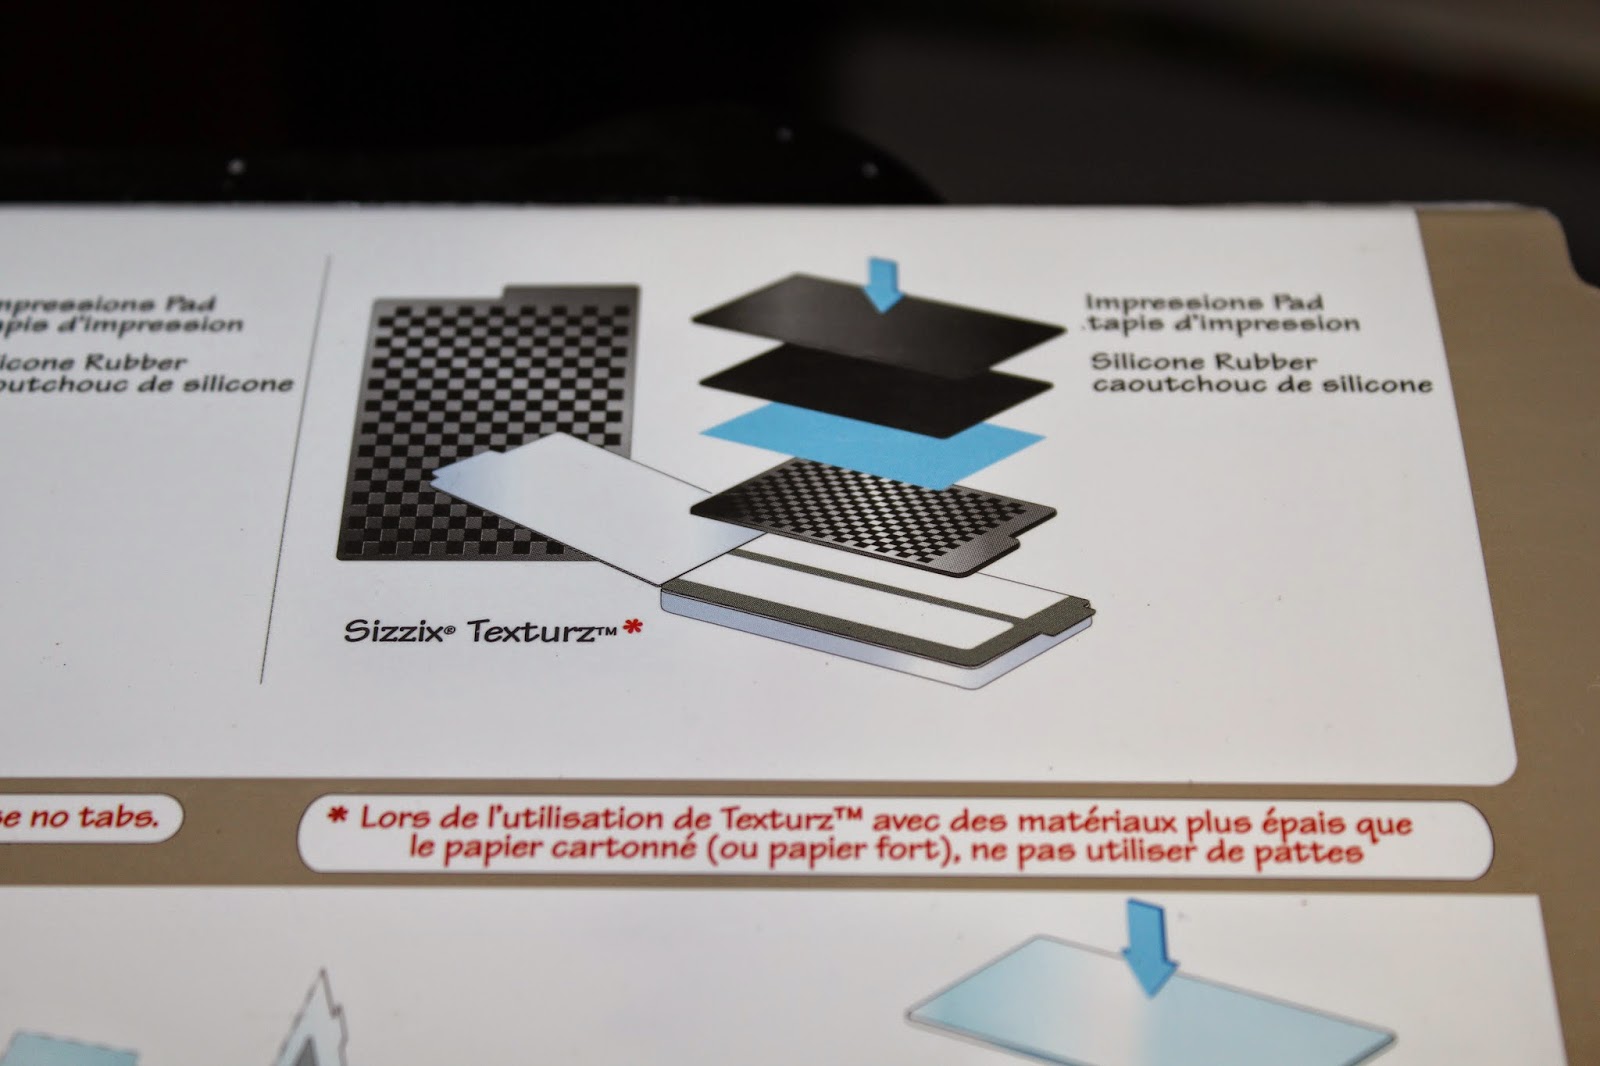 |
| The "sandwich" will vary with different embossing machines. I use the Big Shot by Sizzix. My "sandwich" from bottom to top - clear acrylic base plate, multipurpose platform tab 1, homemade embossing plate, silicone rubber, and impression pad. |
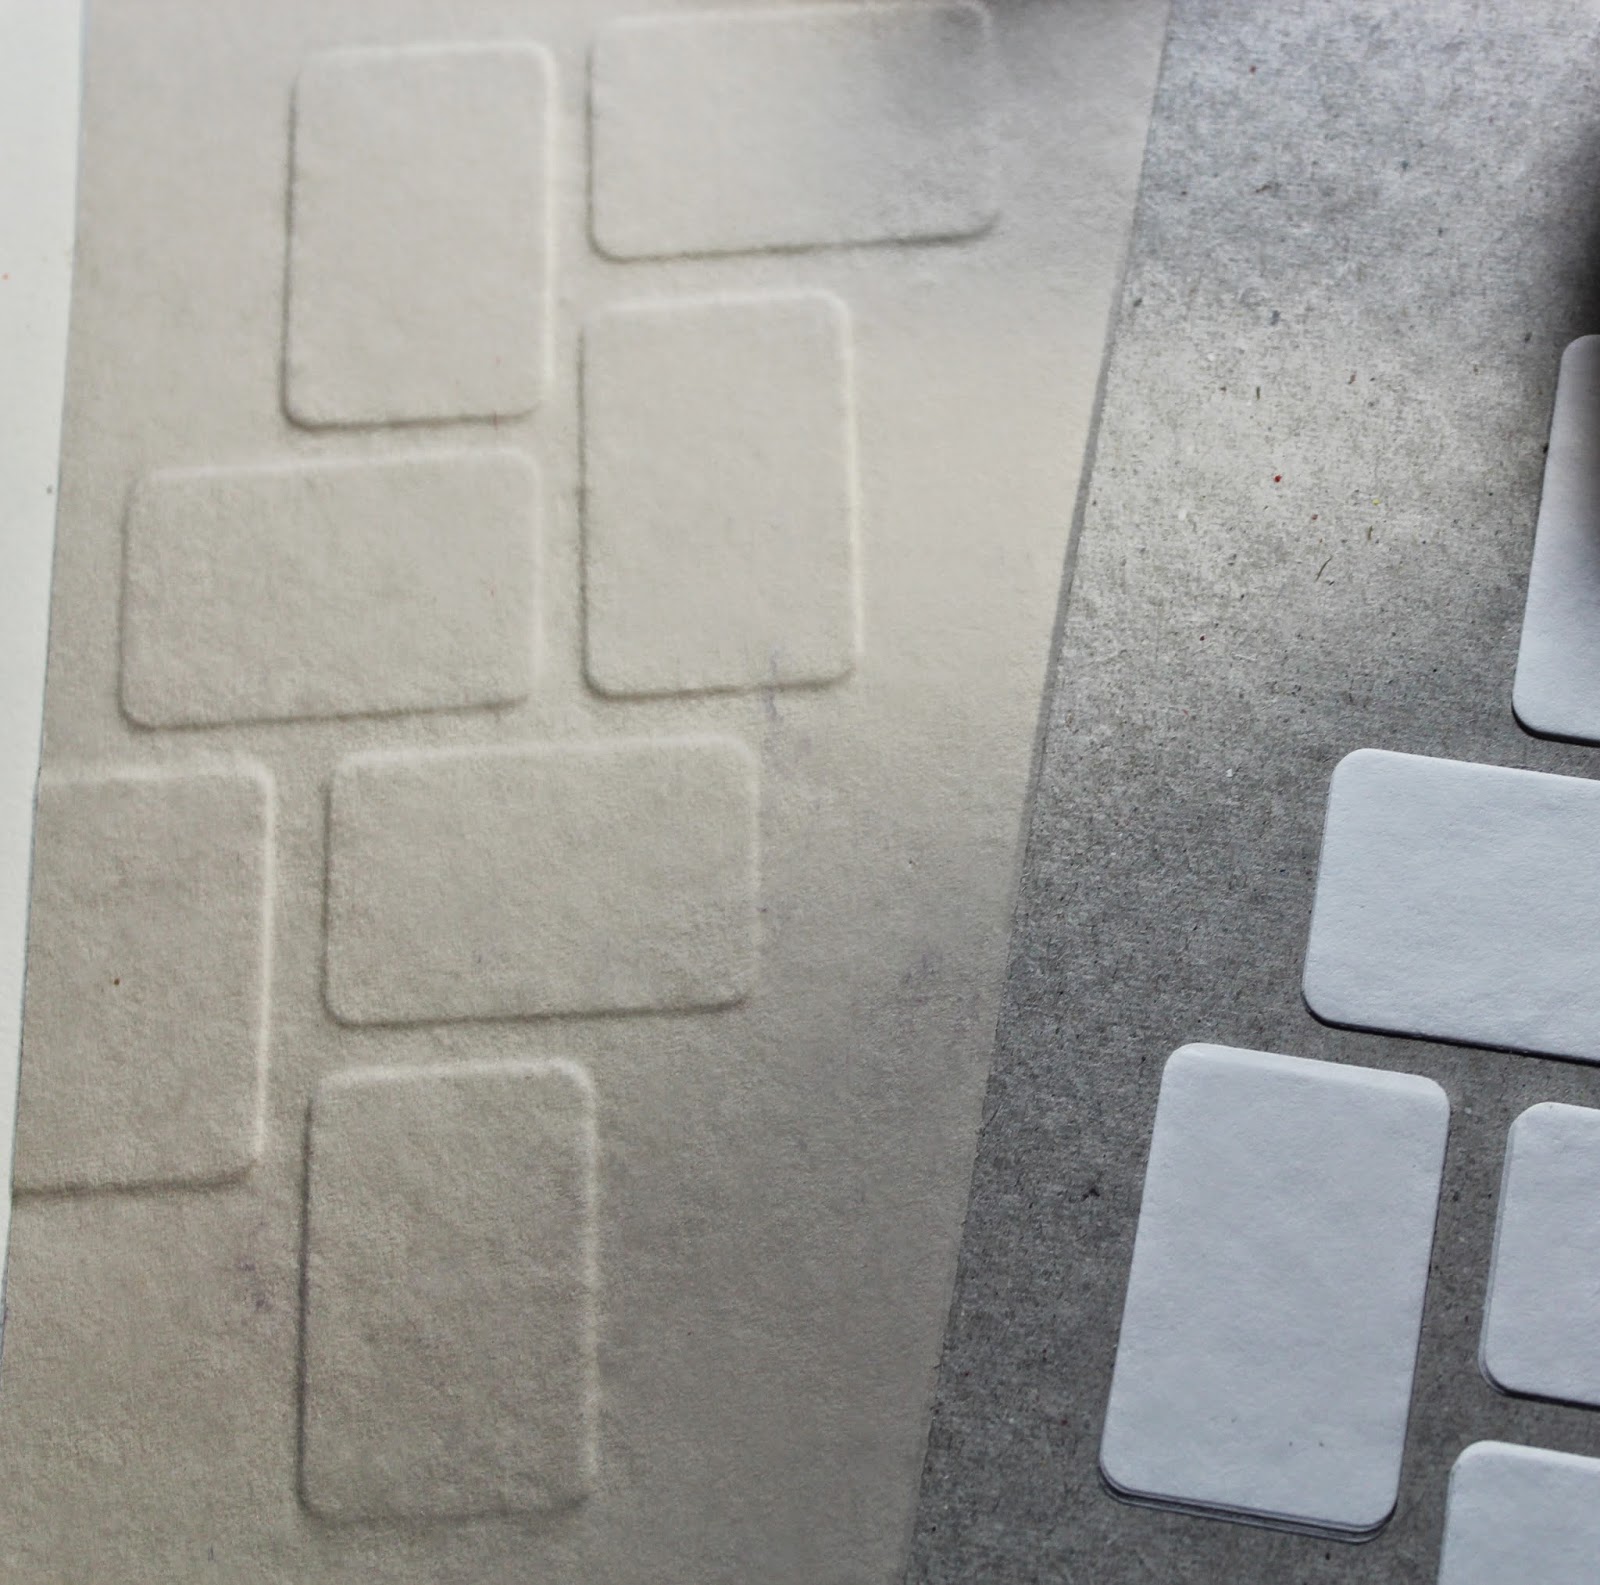
 |
| Oopsie Daisy Gray paper held up nicely to the embossing. |
 |
| The plain White cardstock was a bit thin for this technique and tore. |
Bonus embossing plate:
1. Adhere leftover film strip scraps together in stacks of five.

2. Adhere onto base plate chip board in random pattern.

 |
| Embossed Oopsie Daisy Gray paper. |
Once you have a nicely embossed piece, it is time to assemble a card.
1. Stamp Borders and Backgrounds images onto de-bossed (indented) side of plain White paper.

2. Continue to add color with a sponge tool in Amethyst, Orchid and Fuchsia hybrid inks over the de-bossed filmstrip image.

3. Nest the panel onto a 4x5.25" Wine matte.

4. Add embellishment (Spring Chorus rhinestone stickers) and the card is complete!

I hope you enjoyed this fun tutorial and will give it a try. Have a show-stopping week!
 Julie
Julie
1. Stamp Borders and Backgrounds images onto de-bossed (indented) side of plain White paper.
2. Continue to add color with a sponge tool in Amethyst, Orchid and Fuchsia hybrid inks over the de-bossed filmstrip image.
3. Nest the panel onto a 4x5.25" Wine matte.
4. Add embellishment (Spring Chorus rhinestone stickers) and the card is complete!
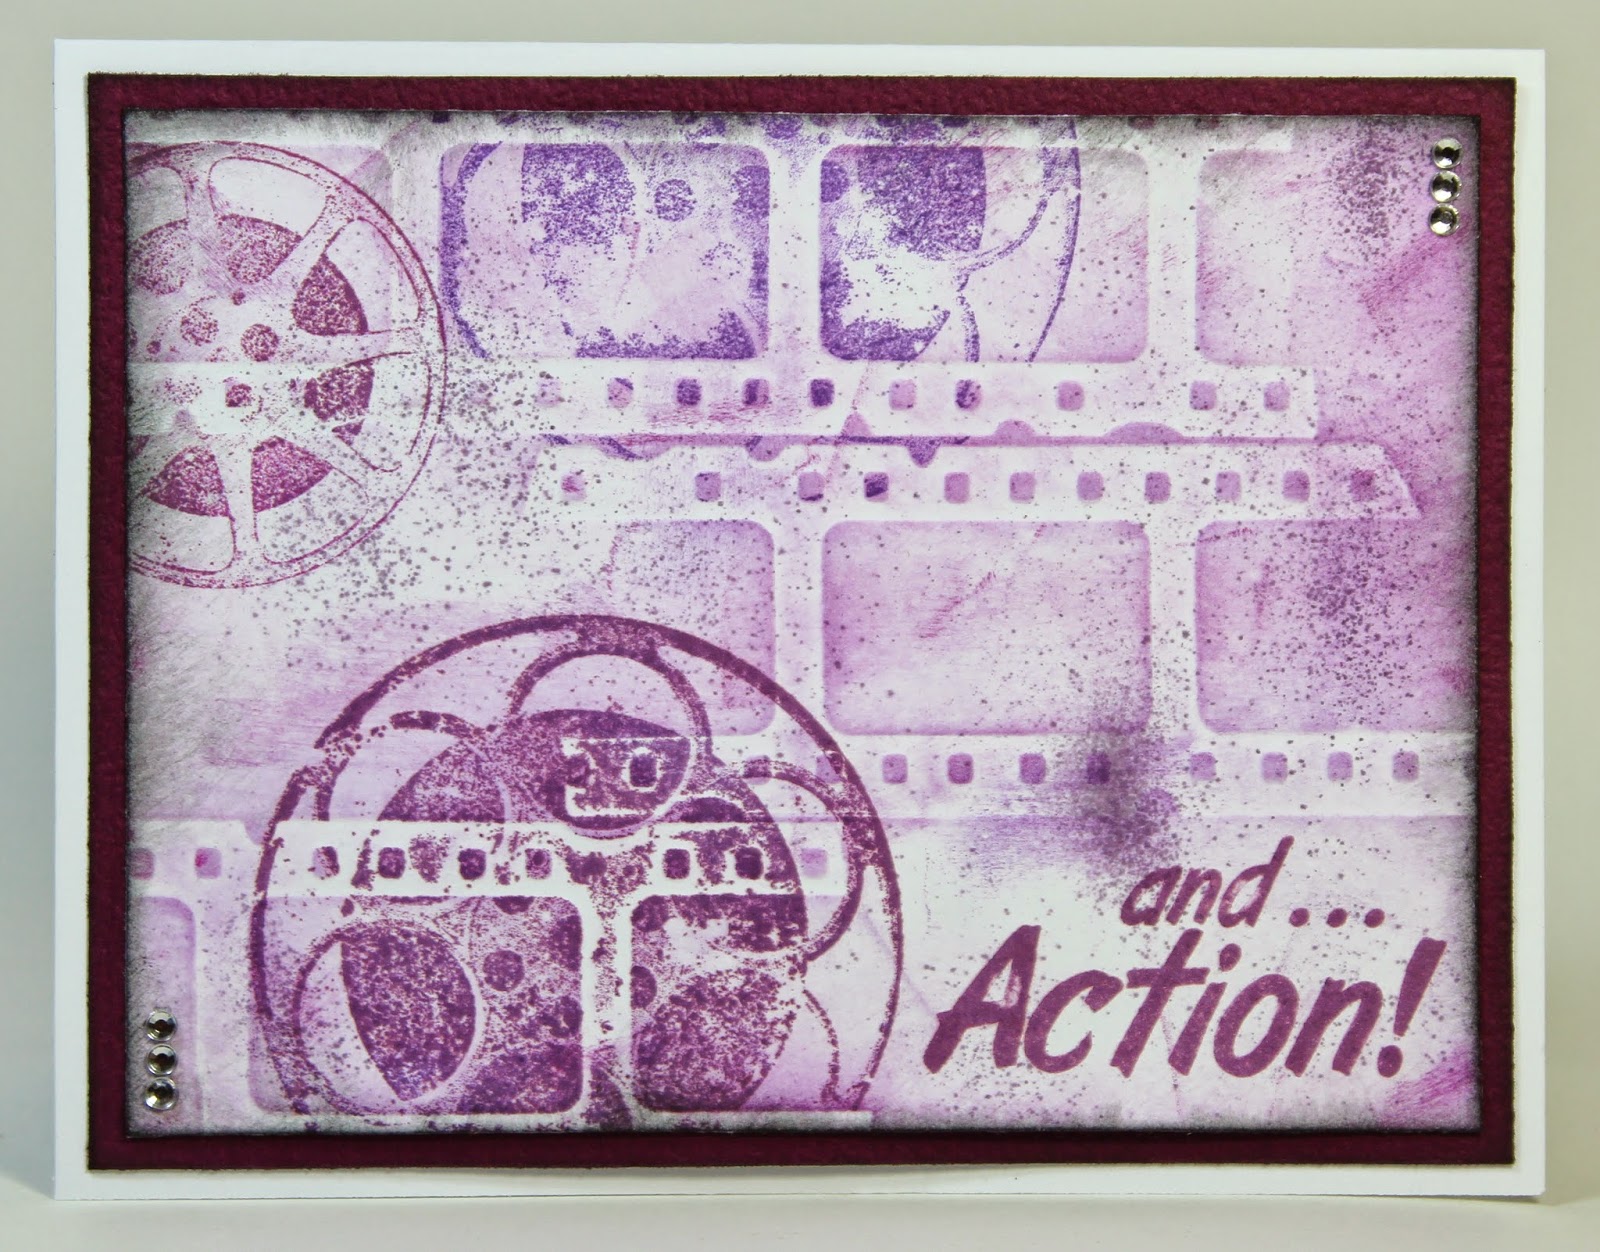 |
| I added a little bit of spritzing with the Tim Holtz spritzer tool and a Dusty Concord Distress marker. |
I hope you enjoyed this fun tutorial and will give it a try. Have a show-stopping week!
Really cute!!
ReplyDeleteImpressive, you know until just now reading this I never would have thought of making my own (I'm still trying to get the hang of using the darn things ha ha!) I know what you mean about having things sitting around though!
ReplyDeleteJulie, Julie, Julie, you are truly the Queen of Imagination. Who would have thought to do something like this, you of course!! This is a great idea and I love the card. I will have to see if I can try this.
ReplyDeleteWay to rock the innovation, Julie!
ReplyDeleteTremendous - thank you so much.
ReplyDeleteWow, how creative. You ROCK!
ReplyDeleteLove ya, Stef
I love the way you enhanced the beautifully soft image. What a great idea! TFS
ReplyDeleteNow that is a great idea! Cute!
ReplyDeleteTerrific idea, Julie! And yes, I certainly have a few things in my craft room that don't get used nearly enough - I'm definitely gonna try this technique!
ReplyDeleteVery clever indeed, love this idea.
ReplyDeleteVery cool Julie! Yet another thing I need to add to my crafty to-do list... Thanks for showing us the lovely finished product!
ReplyDeleteSo much fun making your own embossing plate, this way you can make something for any theme! Great idea,Julie!
ReplyDeletethat's a great way to do it
ReplyDeleteHow cool is this!!! Great creative share! Hats off to you, Julie!
ReplyDeleteWHAT FUN!!! Such a nifty way to put those unused dies to great use. Love the finished card - it's beautiful!
ReplyDeleteTFS Julie!
I'm speechless. Great minds...
ReplyDeleteI love the embossing plates you created - now to create mine!! Thanks for the inspiration!
ReplyDeleteJulie I just love your ideas. Do you ever get any sleep, your brain must be working all night to keep coming up with such great ideas to share with us. Thanks again.
ReplyDeleteI have made embossing plates in the past using chipboard shapes glued on a chipboard plate, you don't need to layer those but you do need to adhere them.
ReplyDeleteWOW, thanks everyone, isn't it fun, loved finding a use for this die!
ReplyDelete