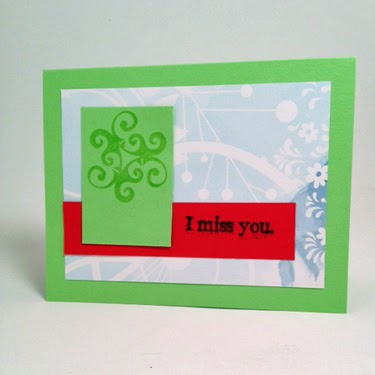
Member Debby Hernandez put in a request on the forum for cardmaking instructions using 12x12 papers. Here's a new one for you!
I created four cards with these instructions, 12x12 Beige and Light Green papers from the
Trees kit, several stamps from the
Trees Borders & Backgrounds unmounted stamps and
Hybrid Inks in Moss, Leaf, Spruce* and Earth.
I used stamps and inks to alter the panels so I could differentiate them for layering.
Here is how I created contrast with the nesting panels.
Card One
1. Ink the 3.5x4.75" Light Green panel with a direct-to-paper technique. I love the way the Leaf ink reveals the gorgeous texture of the paper.
2. Create a unique pattern with the diamond stamps from the UM Borders & Backgrounds sheet. I cut the diamonds apart and reconfigured them into this pattern on my acrylic block.
3. Stamp a pattern onto one of the tan card bases with Earth ink.
4. Stamp one 1.75x2.5" Beige panel with Earth ink and the dotty "noise" stamp. Stamp one 1x4.25" Beige panel with the sentiment stamp and Earth ink. Wrap a small piece of the paper
paper rafia around the panel and adhere all layers to the card base.
Card Two
1. Stamp onto one Light Green card base with the large tree image and Spruce ink.
2. Use the direct-to-paper ink technique from step one for the 3.5x4.75" Beige panel and the diamond technique for the 1.75x2.5" Light Green panel. Stamp a sentiment onto the 1x4.25" strip. Ink a small portion of the large tree stamp as a focal image next to the sentiment.
Card Three
1. Repeatedly stamp the dotty "noise" image onto the Light Green card base with Moss, Spruce and Leaf inks.
2. Ink the leaves of the tree image with assorted shades of green, and use a brown marker to color the branches; stamp onto the 3.5x4.75" Beige panel.
3. Use the direct-to-paper technique on the remaining 1.75x2.5" Light Green panel.
4. Stamp the diamond pattern onto the 1x4.25" panel from left to right using increasingly lighter shades of ink to create an ombré effect. Finish by stamping the sentiment in Earth ink.
Card Four
1. Use the direct-to-paper technique with Earth ink on the Beige card base.
2. Stamp the tree image with the coloring technique from the previous card and stamp onto the remaining 3.5x4.75" Light Green and 1.5x.25" panels. Align the images when layering onto the completed card.
3. Stamp the sentiment onto the remaining tan 1x4.25" panel and add the dotty "noise" stamped image with the ombré effect and Spruce ink.
Enjoy this set of free cutting instructions and don't forget to share your work with us on the
Club Scrap Forum!
Julie
*Spruce Hybrid Ink Holiday WOW special edition ink pad no longer available.