Showing posts with label Spring Chorus. Show all posts

Monday, June 24, 2013

ALSB Shortcuts...

. . . are one great way to make your precious Club Scrap papers go further for you.

I know I have my own ways to stretch my monthly kits, and here are just a few of them. (Not a monthly member yet? Click HERE to sign up!)

I love the ALSB instructions that are provided so generously by Club Scrap every month. Who wouldn't love someone taking all the guess work out of what to do with all those wonderful papers and supplies we receive!

I thought it would helpful for you to see the instructions and layout style I was working with today.  This is layout 11 & 12 from the Spring Chorus Collection:


I am a Club Scrap kit member, which ships on the 1st of the month, and this kit has it all.

Many of the layouts incorporate 8.5x11 papers in conjunction with the 12x12 base pages. They act as anchors for the pages.

To salvage the base paper underneath the 8.5x11 paper, I begin by flipping over the 12 x 12 sheet and tracing the 8.5 x 11 paper (upside so not to get any pencil on that paper) onto it.


Using my rotary trimmer (a craft knife and self healing mat would be perfect for this cutting procedure too), I cut 1/2 inch inside the traced image of the paper. This gives the 8.5x11 sheet a place to be attached onto the base paper.


Then I flipped over the base paper, added ATG adhesive to the back of my 8.5x11 sheet and attached to my base page.  *Special note: I also stick clear tape to the back side of my layout just to ensure the pieces stay together correctly and to keep them from hooking onto my page protectors as I am sliding in my finished pages.


The right side of this layout used another trick. Typically the instructions direct us to lay the white print over top of the blue base paper. I didn't want to hide (lose) the paper under the long white print piece.  I made marks on the back of the paper to show where the white print would lie on the base paper.


I trimmed the small section out of the large base paper.


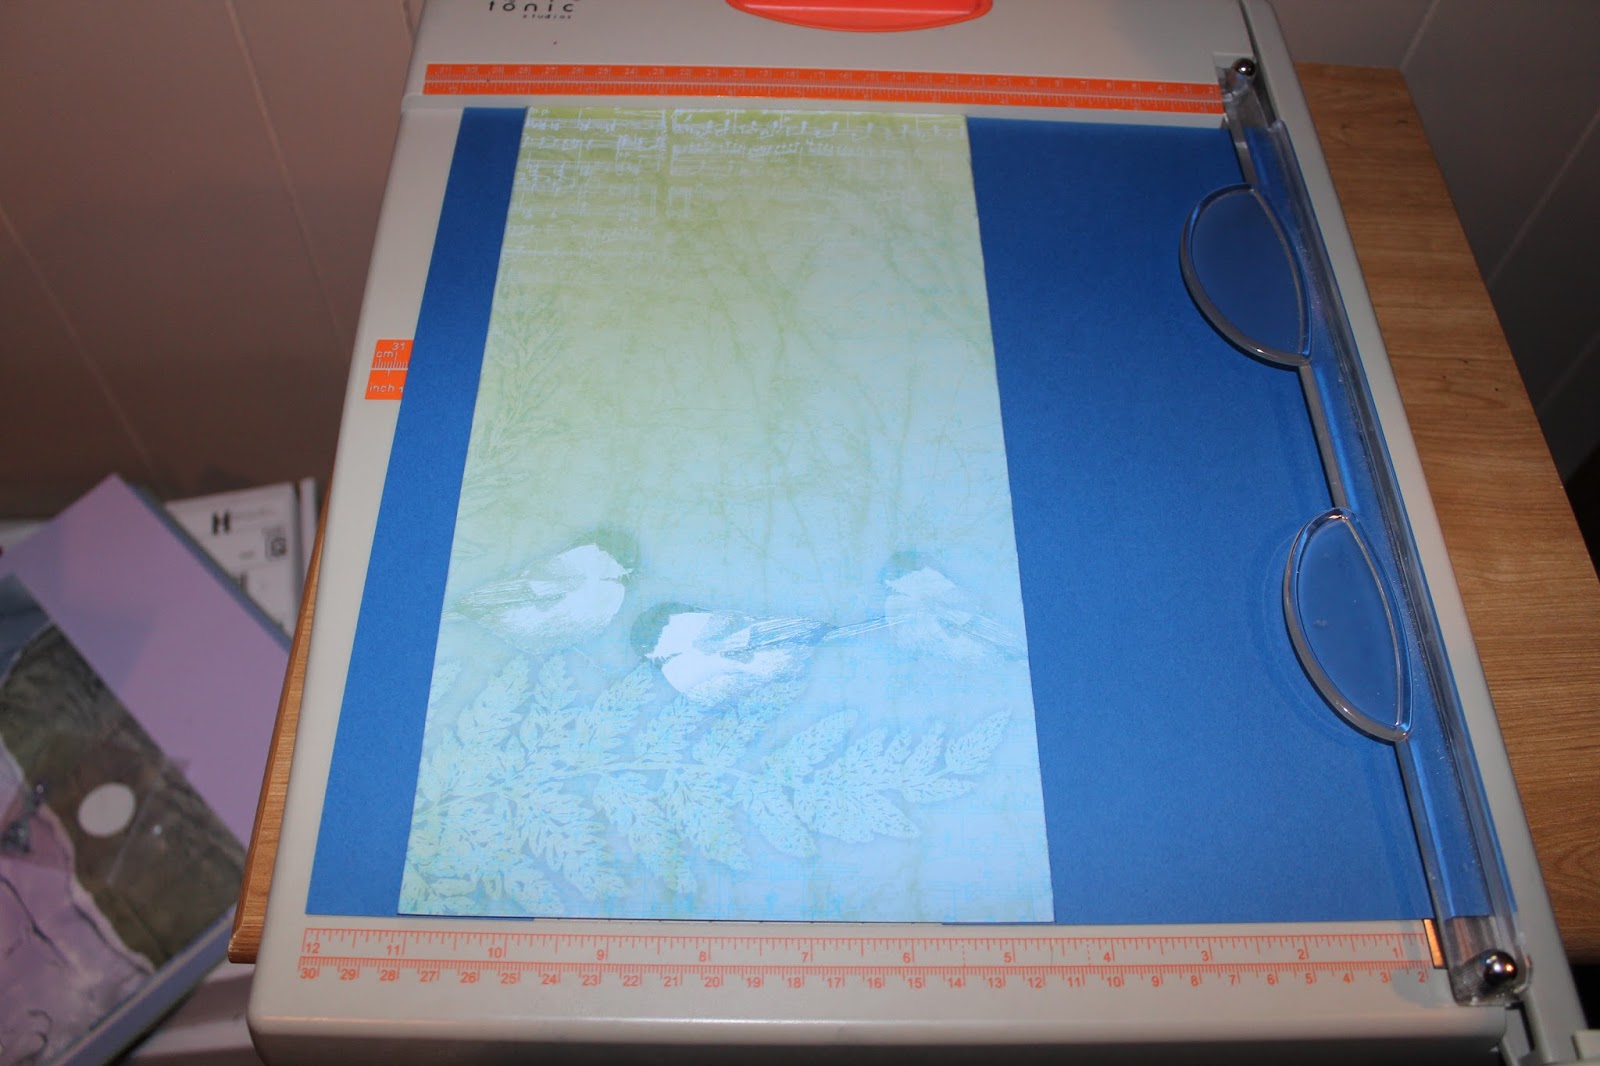
I positioned the paper on my Tonic trimmer so they are all lined up with the 12x12 mark, I ran ATG  tape on the base paper pieces and then adhered the 7x12 white print paper on top. Having the papers on the trimmer keeps all of them lined up and squared at 12 x 12 inches.



I used the extra blue paper I saved from this layout to create some of the flowers and mini album mattes from my Spring Chorus Blog Hop project. If you missed it you can see it HERE.

Here are the bases just waiting for completion. :)


I really hope you found these paper-saving shortcuts helpful.  
Thanks so much for stopping by!

Julie Heyer


Friday, April 19, 2013

Sneaking a peek at the Photo Keeper

It's Friday April 19th and SO close to Club Stamp shipping day on Monday! Once again, I just have to share what's in store for those of you receiving the Club Stamp Project!

Check out how this project unfolds . . .


When Tricia created a prototype of this sweet Photo Keeper Project, I'm pretty sure we all knew it had to be a Club Stamp Project sooner than later. it's like a triptych frame that holds several photos in each of the three frame locations. So, it features both display and storage qualities.


We had a lot of fun decorating this Photo Keeper while putting together the instructional Project Card.


Here are Tricia's hands, in action now....


Opened or all closed up, it's a fun project! AND, my favorite thing - there are going to be paperless versions of the project kit available right away, too!


One more little tidbit about the pic below before I go. 
Isn't the torn paper border totally cool around this rubber stamped quote!?!? Tricia just wasn't givin' up on this technique when decorating the front of this Photo Keeper. I have a feeling she'll be sharing more about that in the future!


Don't forget how easy it is to become a Club Stamp member by clicking HERE and receive fun projects each and every month!

Editor Note: link to available Spring Chorus Collection items added 6/13/13 jmh**

Enjoy!
Kay at Club Scrap

Tuesday, April 16, 2013

Stencil Technique with Gesso, Ink and Gelato!

The warehouse was buzzing yesterday with the latest Club Scrap Lite kit heading out the door, and inside those sweet little pizza boxes is another fabulous stencil.


When putting together the ALSB pages for the month, I thought it would be splendid to add some of the fern images to the Dark Blue paper, but figured I'd have to find a way to make the ink pop. Enter: Gesso. It's the gesso we made together in the "Creative Concoctions Workshop" at the 2012 Retreat. Fun stuff!

Honestly, I'm a little wiped out from writing LOTS of instructions lately, so I'm going to take the more visual route to expand upon the technique article included in the latest edition of the Scrap Rap Magazine (see page 11). Kay and I snuck back into the studio again with the camera and let 'er go.

Click here to watch the video on YouTube.


And a look at the finished layout:


If you need some supplies, here are a few quick links:
Club Scrap Lite Kit
Peridot Ink
Ink Applicator
Spring Chorus Unmounted Stamps
Gelatos

Thanks for stopping by . . .
Tricia


Editor's note: links removed for Spring Chorus Stencil due to unavailability 6/13/13 jmh**

Friday, April 12, 2013

It's April Lite Spoiler time!

Monday is April 15th. Do you know what that means?  
Yeah, income taxes are due, BUT most importantly, it's Club Scrap Lite shipping day!

Here are a couple of peeks at the upcoming kit shipping to Club Scrap Lite members on Monday.


Tricia has a great set of eight completed pages ready to go into the online Scrap Rap, and we'll have a couple of new Club Scrap Lite articles for sharing there, as well.


Don't forget how easy it is to become a Club Scrap Lite Member (if you aren't already)! It truly is such a great value.


The boxes are packed and ready to go out the door. Hope you love it!

Kay at Club Scrap

Tuesday, April 2, 2013

Painted Mask Technique and Video


Happy Tuesday, Bloggers! Tricia here from Club Scrap!

My craft room at home is a place I love to be, and I don't get in there as much as I'd like. But last week was Spring Break, and my schedule was a little topsy turvy.

I carved out a few hours here and there to hang out in my little crafting space and had the chance to play work with the Faber-Castell PITT Big Brush pens. They're nifty because of the ink properties, coordinating colors, and big, fat nibs. Love big fat nibs. Just sayin'.

Here, I use those fabulous markers to create a background and midground, and then paint on a masking stencil included in the Spring Chorus Club Scrap kit for the foreground. This is fun and easy stuff, folks.

Sometimes it's just easier to duck into the studio with my dear pal Kay Williamson and film the process rather than write instructions. I need a break from writing instructions, thank you.

Oh, before I go . . . don't make just one of these at a time. Make a ton. Then, you'll have wonderful art orphans to use on your cards.

So, here 'ya go!
(click here to watch the video on YouTube)


Friday, March 29, 2013

Singin' Sneak Peek Spoiler

Welcome to the Spring Chorus Sneak Peek!

The sun is finally out here in Wisconsin! We still have plenty of snow, but the birds are chirpin', and it's actually starting to feel a little springy around here! Maybe that's why I'm feeling the need to post a sneak peek of what we are working on here at Club Scrap for April's Spring Chorus Kit!

Hope you enjoy the sneak peek . . .


I'm really looking forward to sharing more of Club Scrap's April Spring Chorus Kit in the Scrap Rap on Monday. For now, wishing you a wonderful Easter weekend!

Kay at Club Scrap